LockitScript
Useful Gestures for using the app
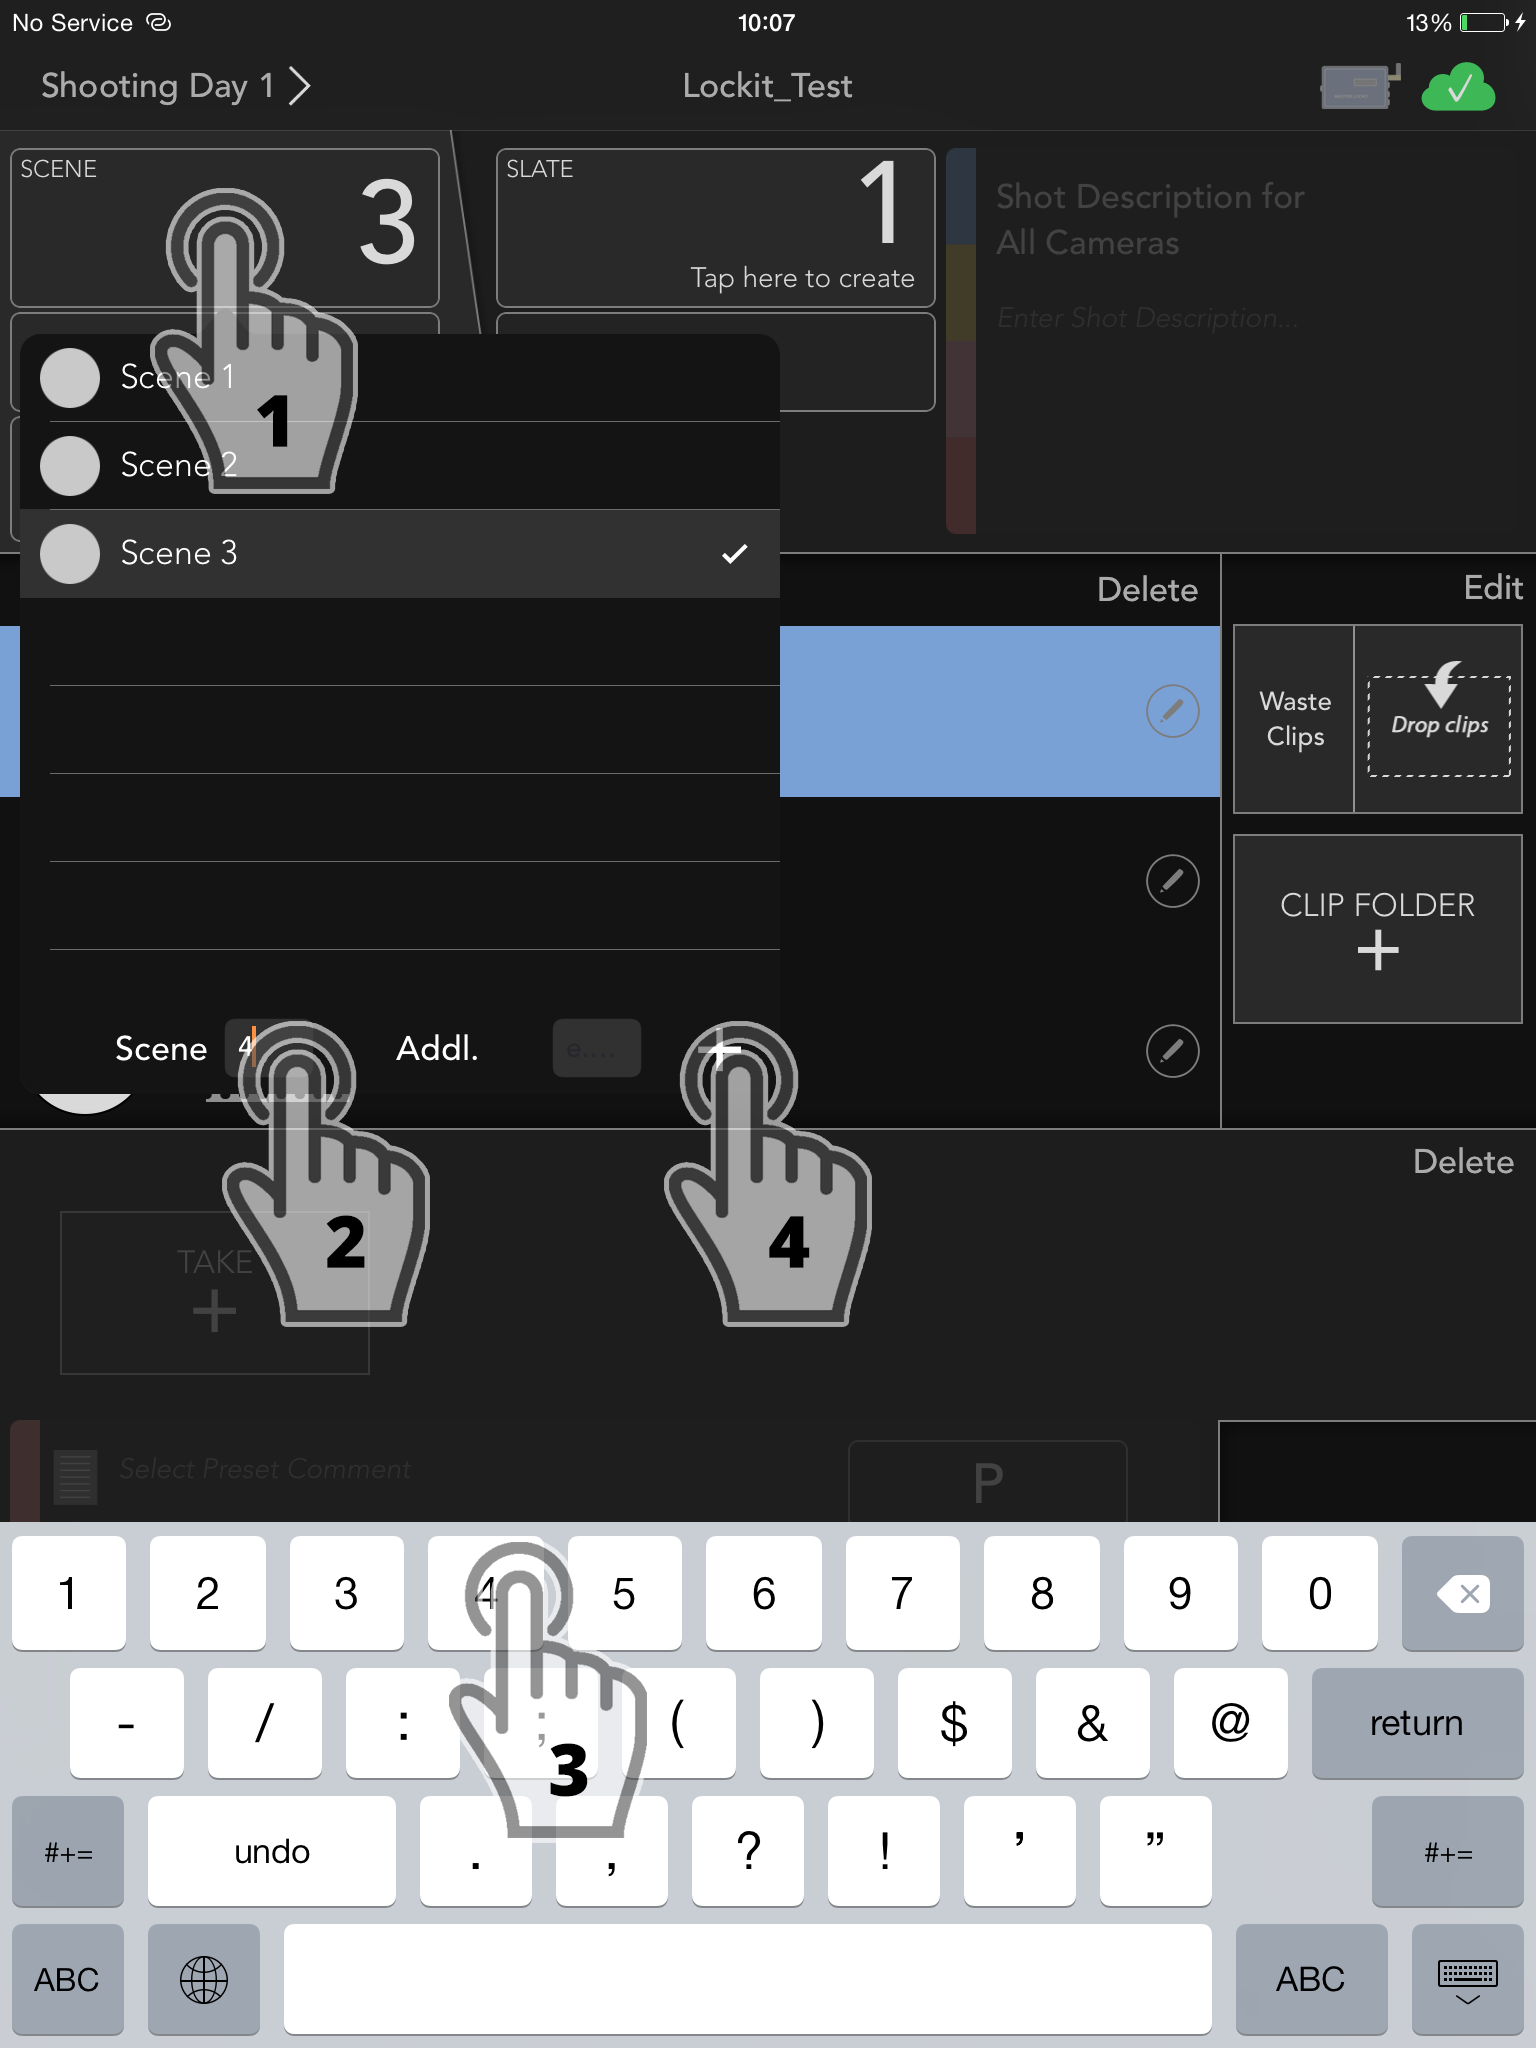
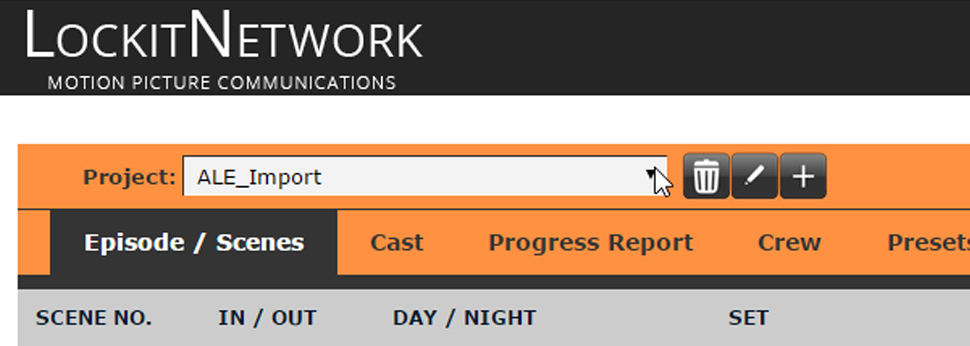
Create new shooting days, episodes, scenes, settings and a lot more by pushing the respective field. Then you enter the value in the drop-down menu underneath via keyboard and push “+”.

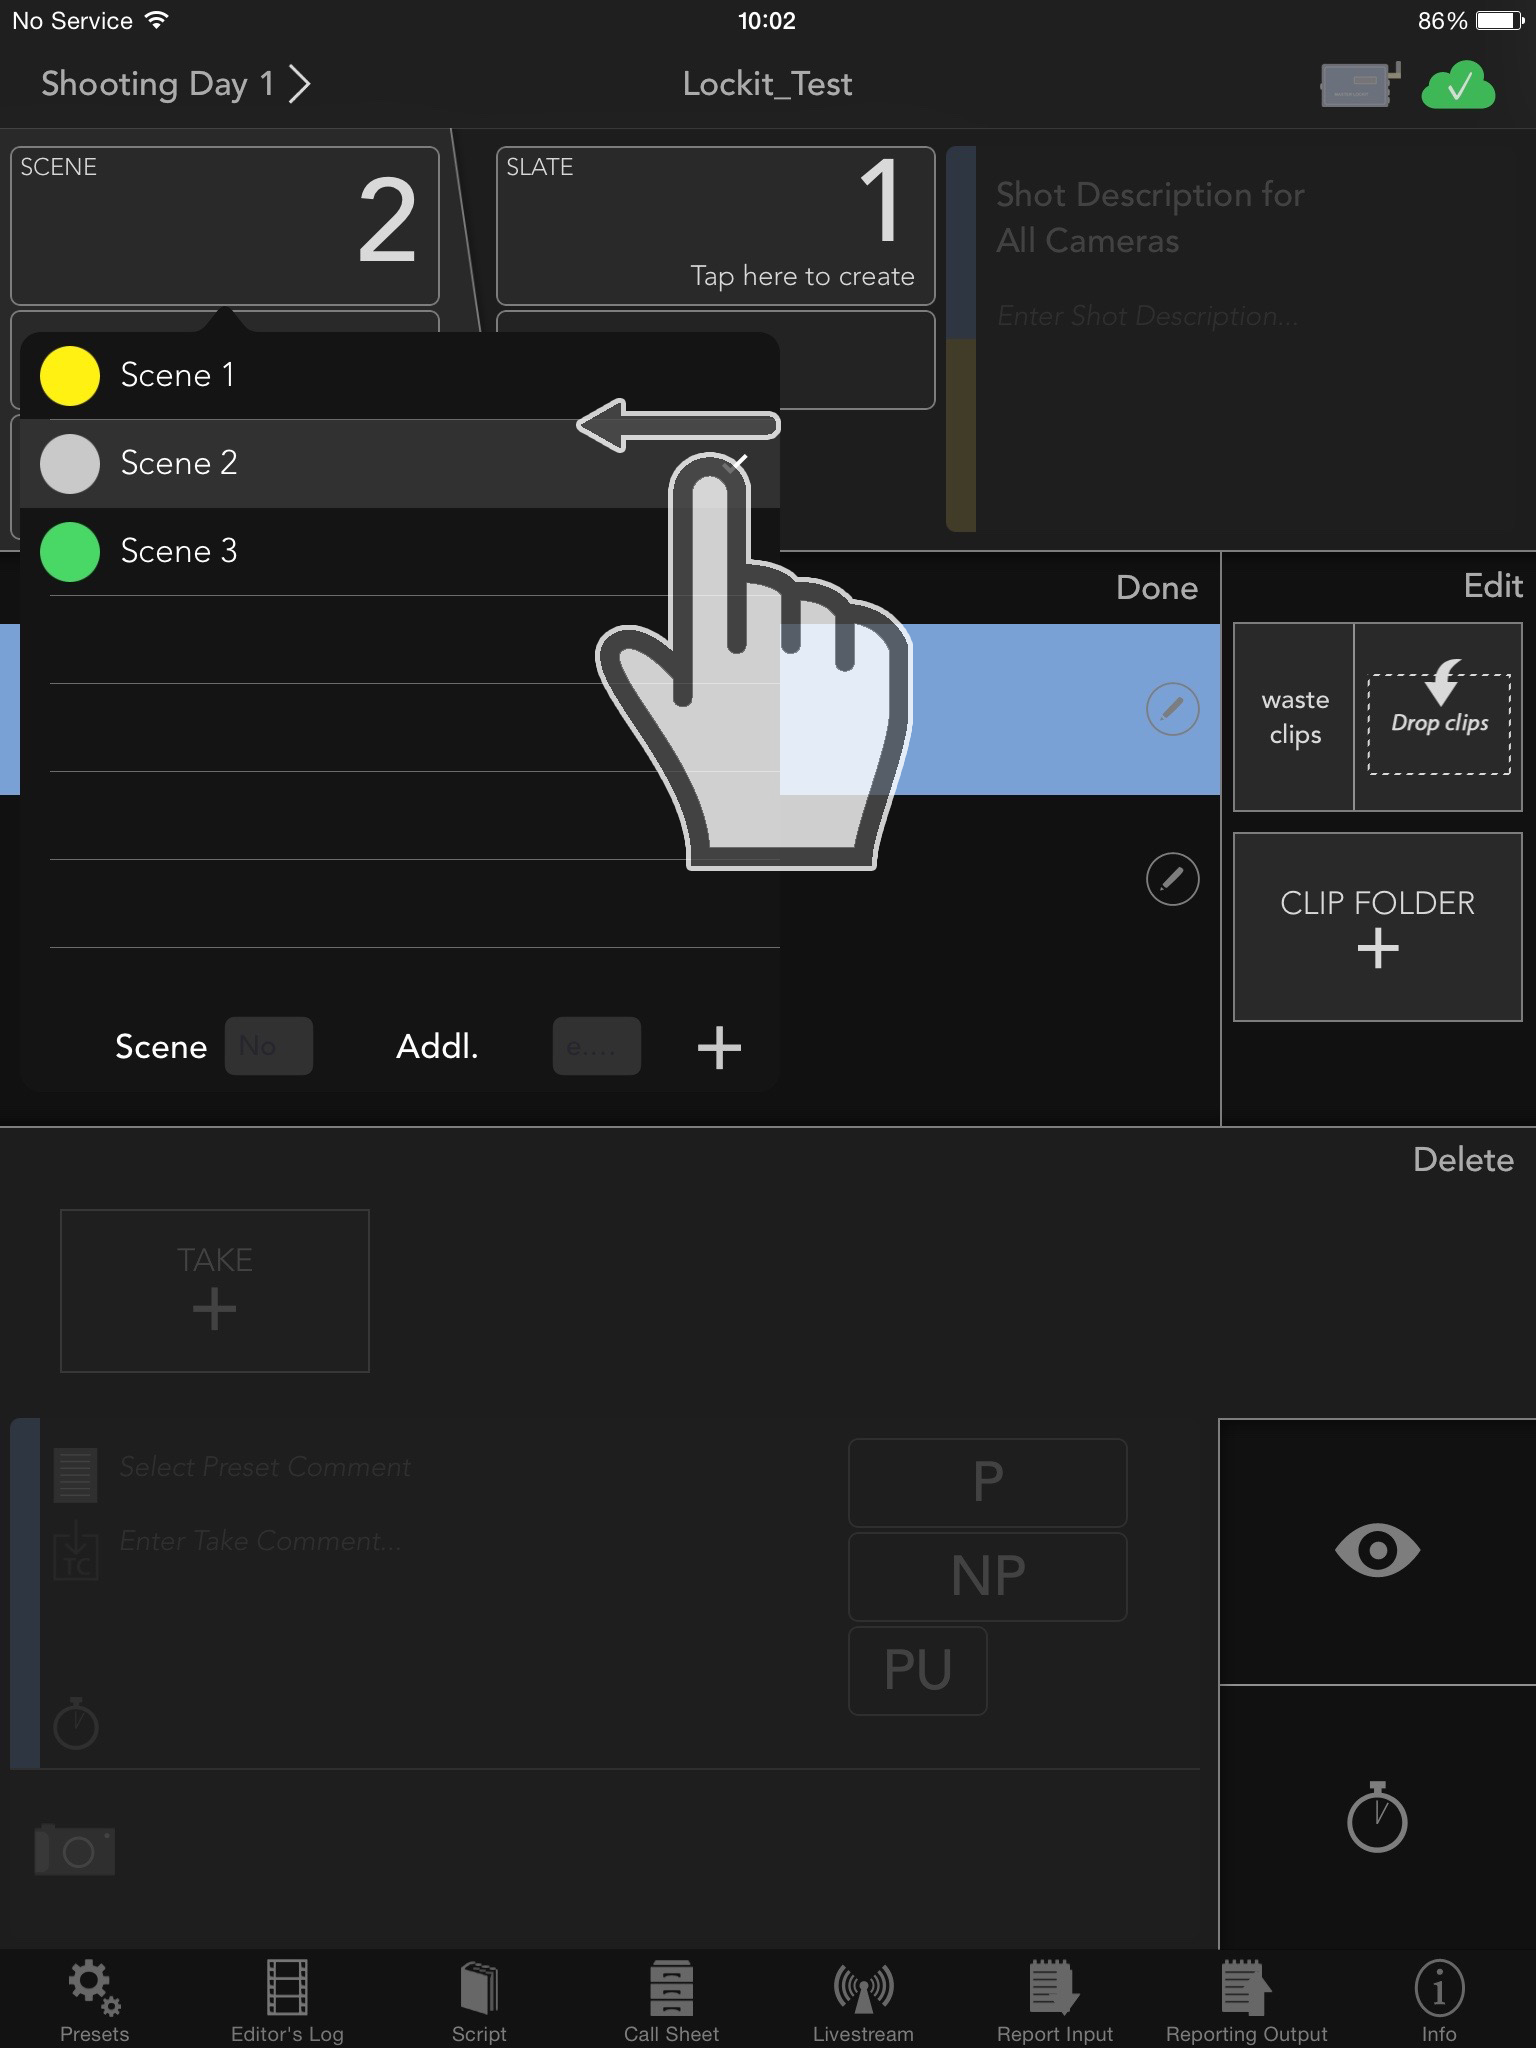
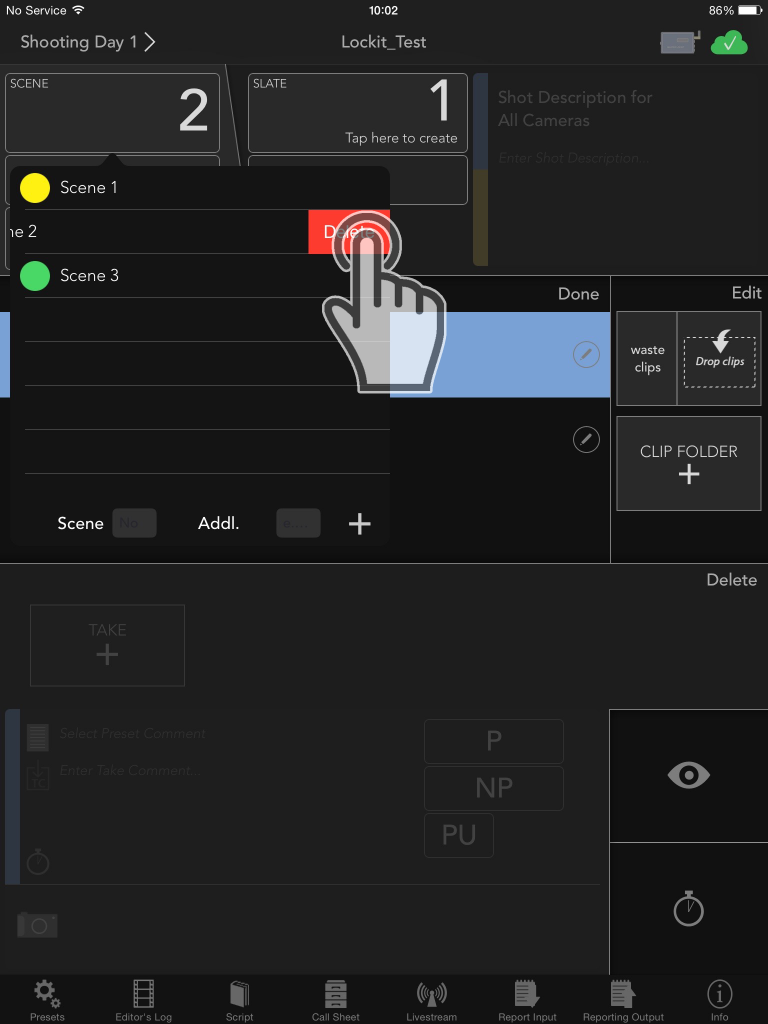
Delete episodes, scenes, settings and all presets and members of the cast simply with a “Backswipe”. Just swipe once from the right to the left behind the entry and then push “delete”.
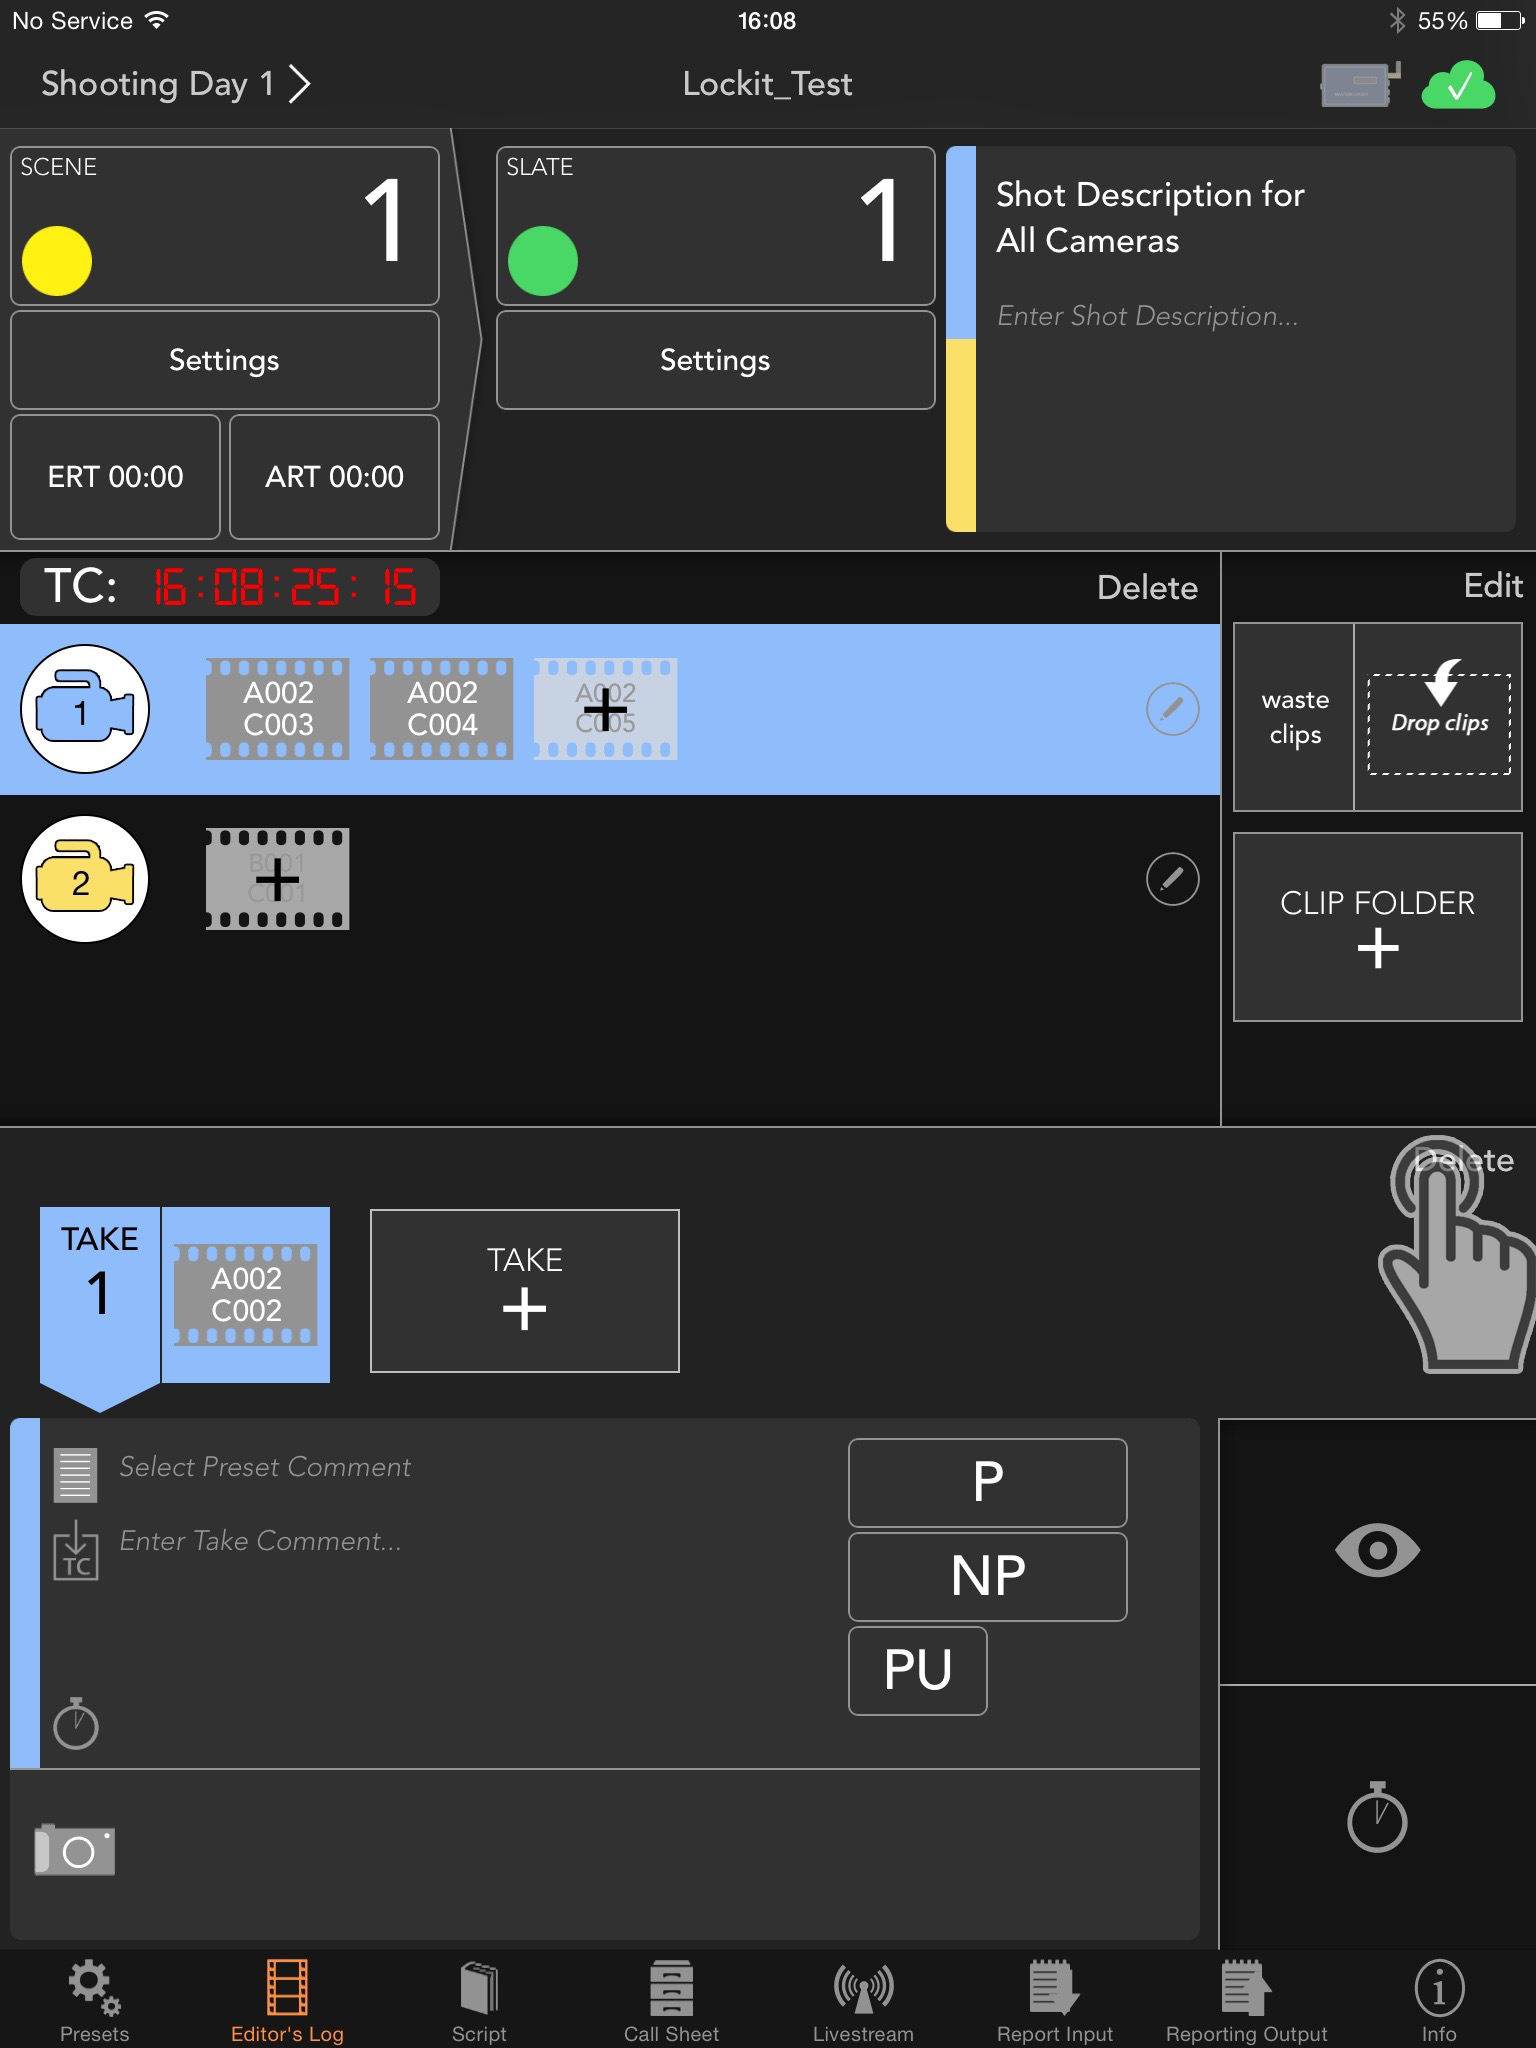
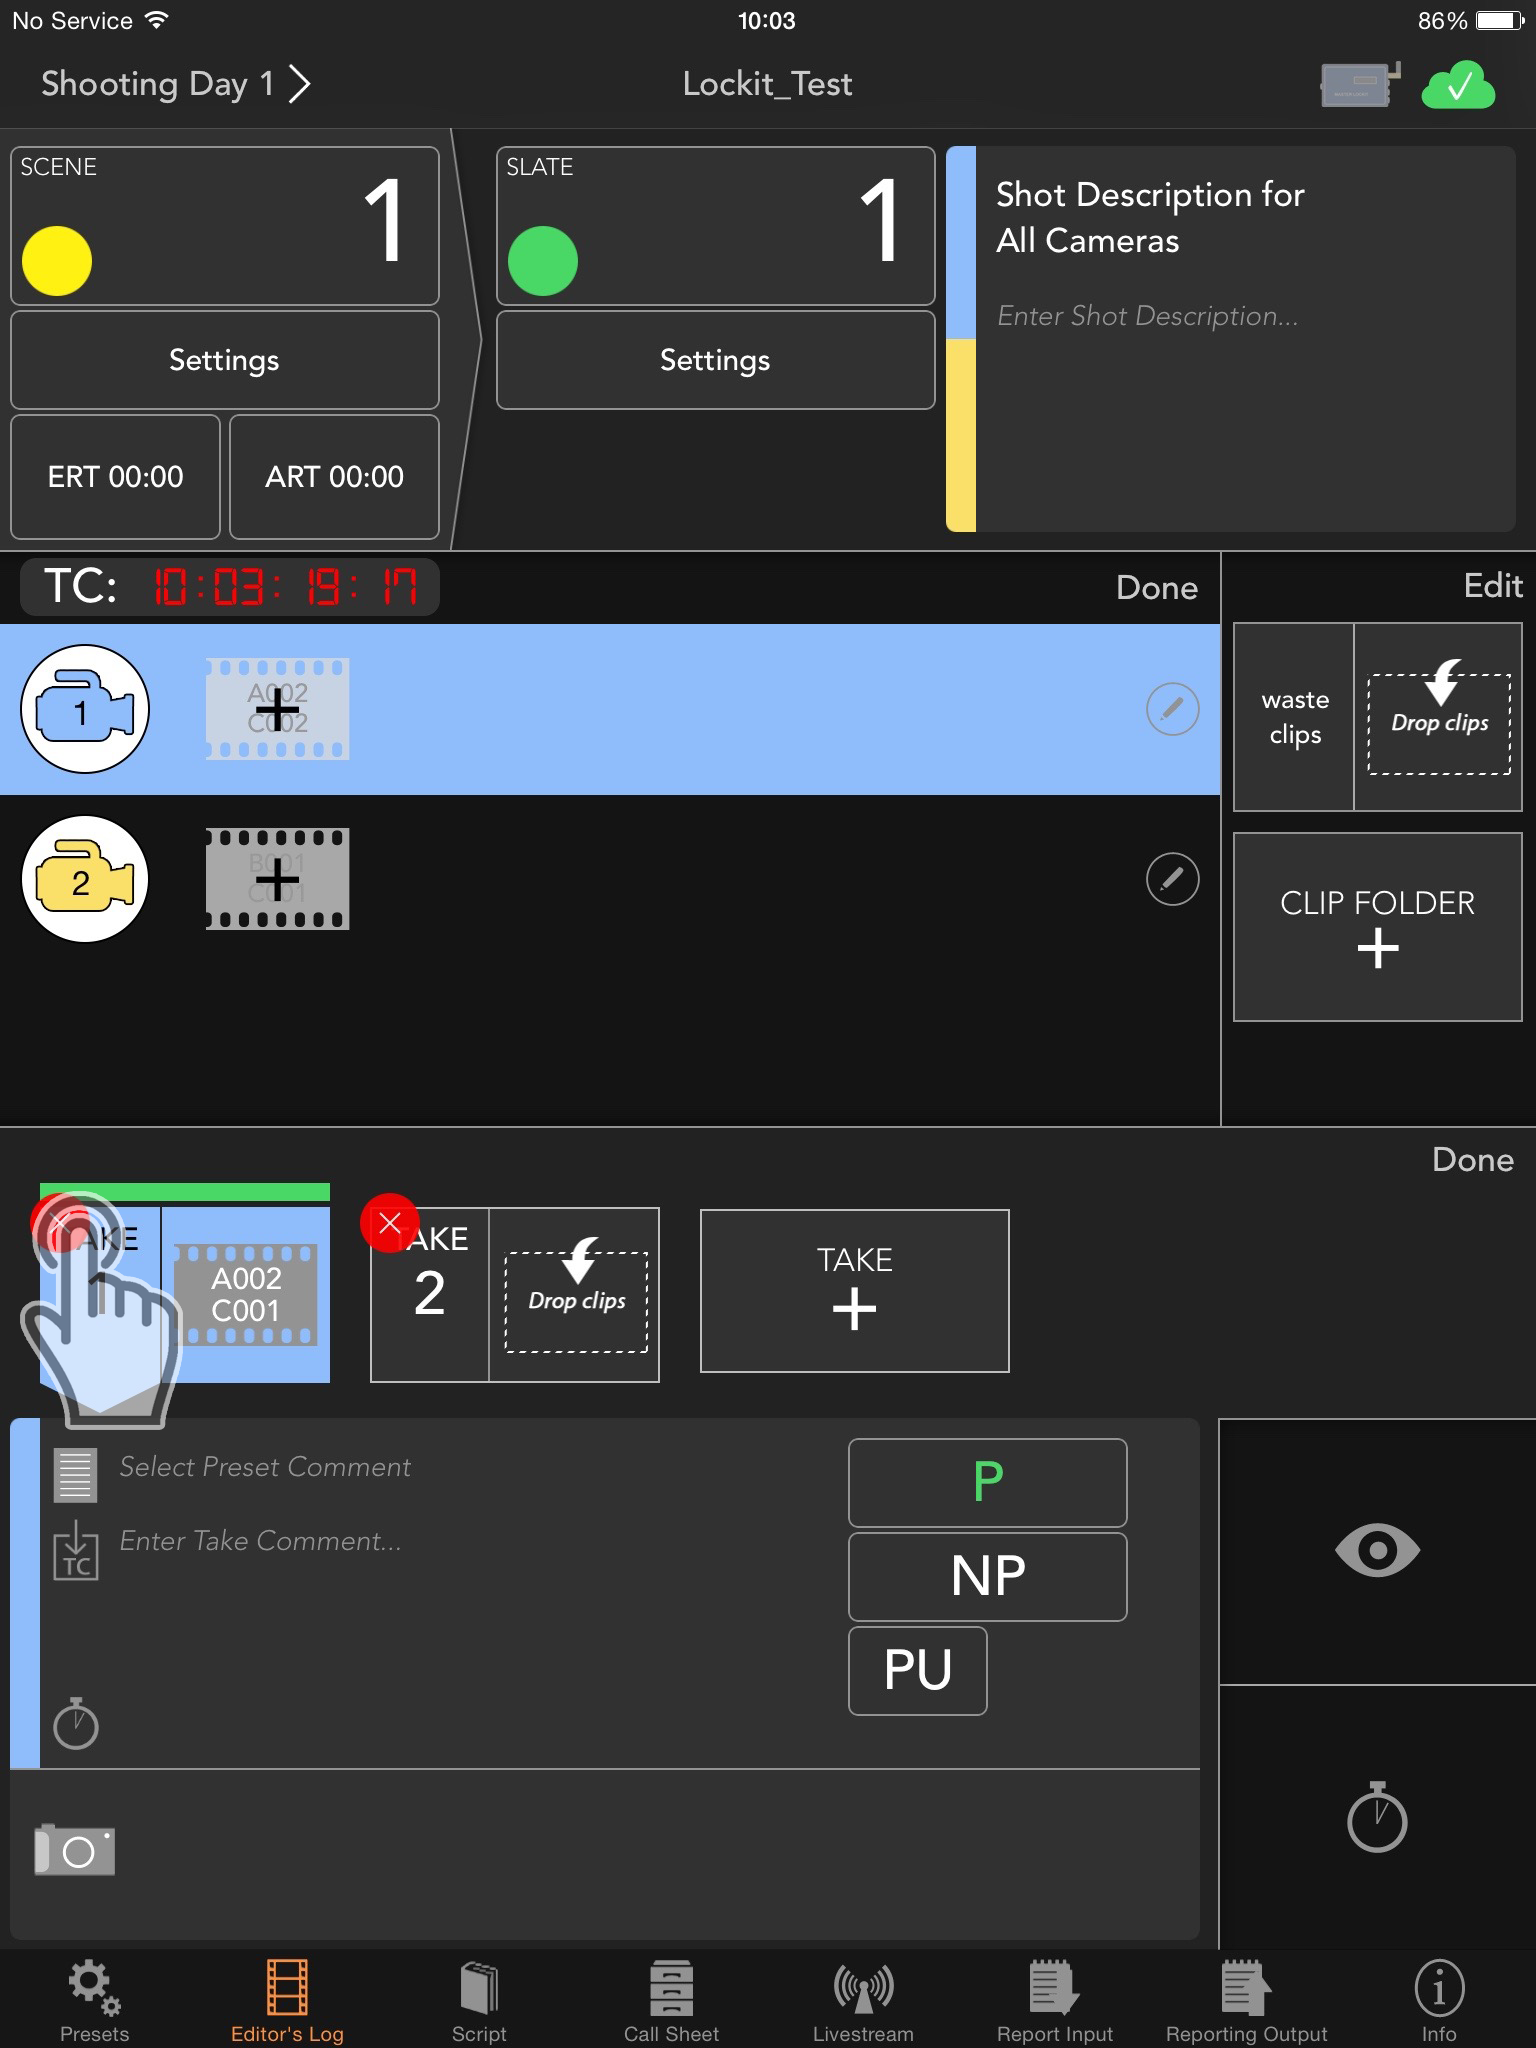
Delete single takes or clips by pushing “Delete”. Then click on the red “x”-symbols to delete single elements.
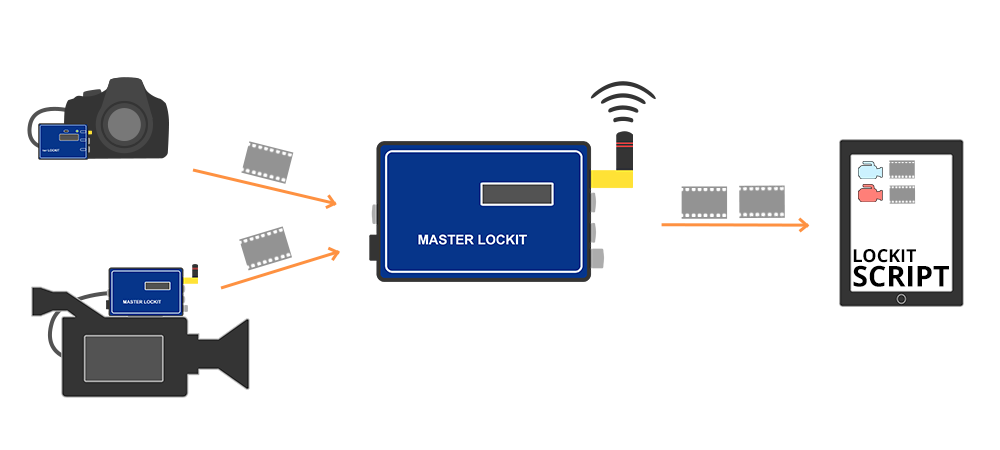
A MasterLockit – if adjusted to a supported camera – is able to transfer clip names directly into the LockitScript App. If you are using the App stand-alone, you have to create the clips manually via the “+”-button.
We stored the counting algorithms of most of the common types of cameras to make this step as simple as possible.
If you want to edit the clip names, click on the “pencil”-symbol on the right. Depending on the type of camera you can now edit the reel number and clip number.
Notice: The display is based on the shooting day. This means you will only see the clips created on the currently selected day of shooting.

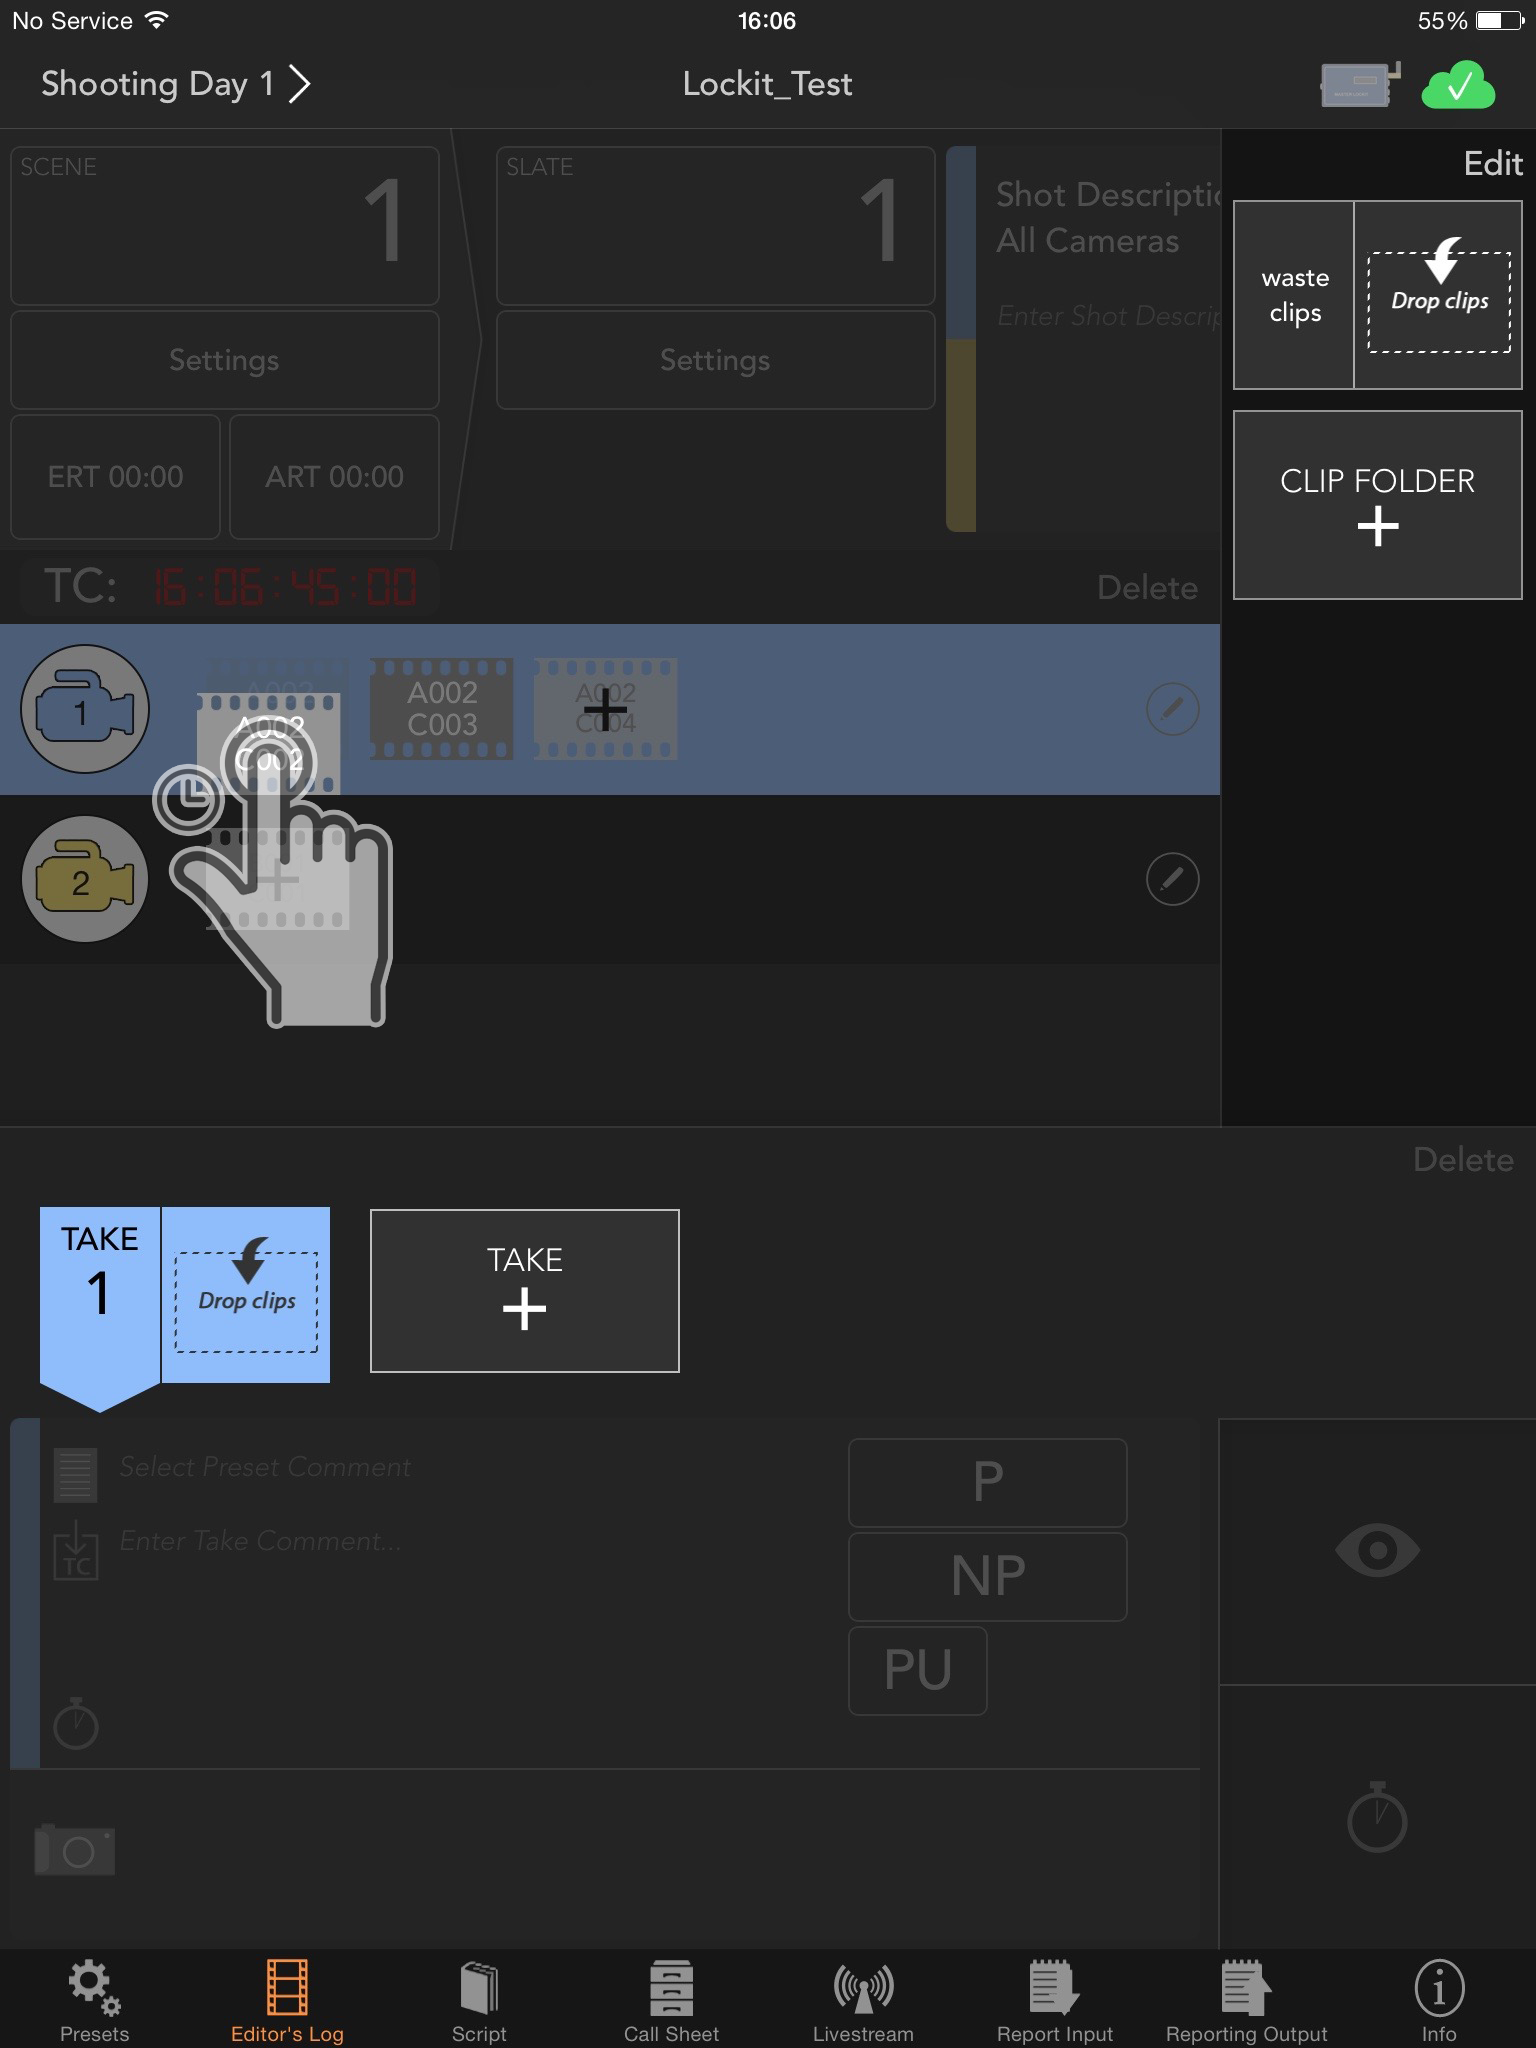
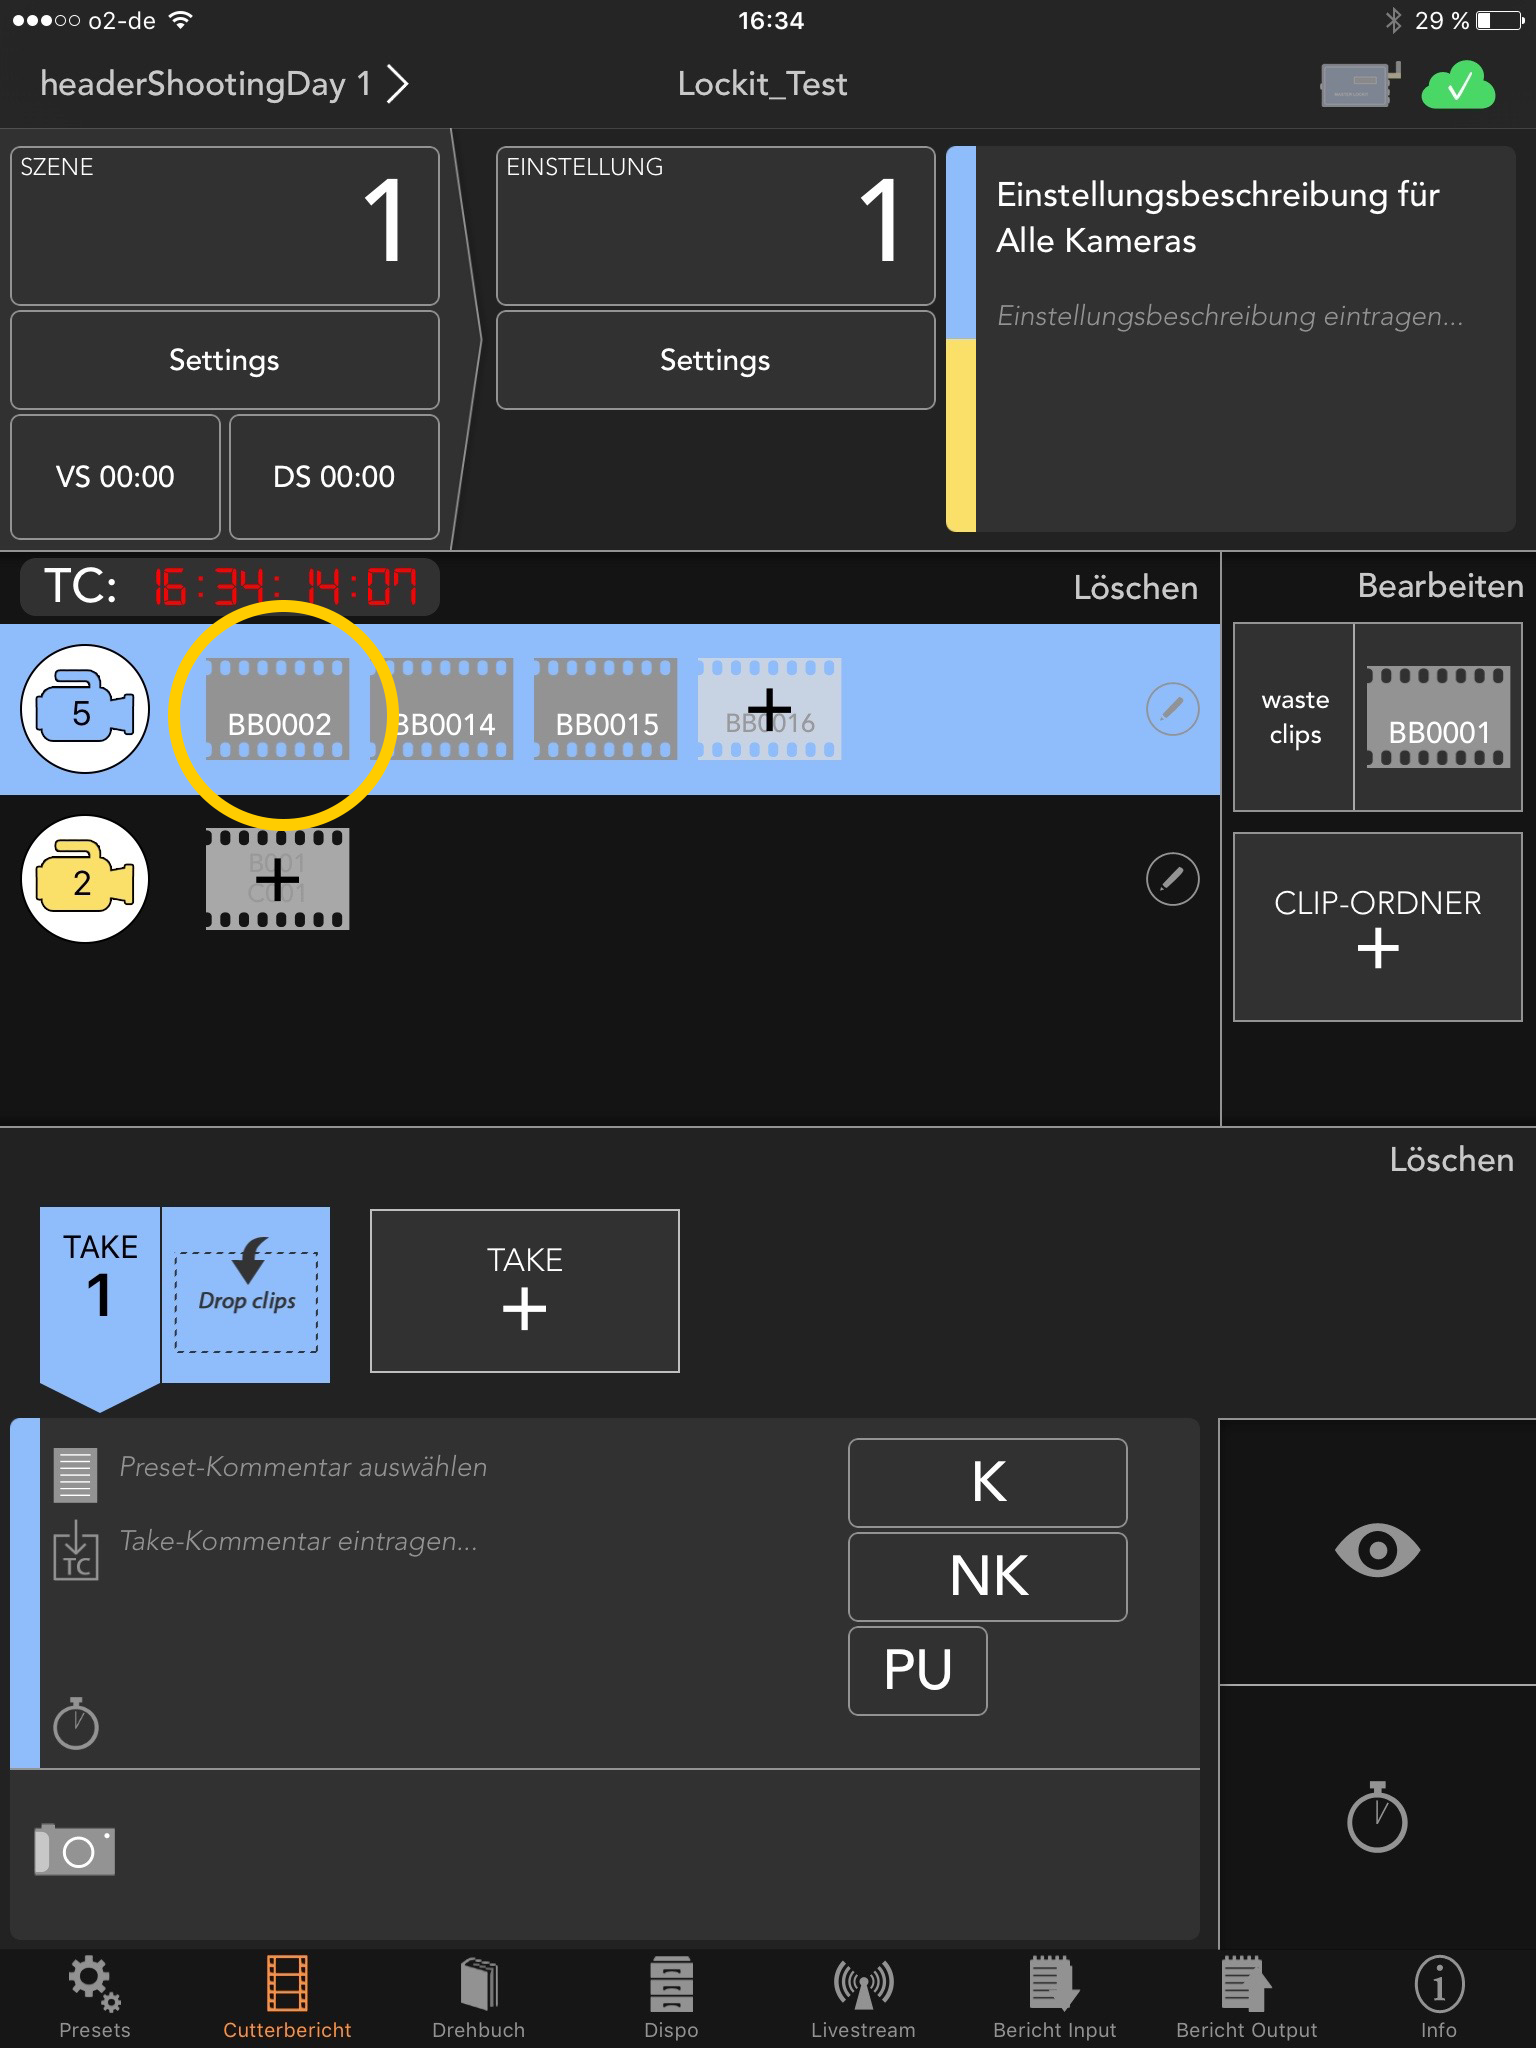
Allocate Clips to a scene/setting/take
There are two ways to allocate the clips to the relevant scenes/settings/take.
Way 1:
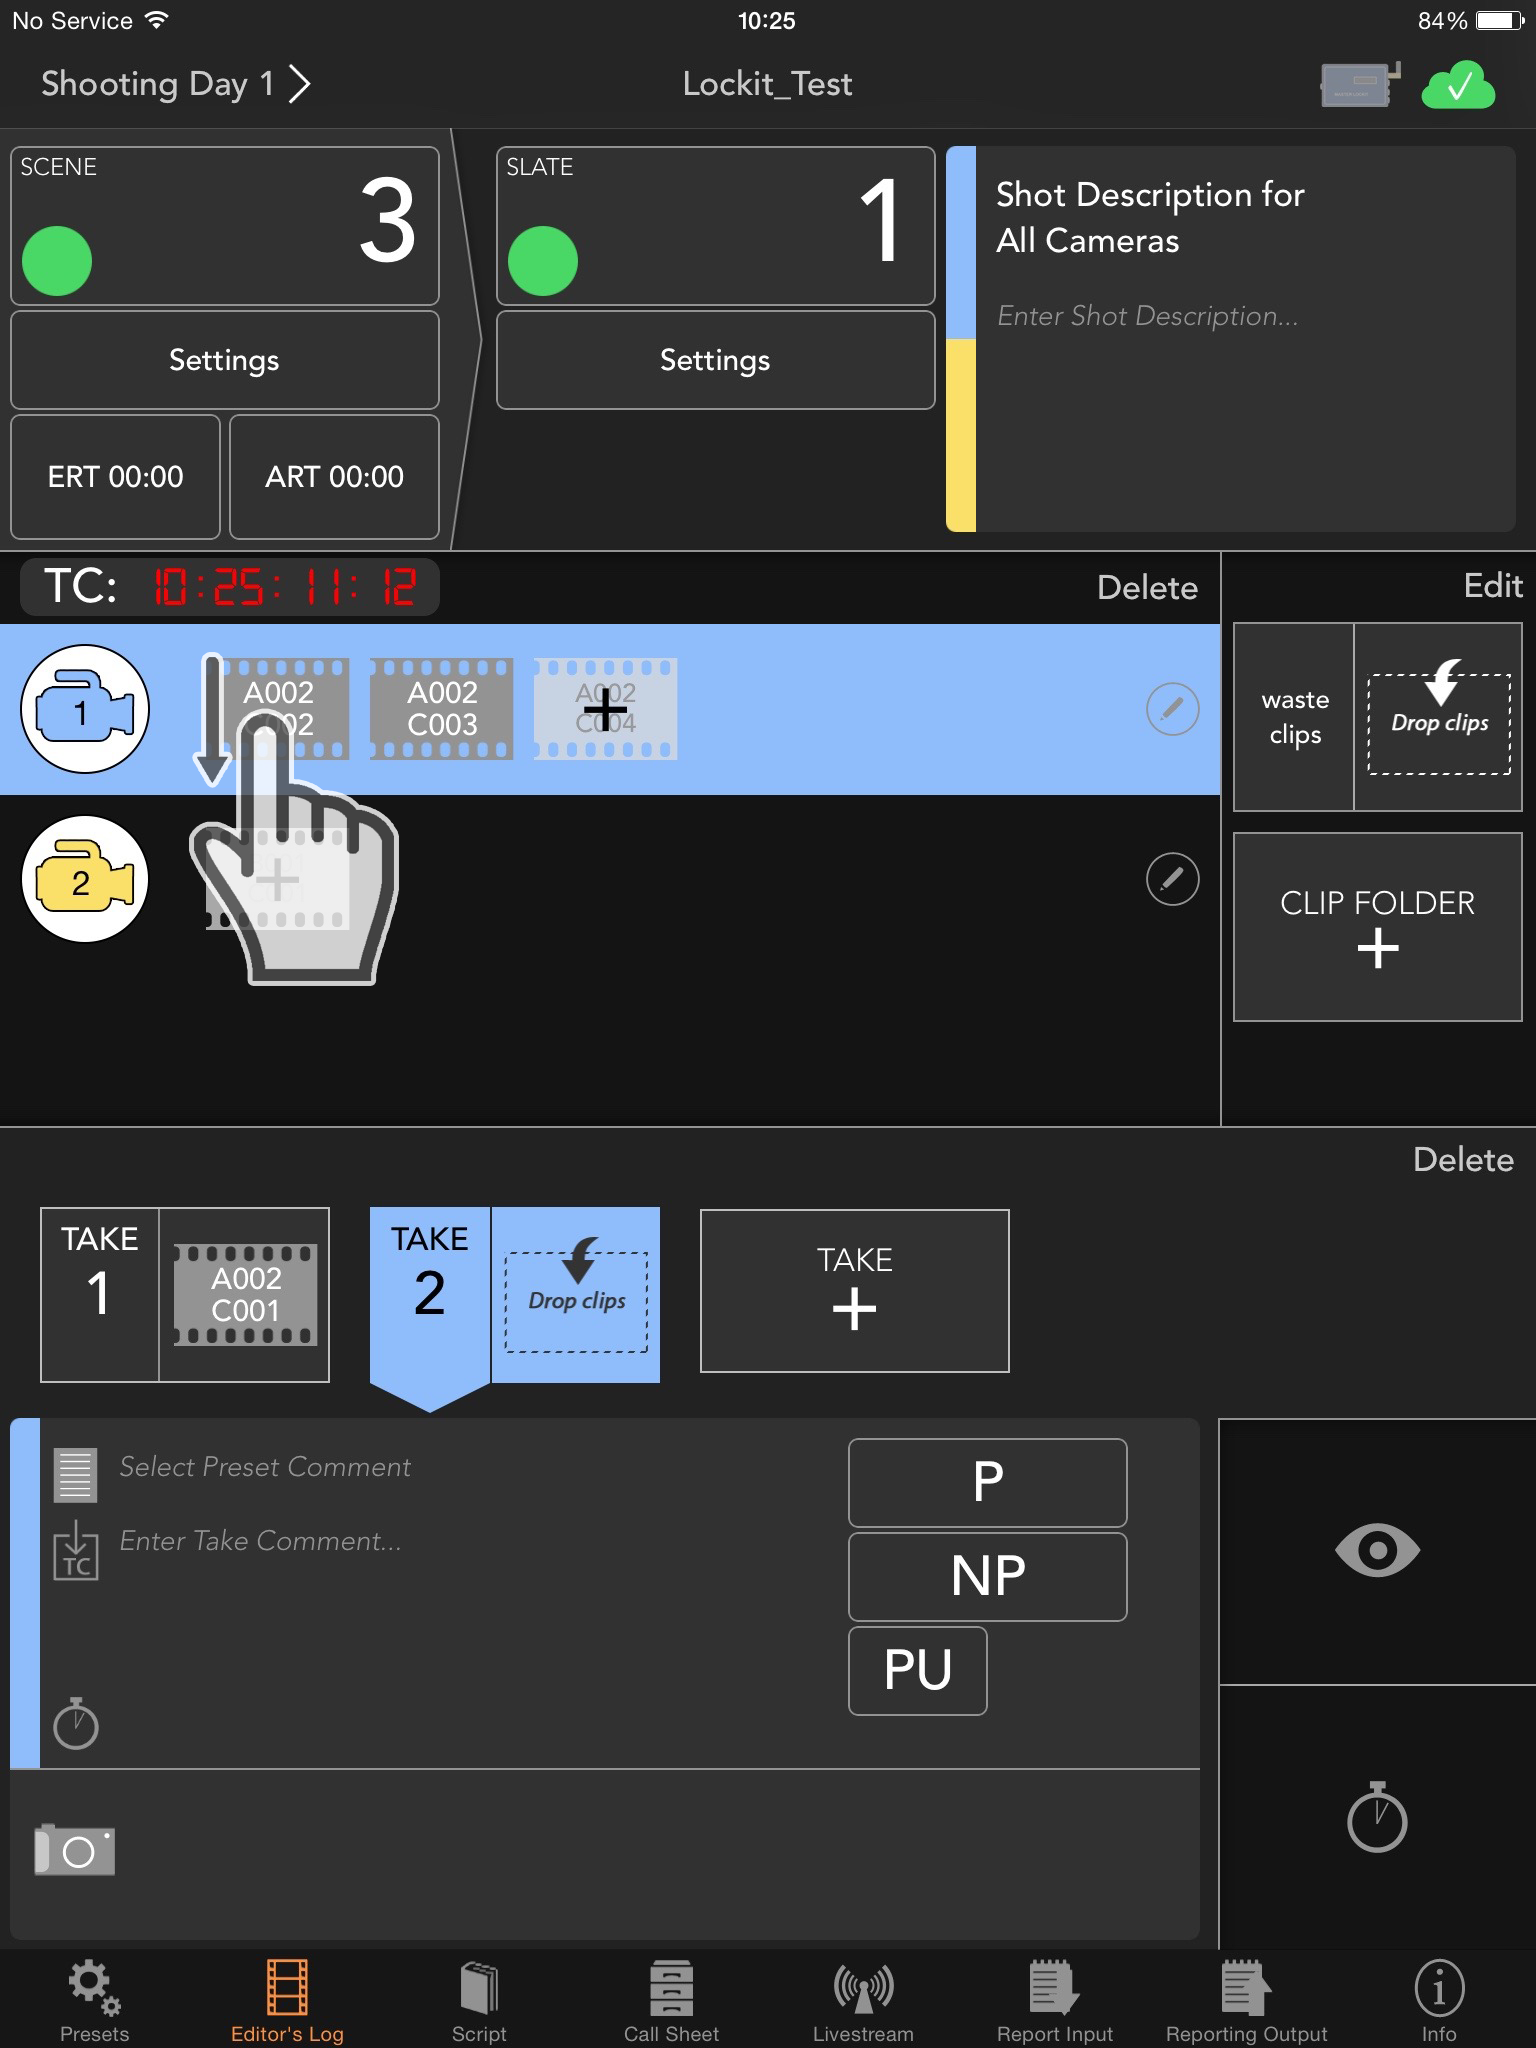
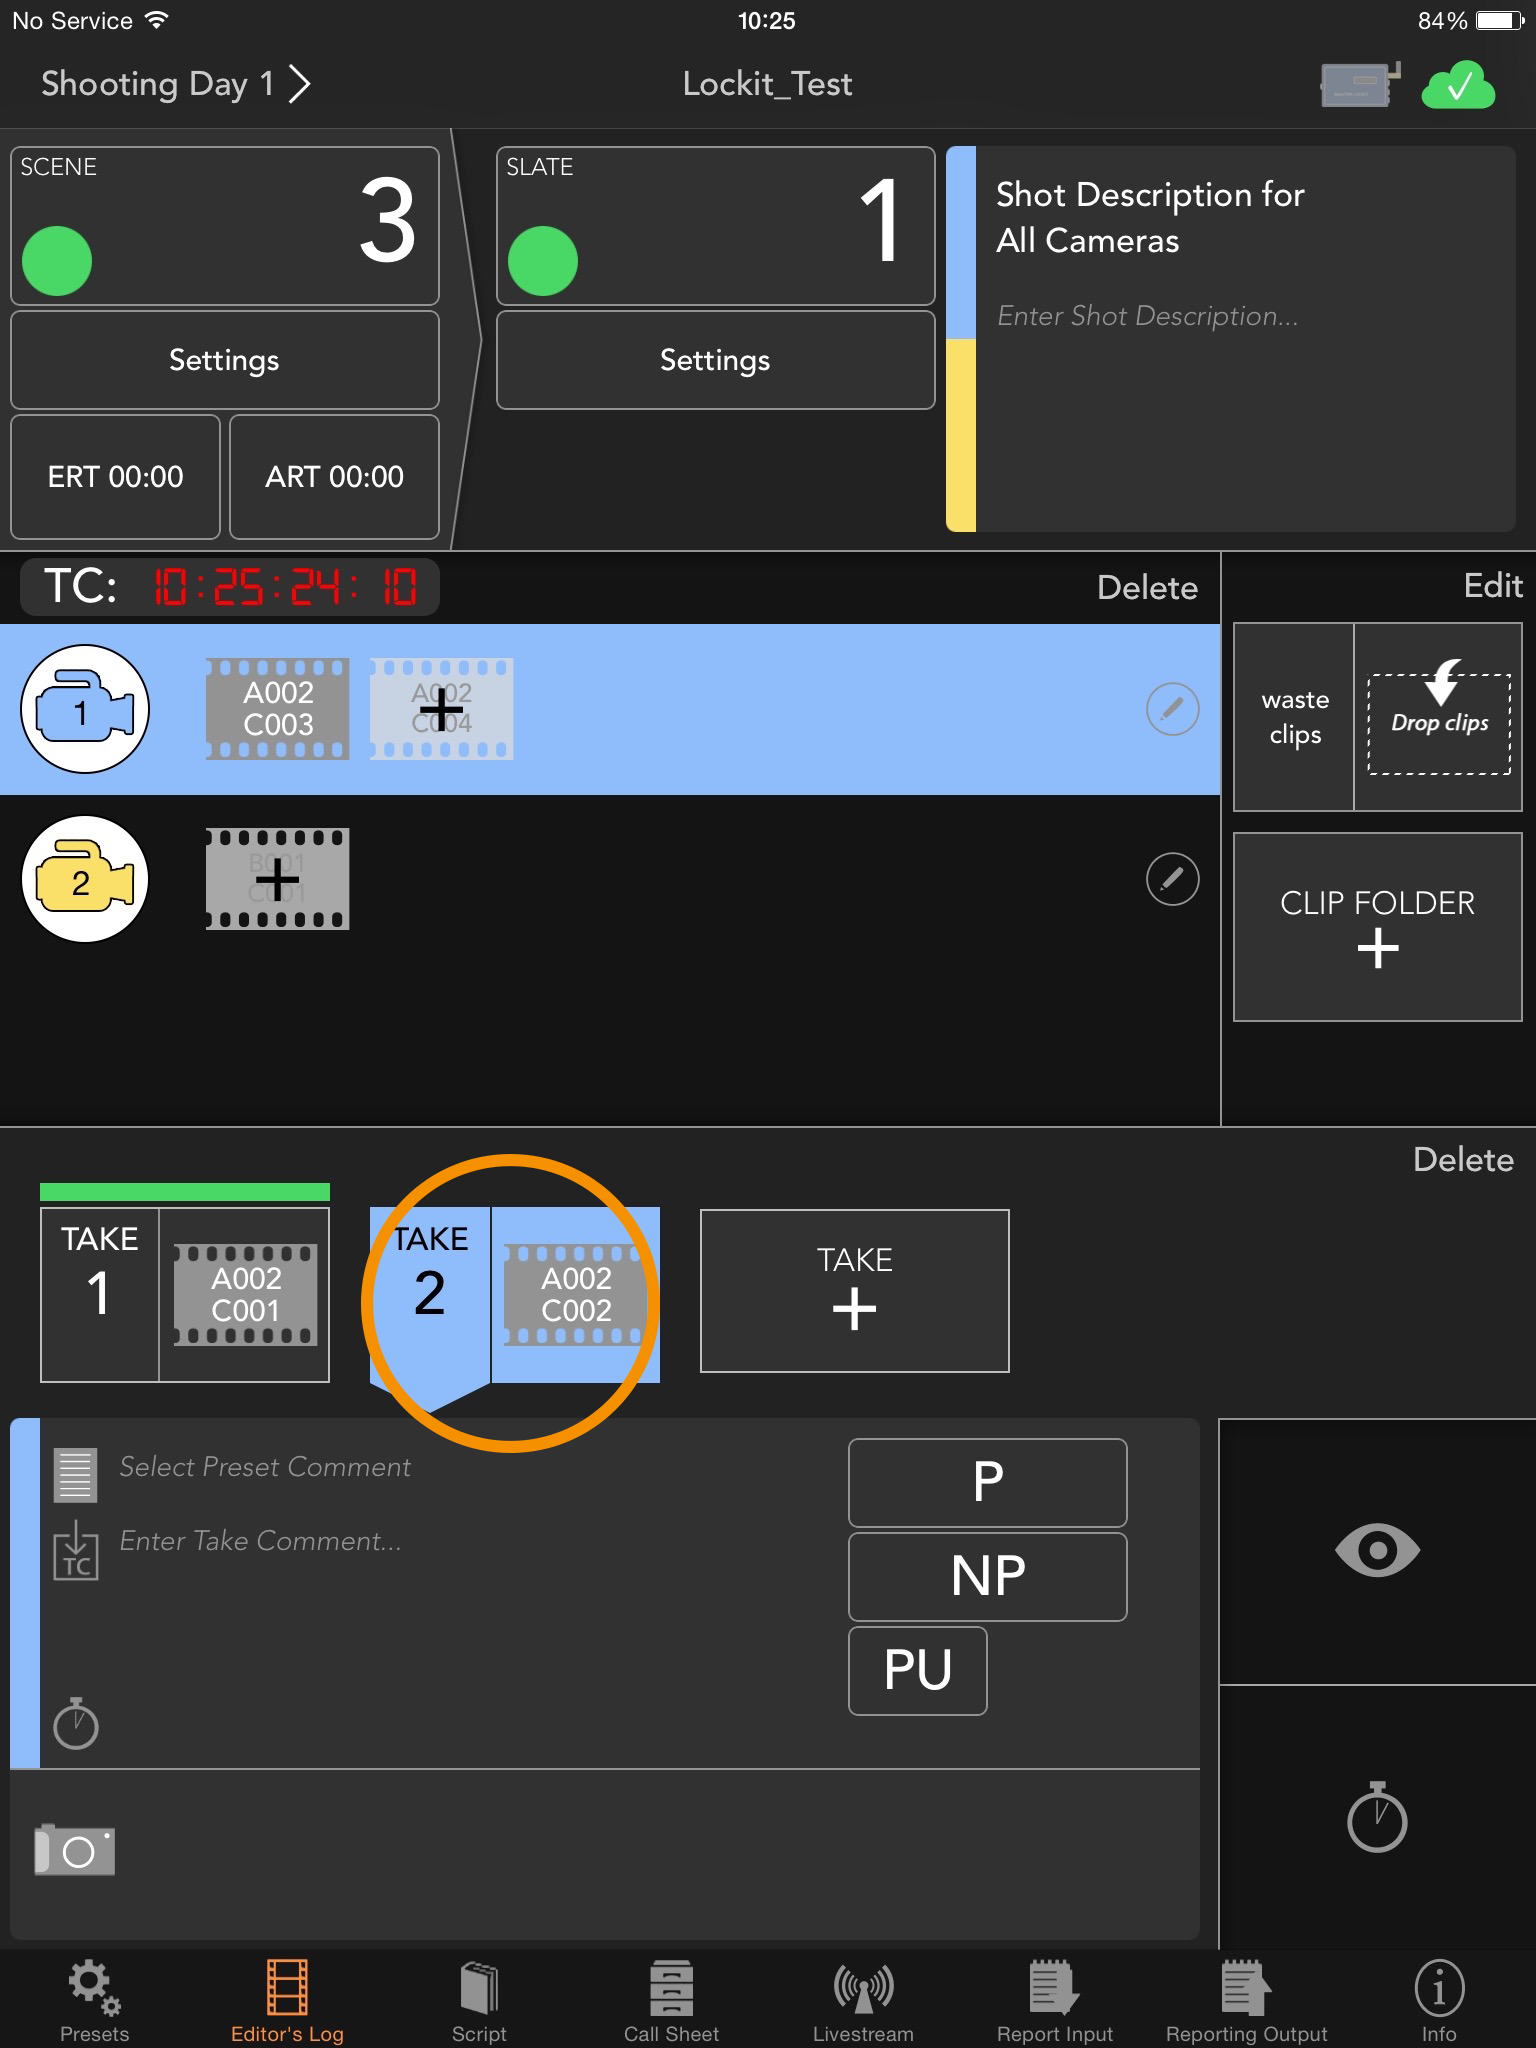
The quickest method is the allocation with a “Swipe Down”. Just swipe top down over the symbol of a clip and it will automatically “fall down” into the currently selected take (or into the next empty one, if the currently selected take already contains a clip).
Like this the following clip is for example allocated to scene 3 /setting 1 / take 2.
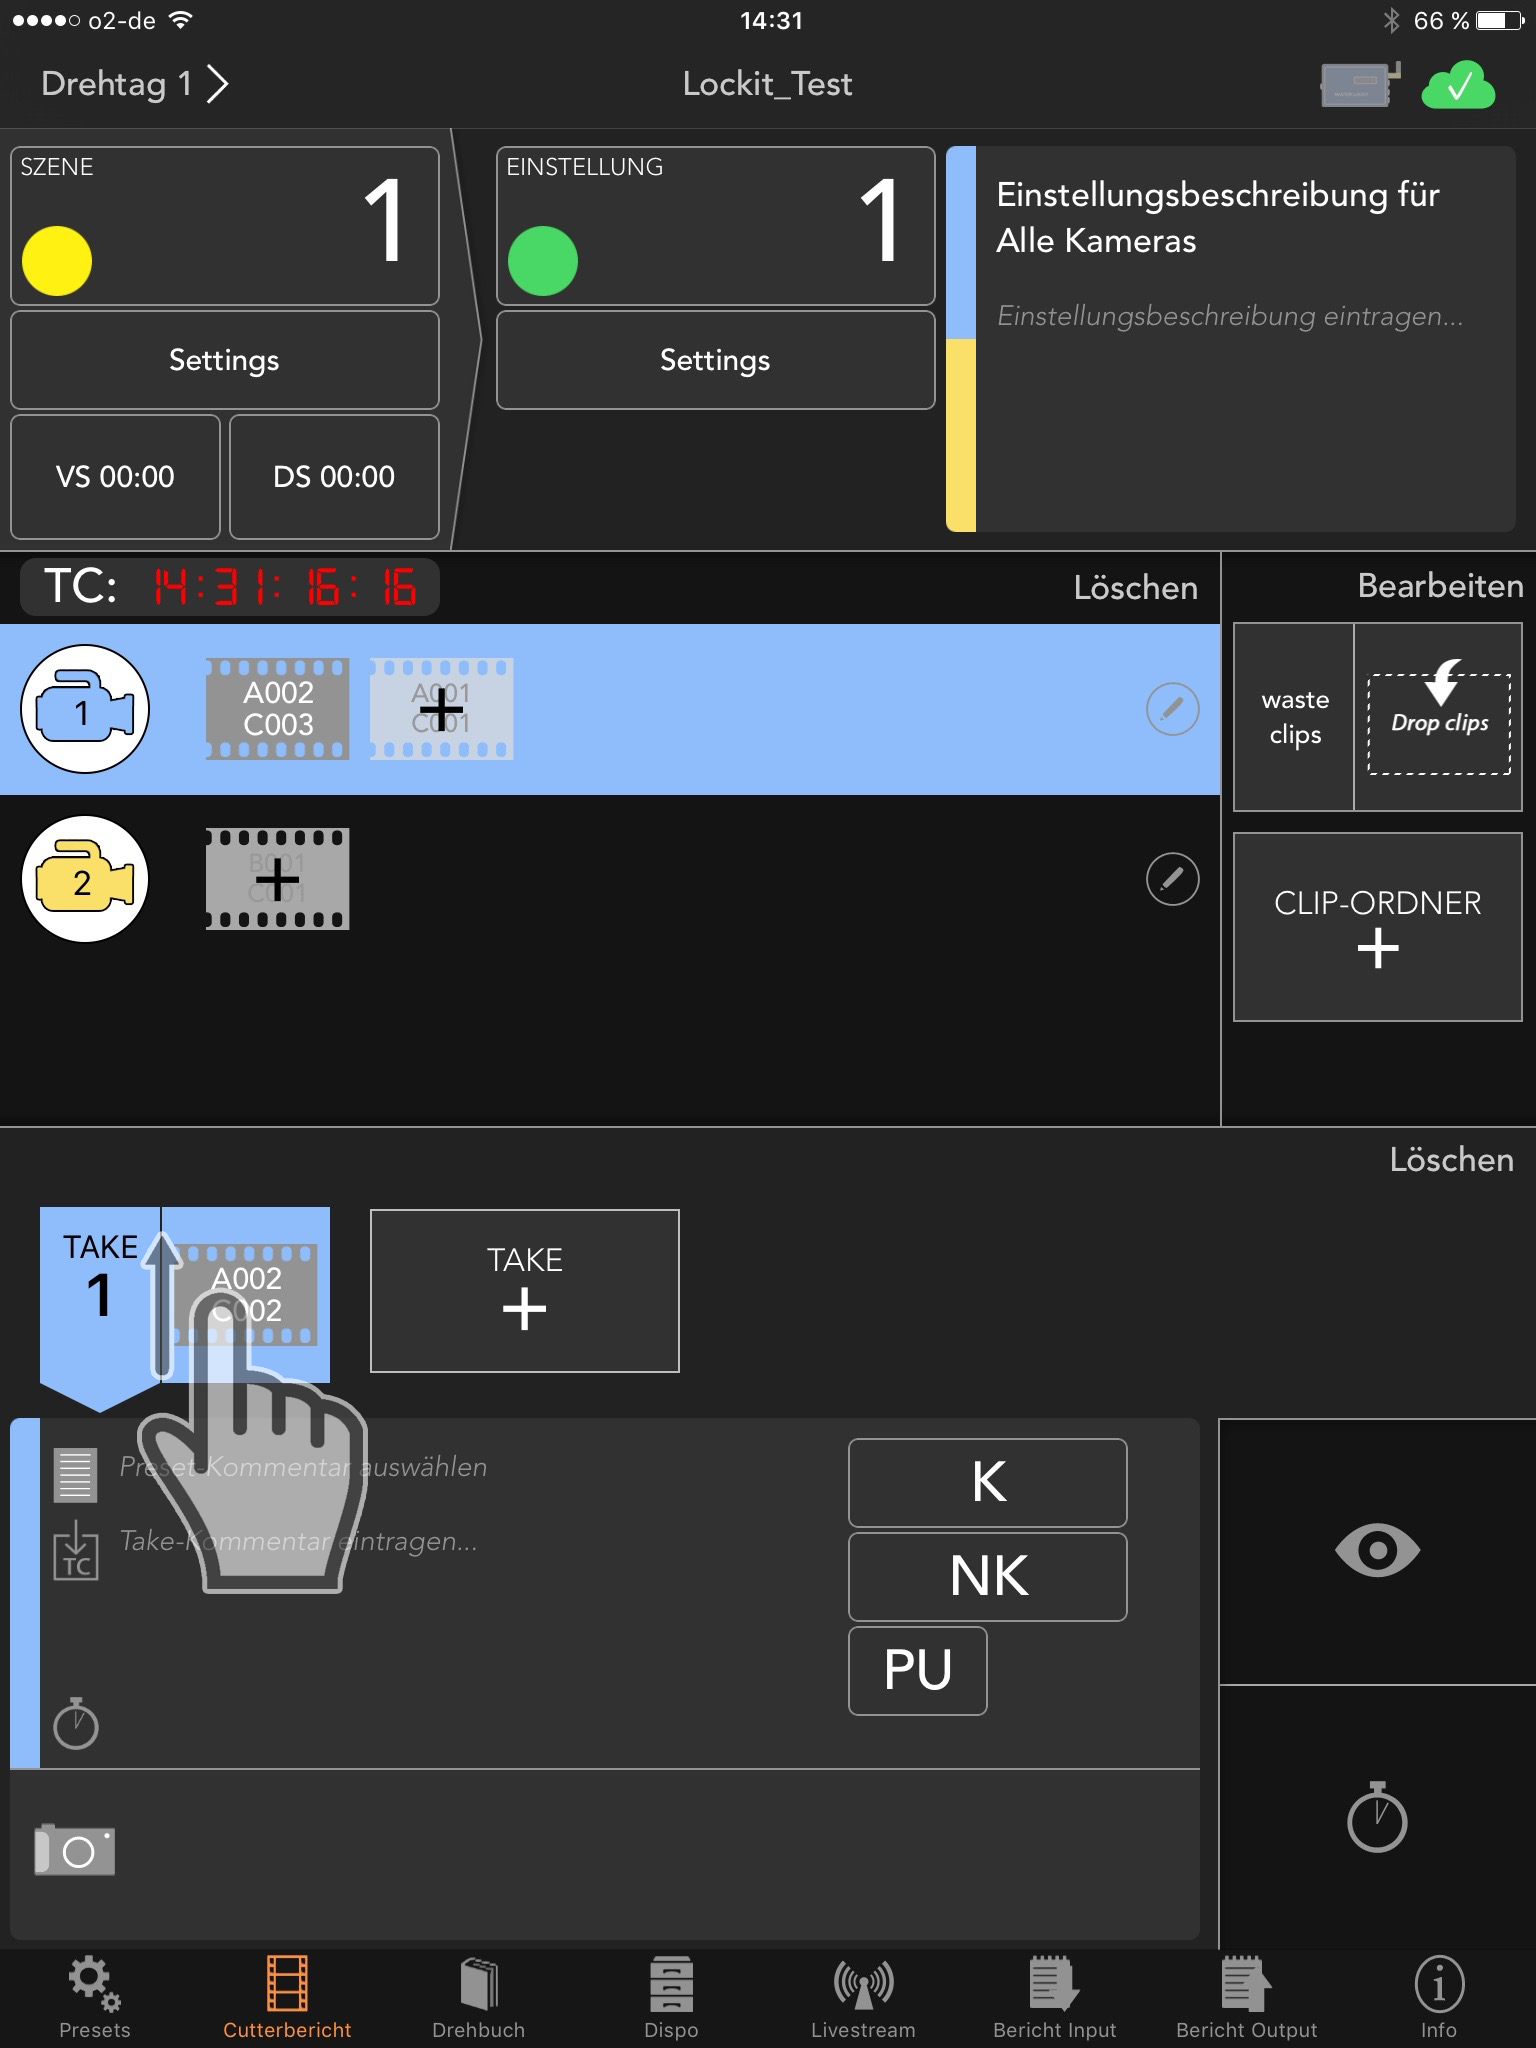
Way 2:
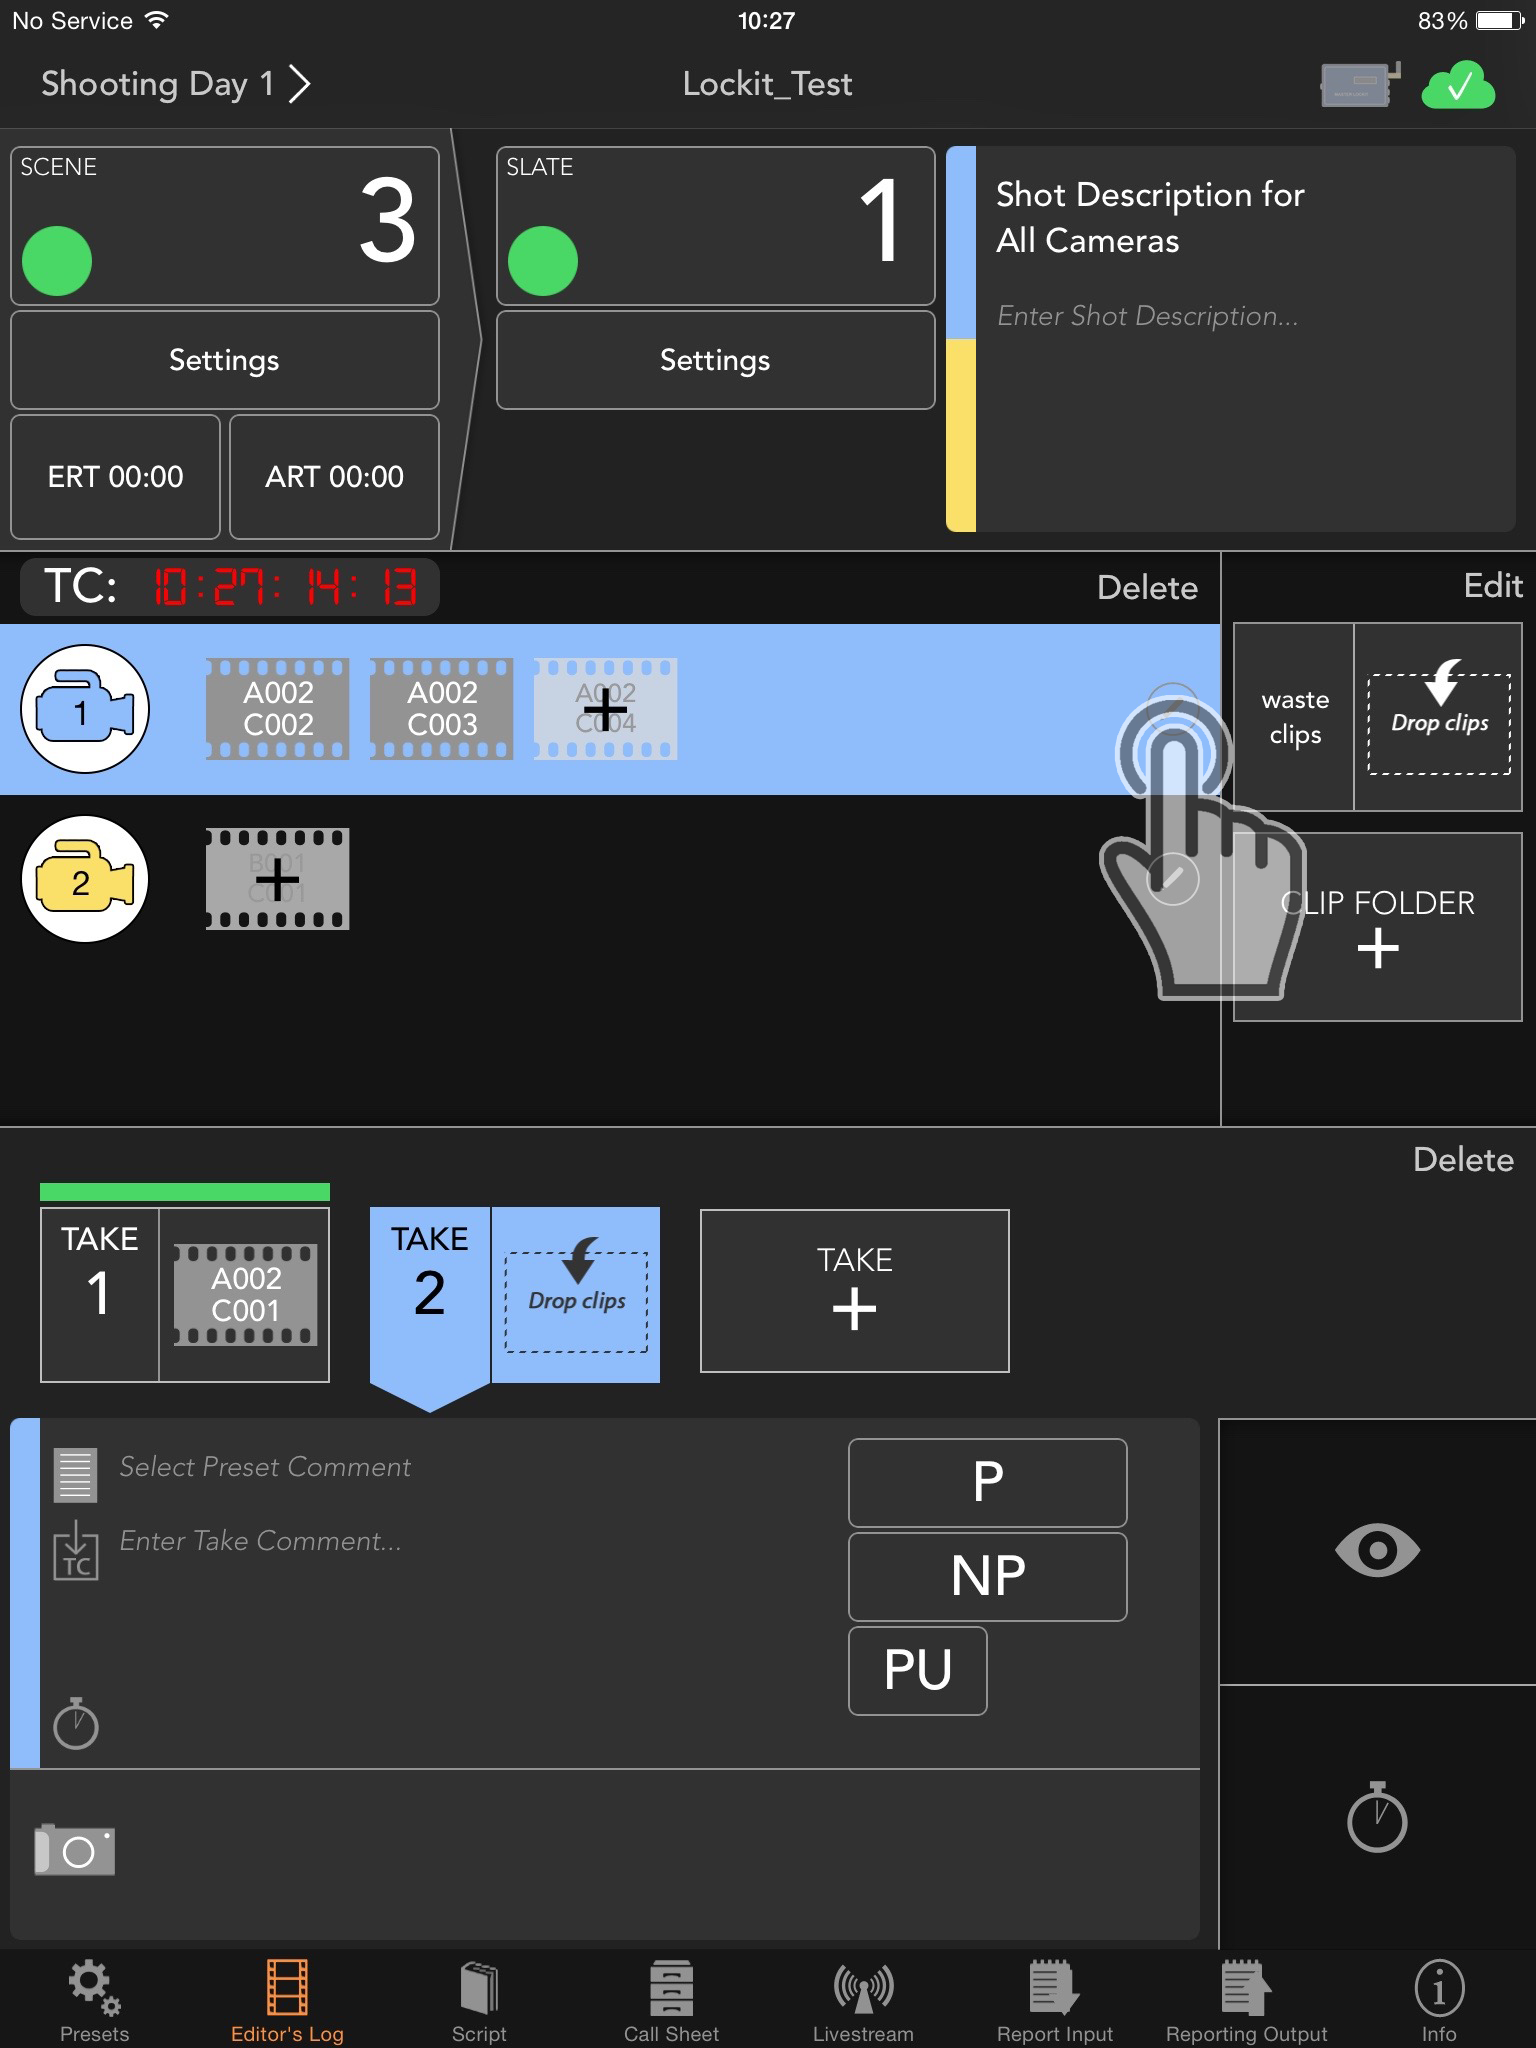
You can also allocate a take via “Drag & Drop”. Simply pull the clip into an existing take or onto “Take +” to create a new take.
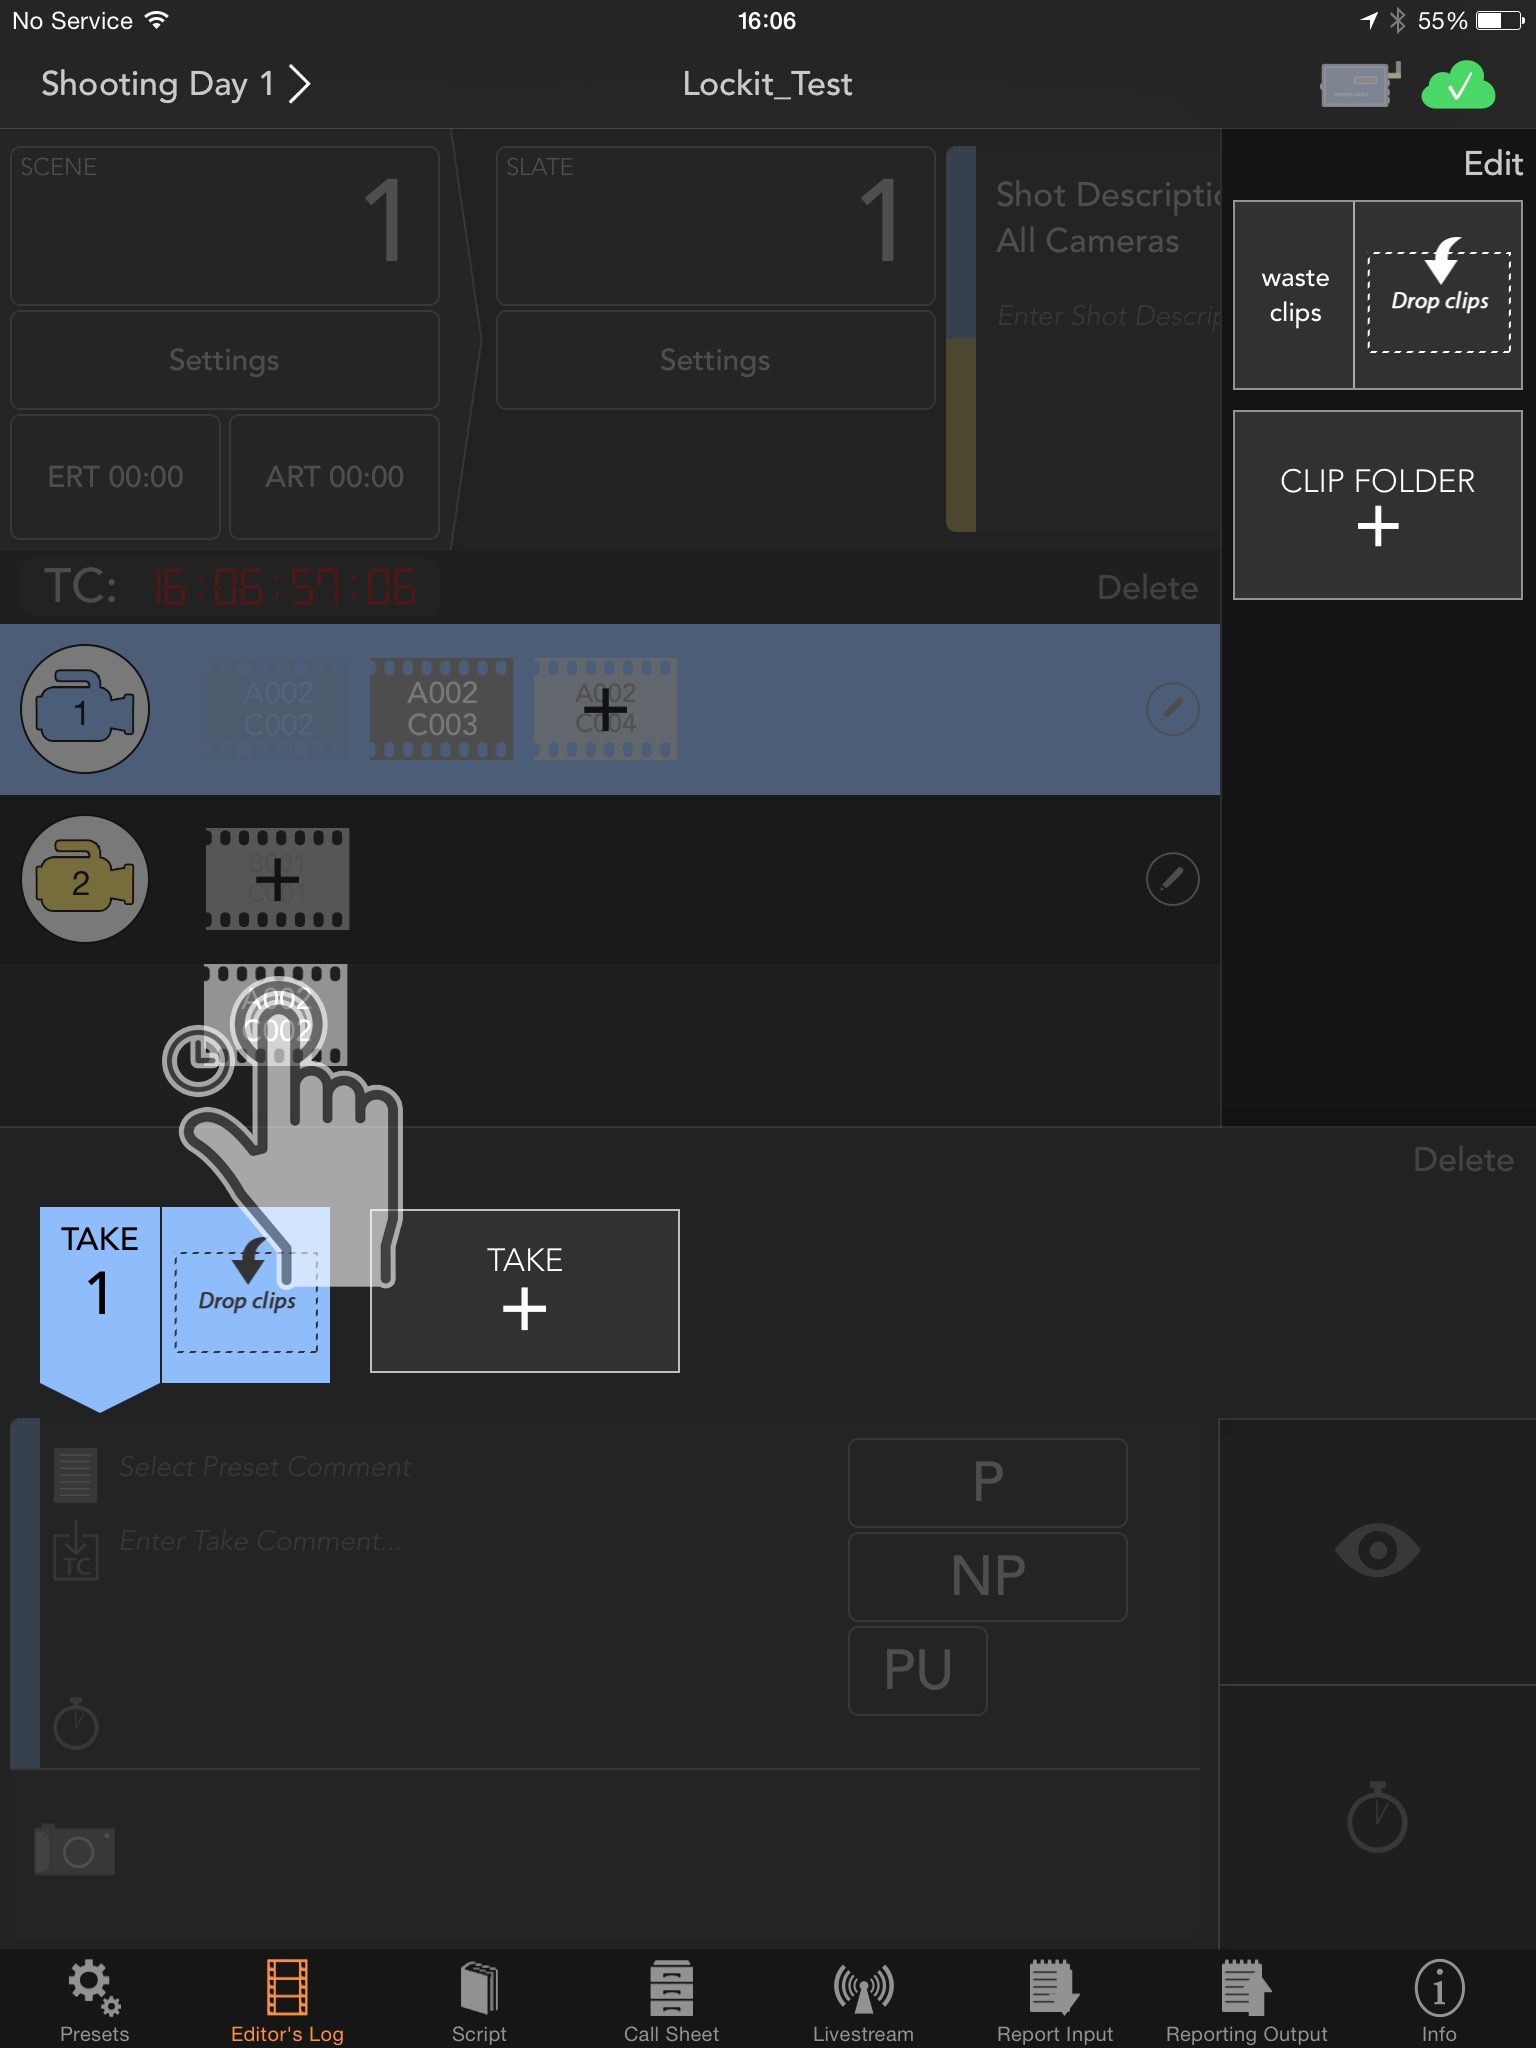
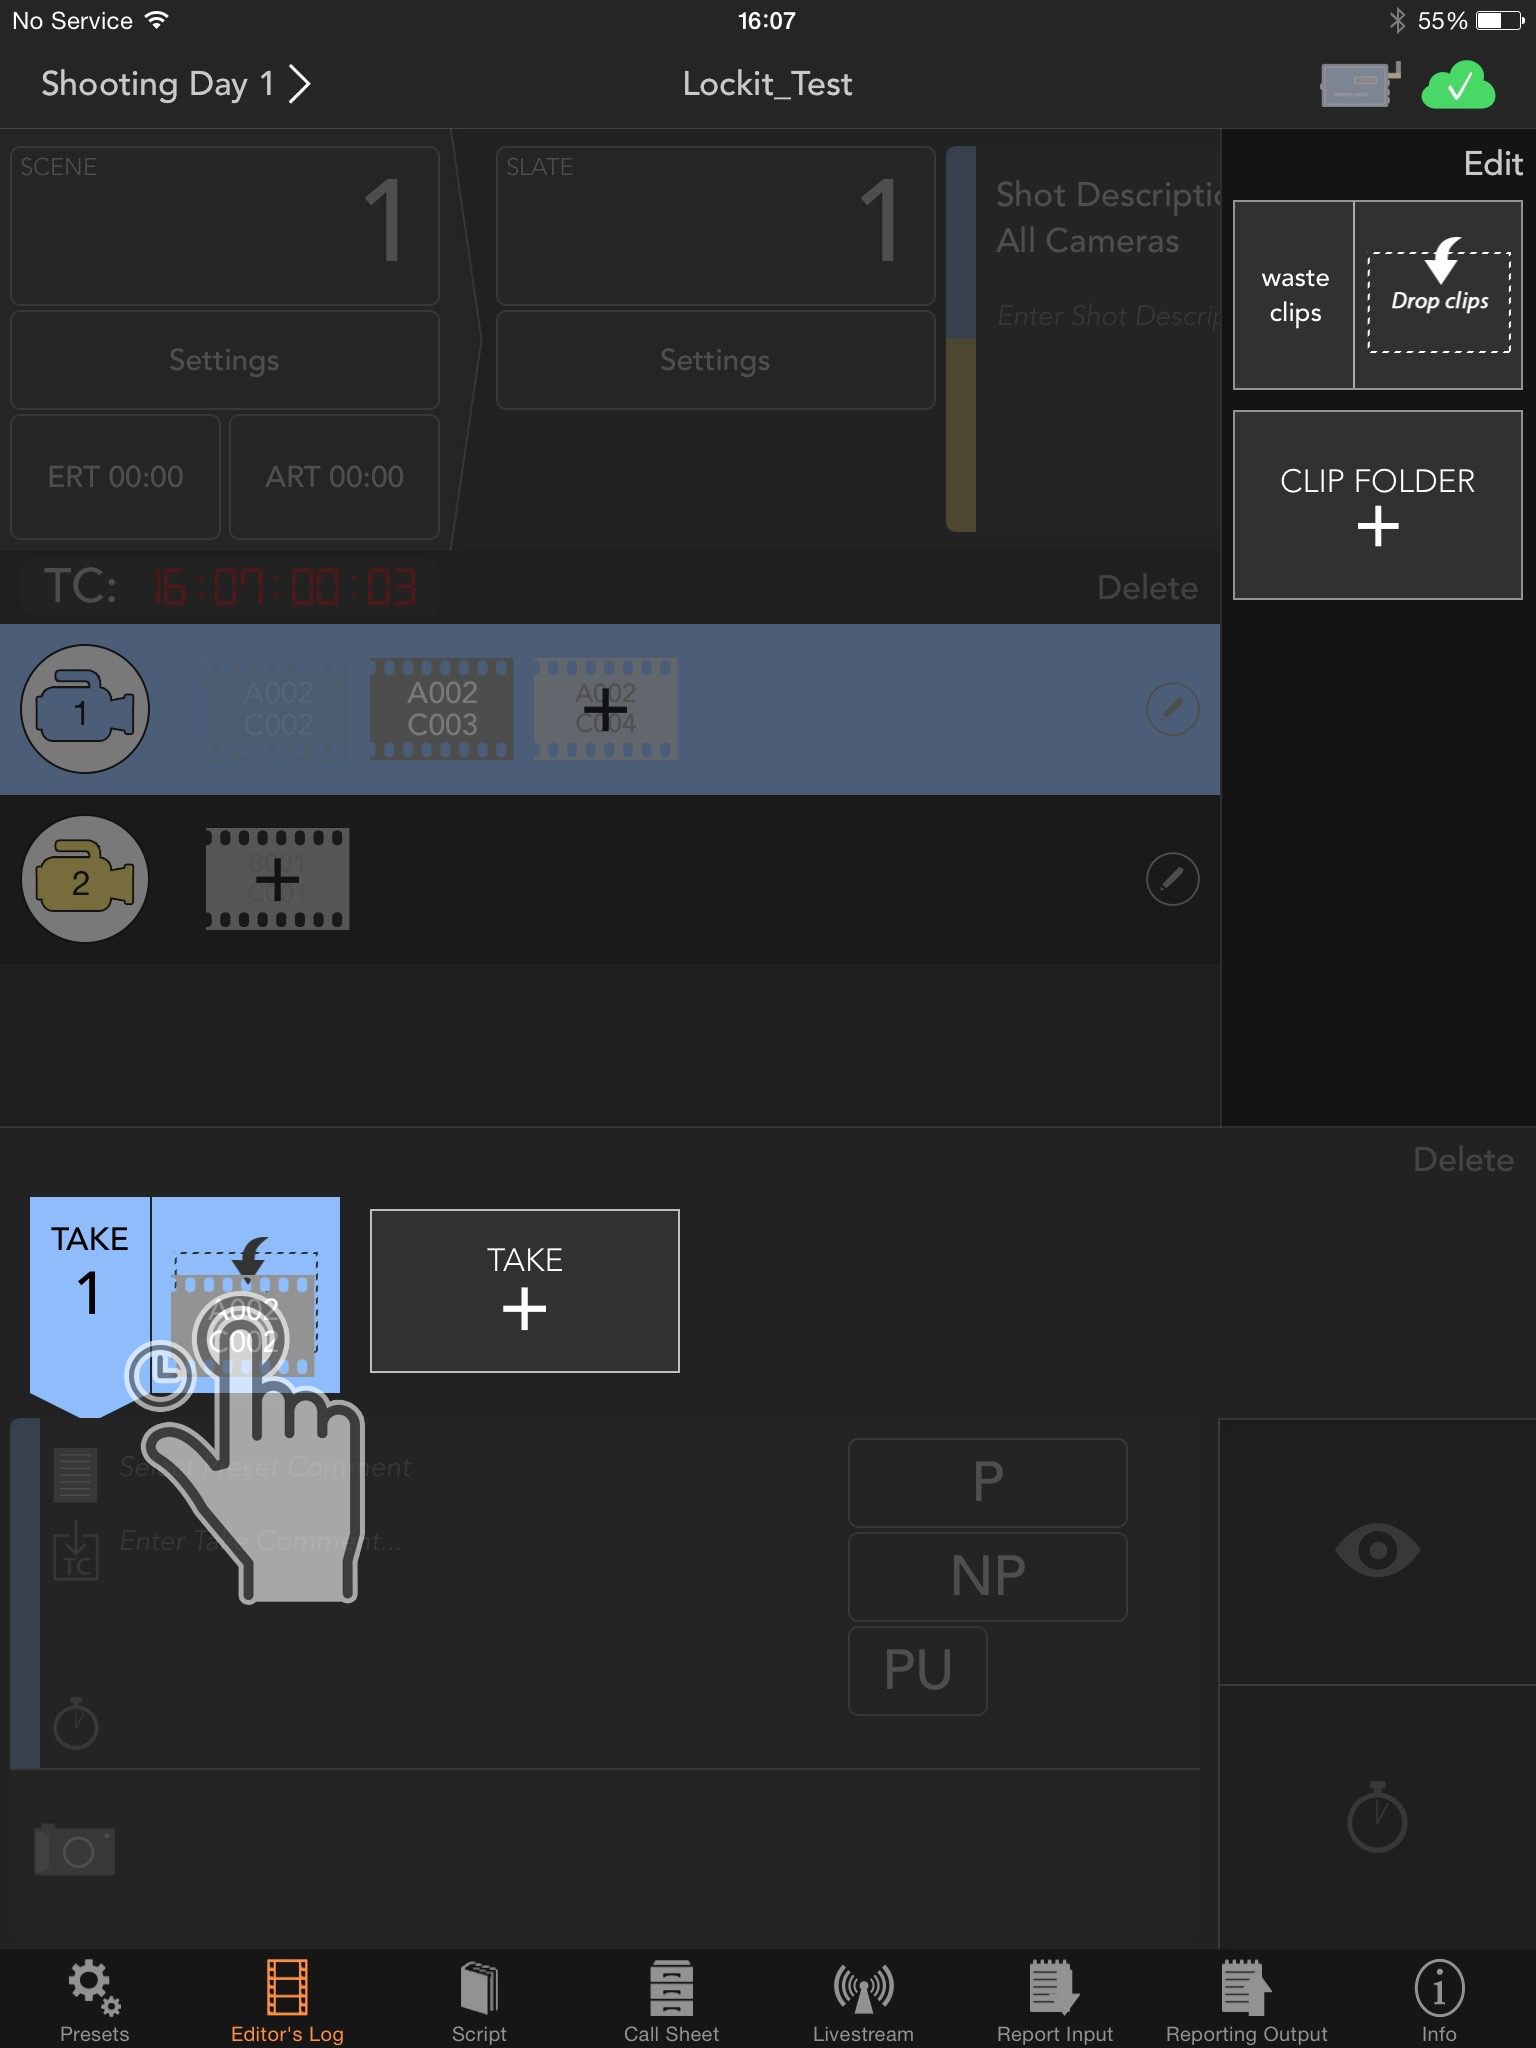
Use the very same method to allocate a clip to any take later on. Or try a “Swipe Up” to push a clip back up into clip window.
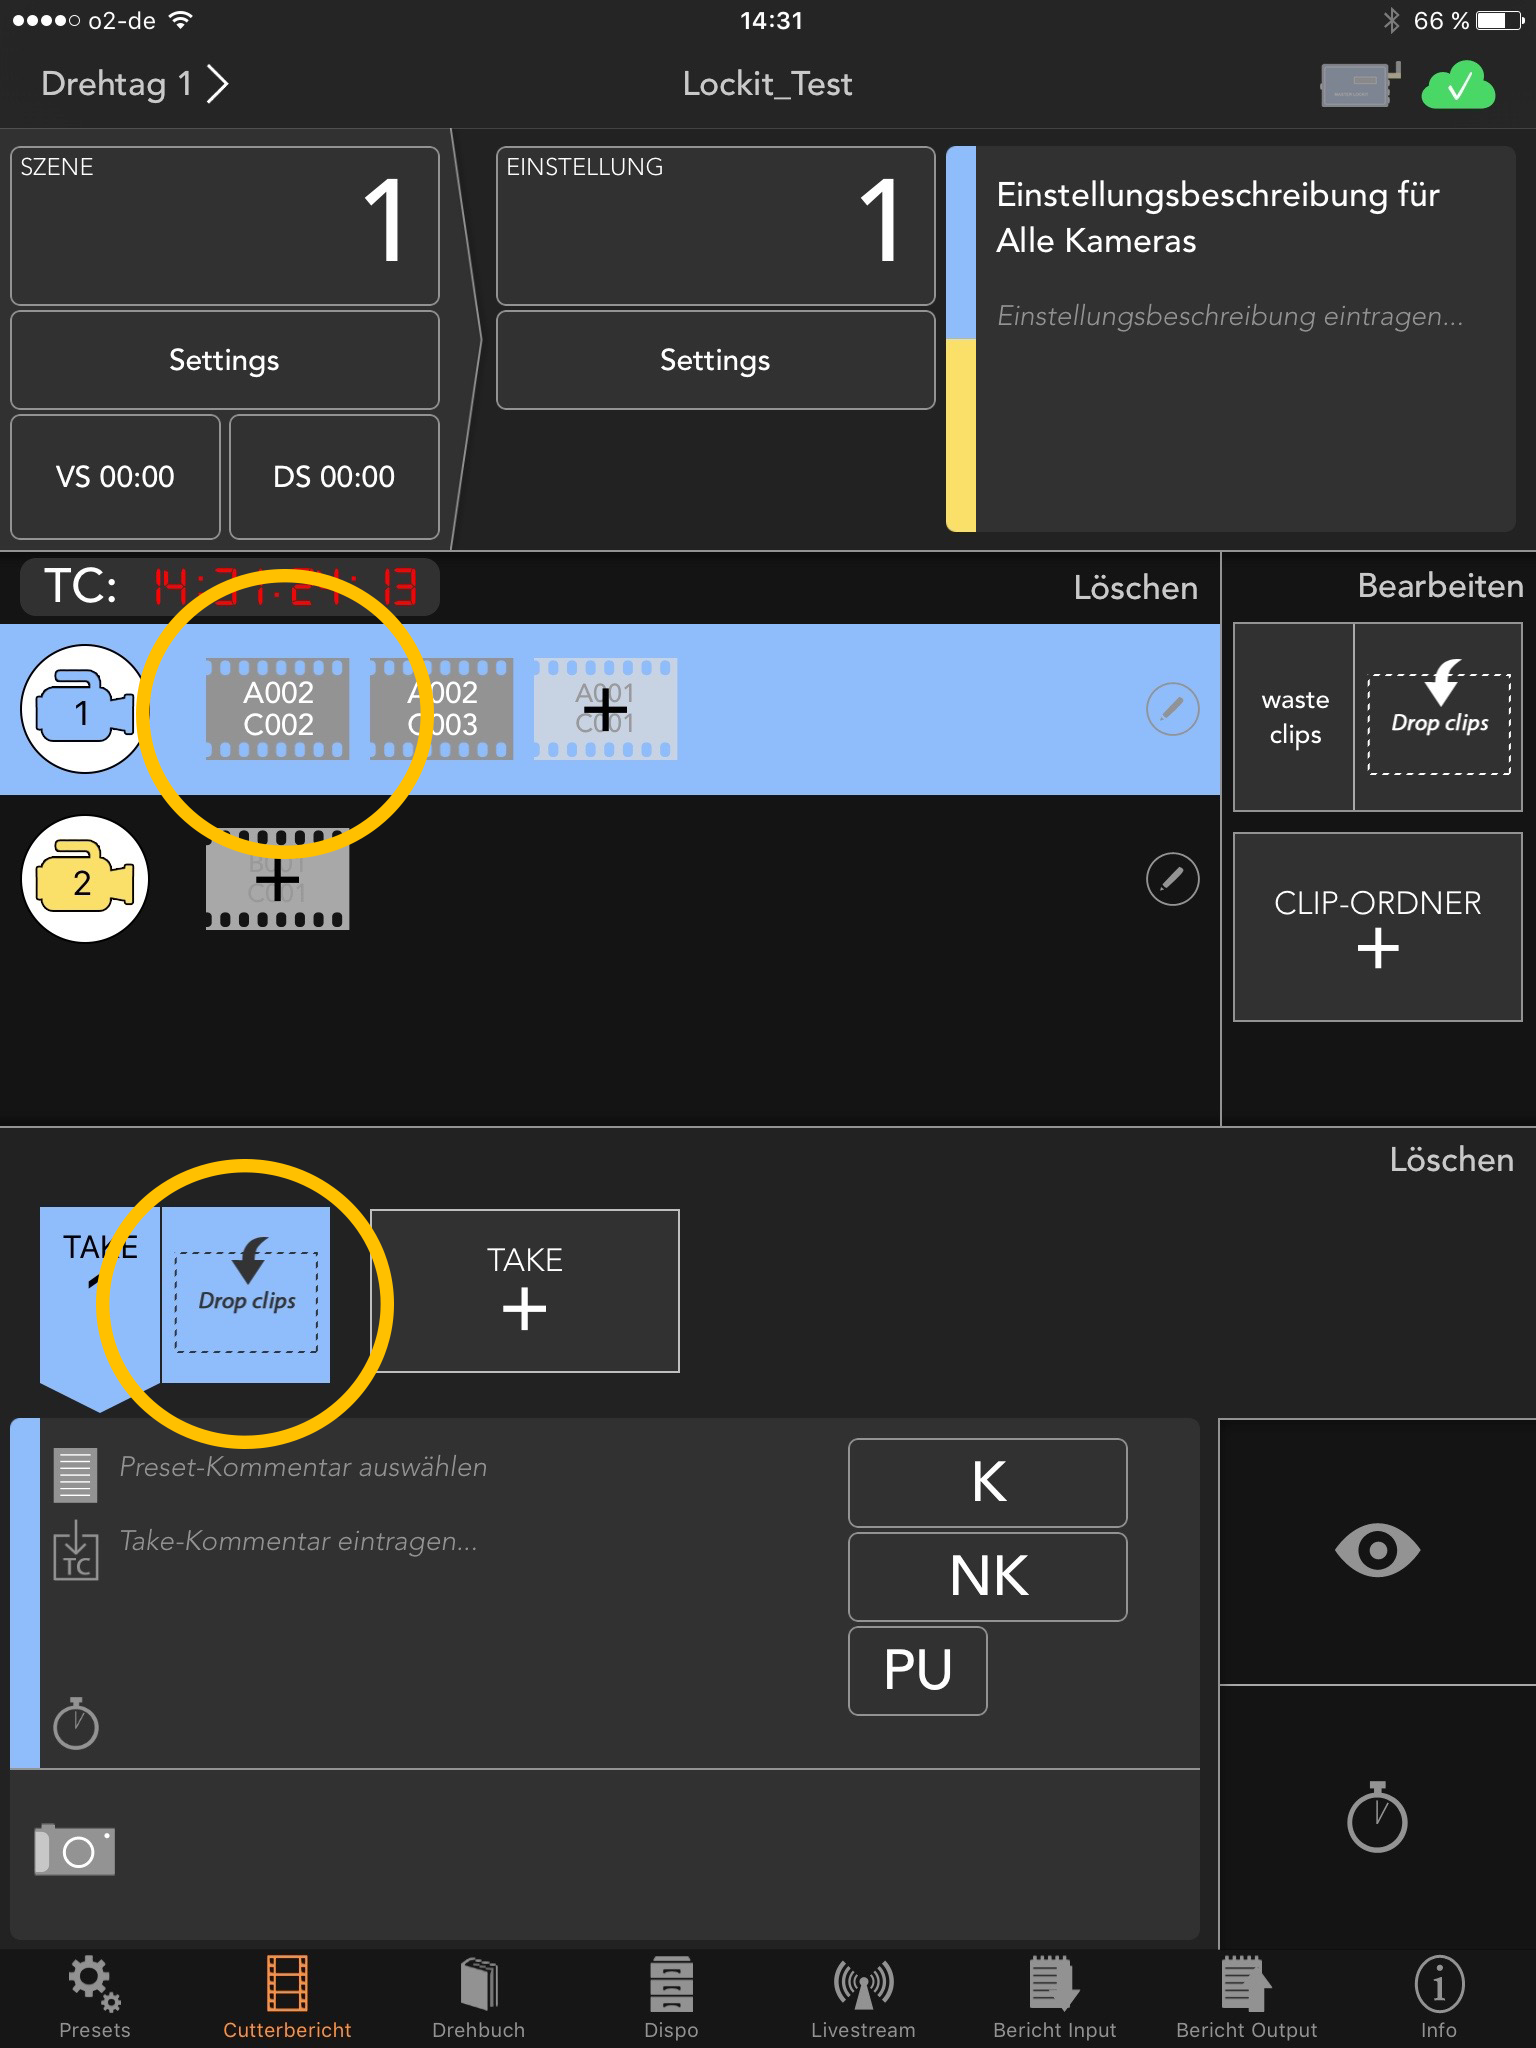
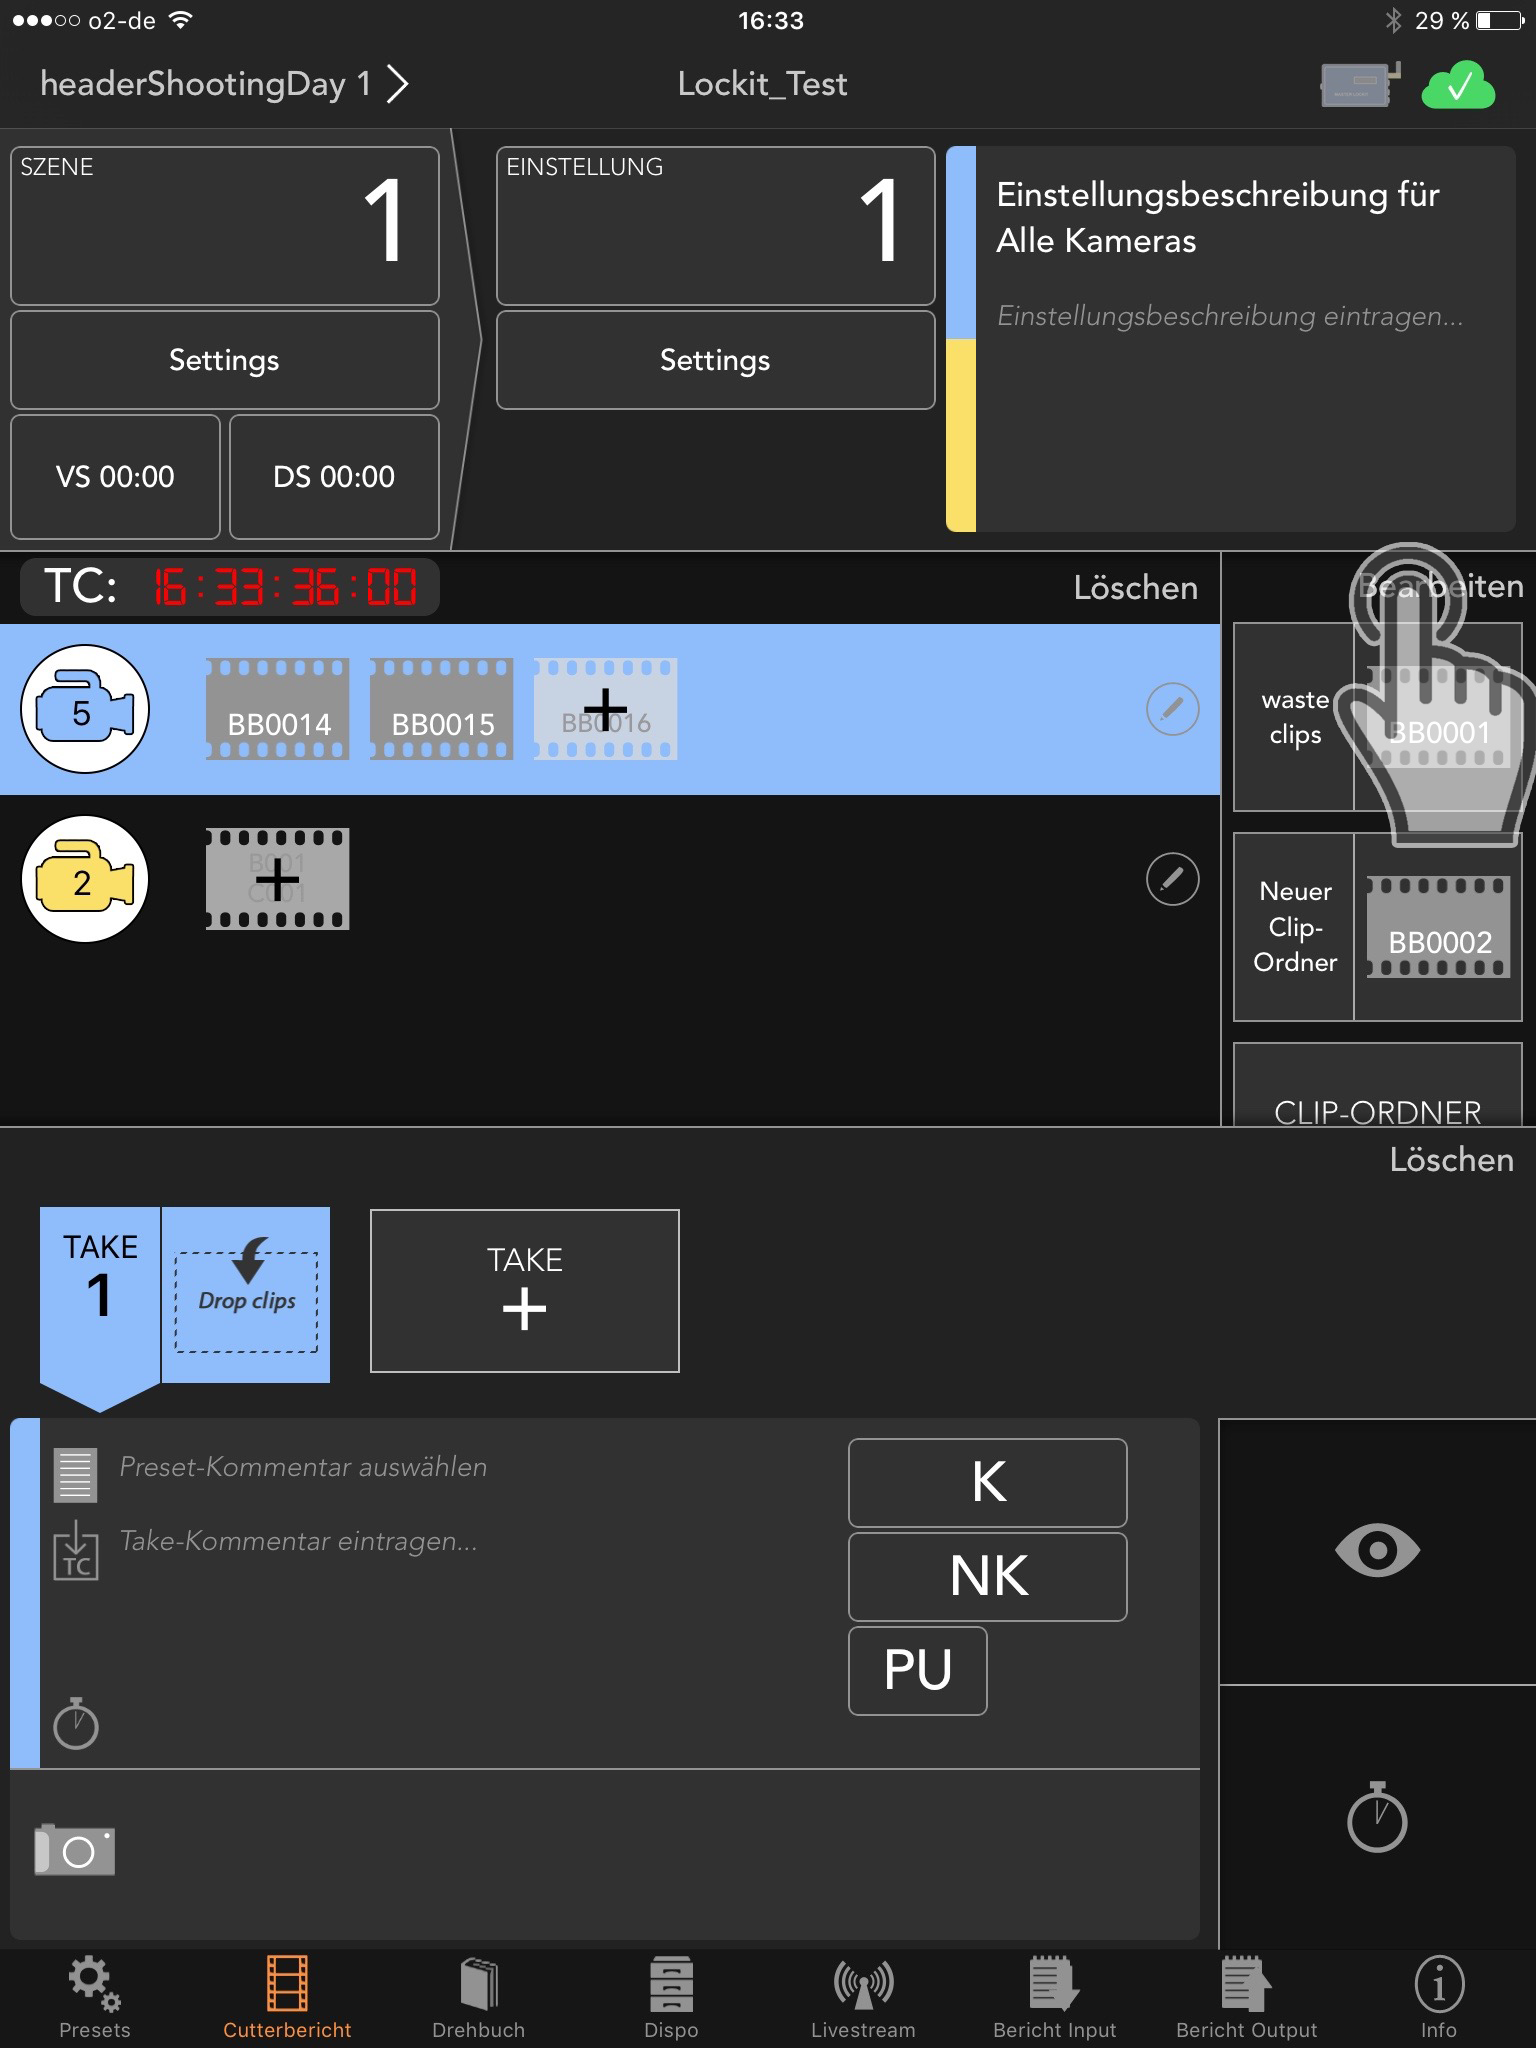
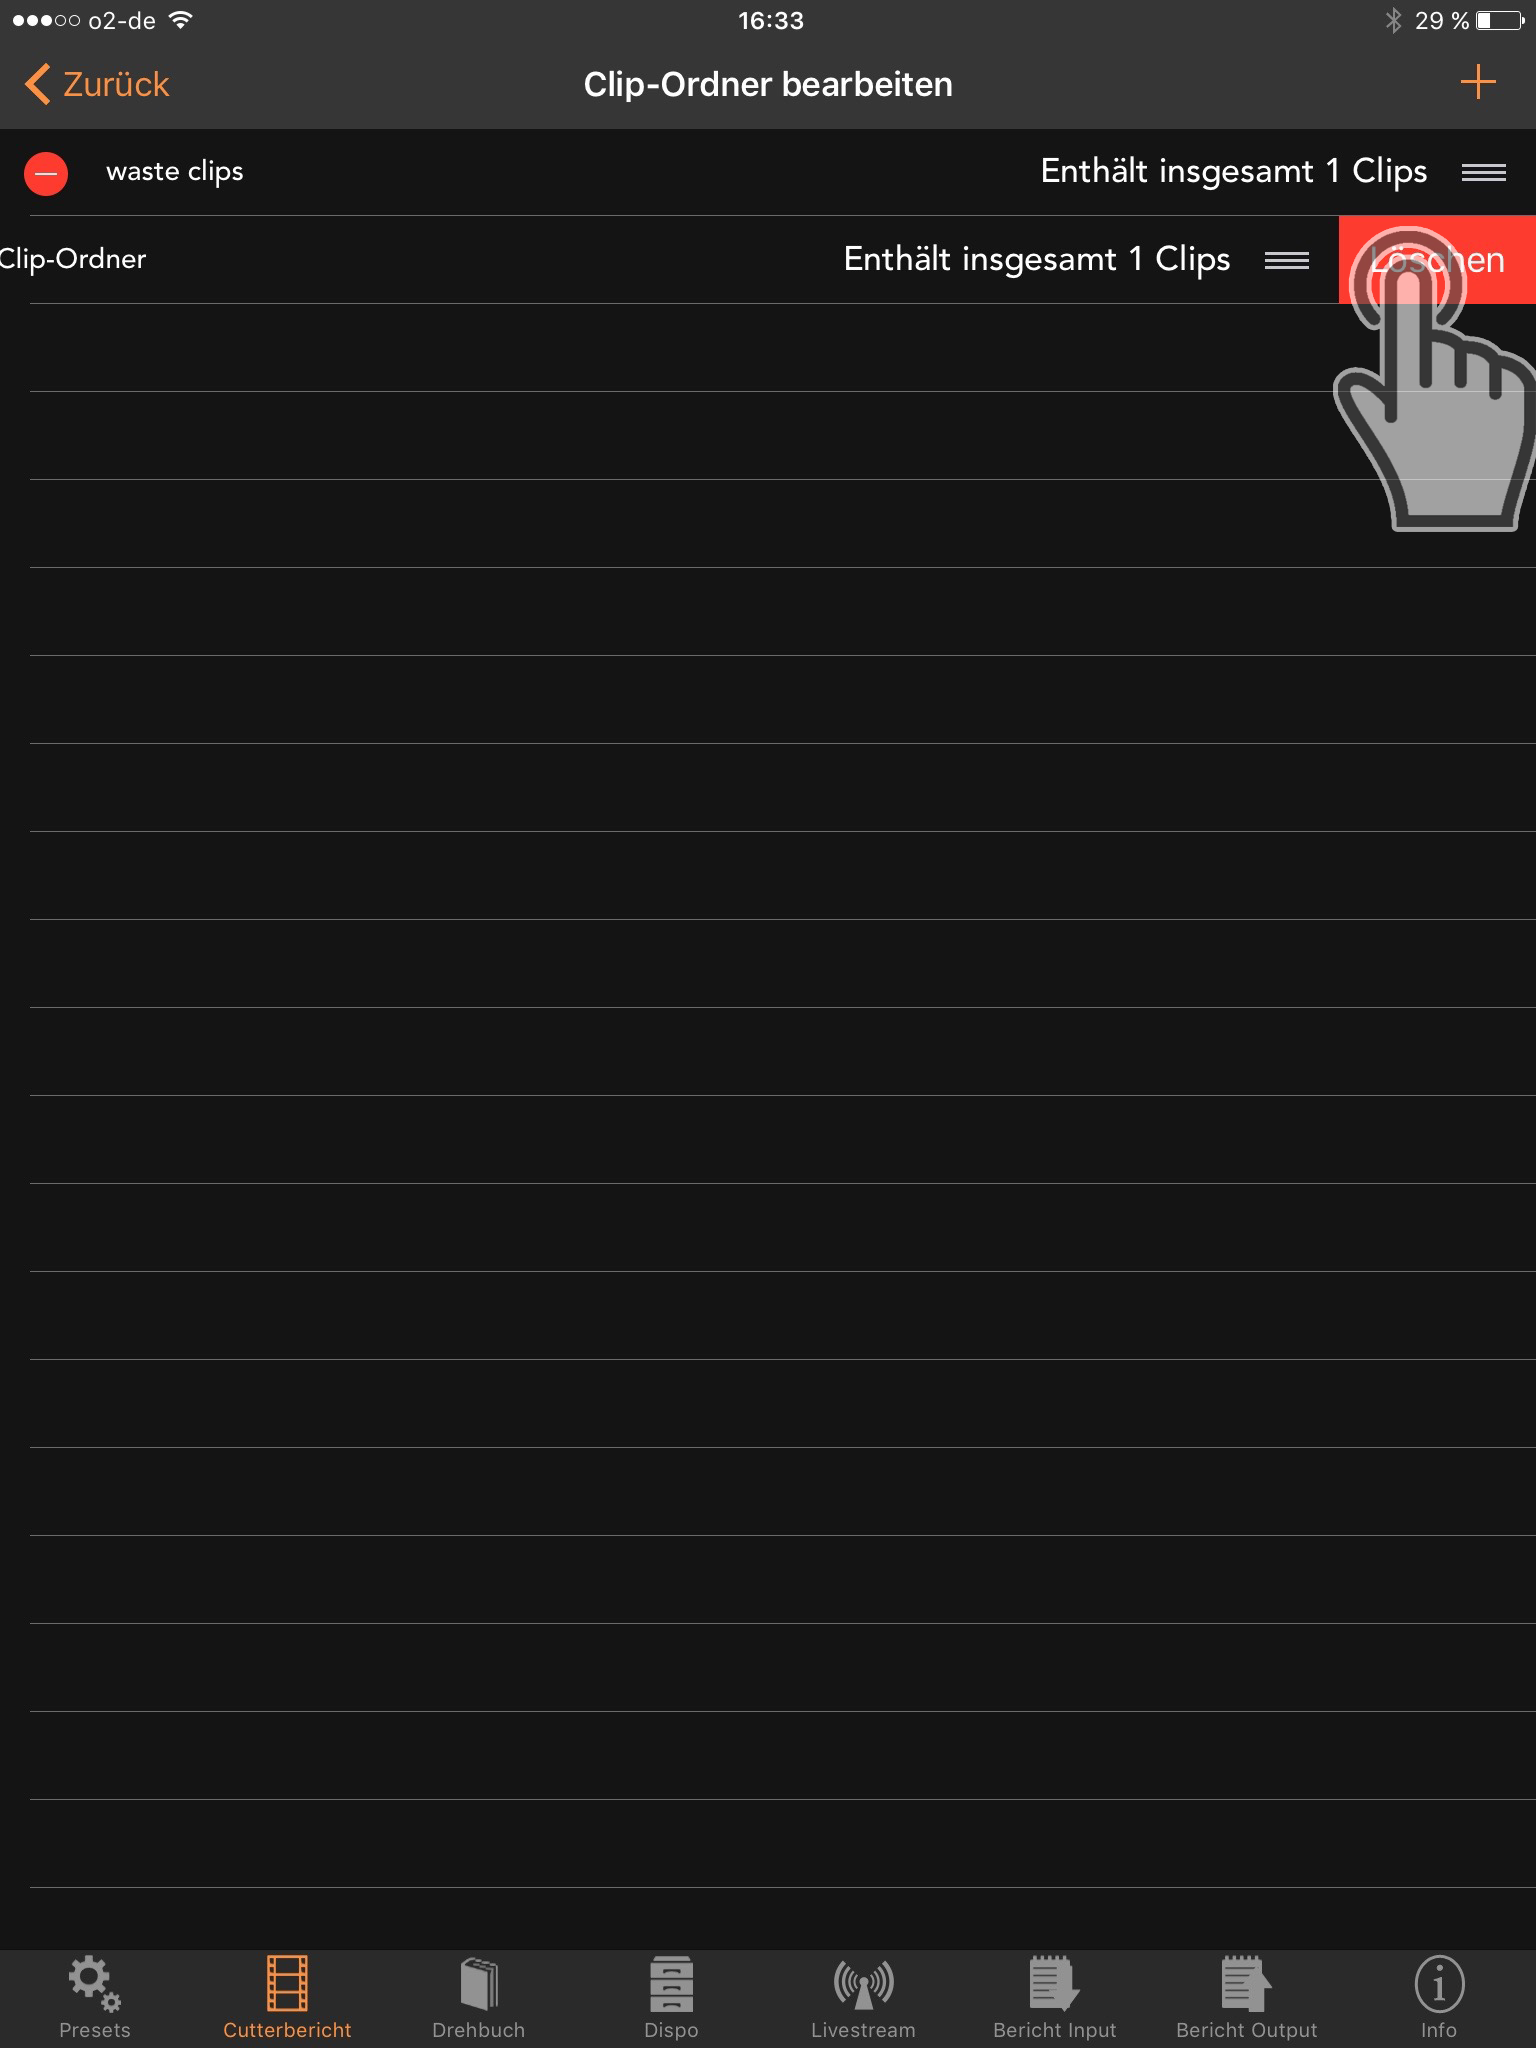
Clip folder
On the right side in the app the clip folders are being displayed. The “Waste Clip”-folder is there by default. Allocate clips to this folder via “Drag & Drop”.

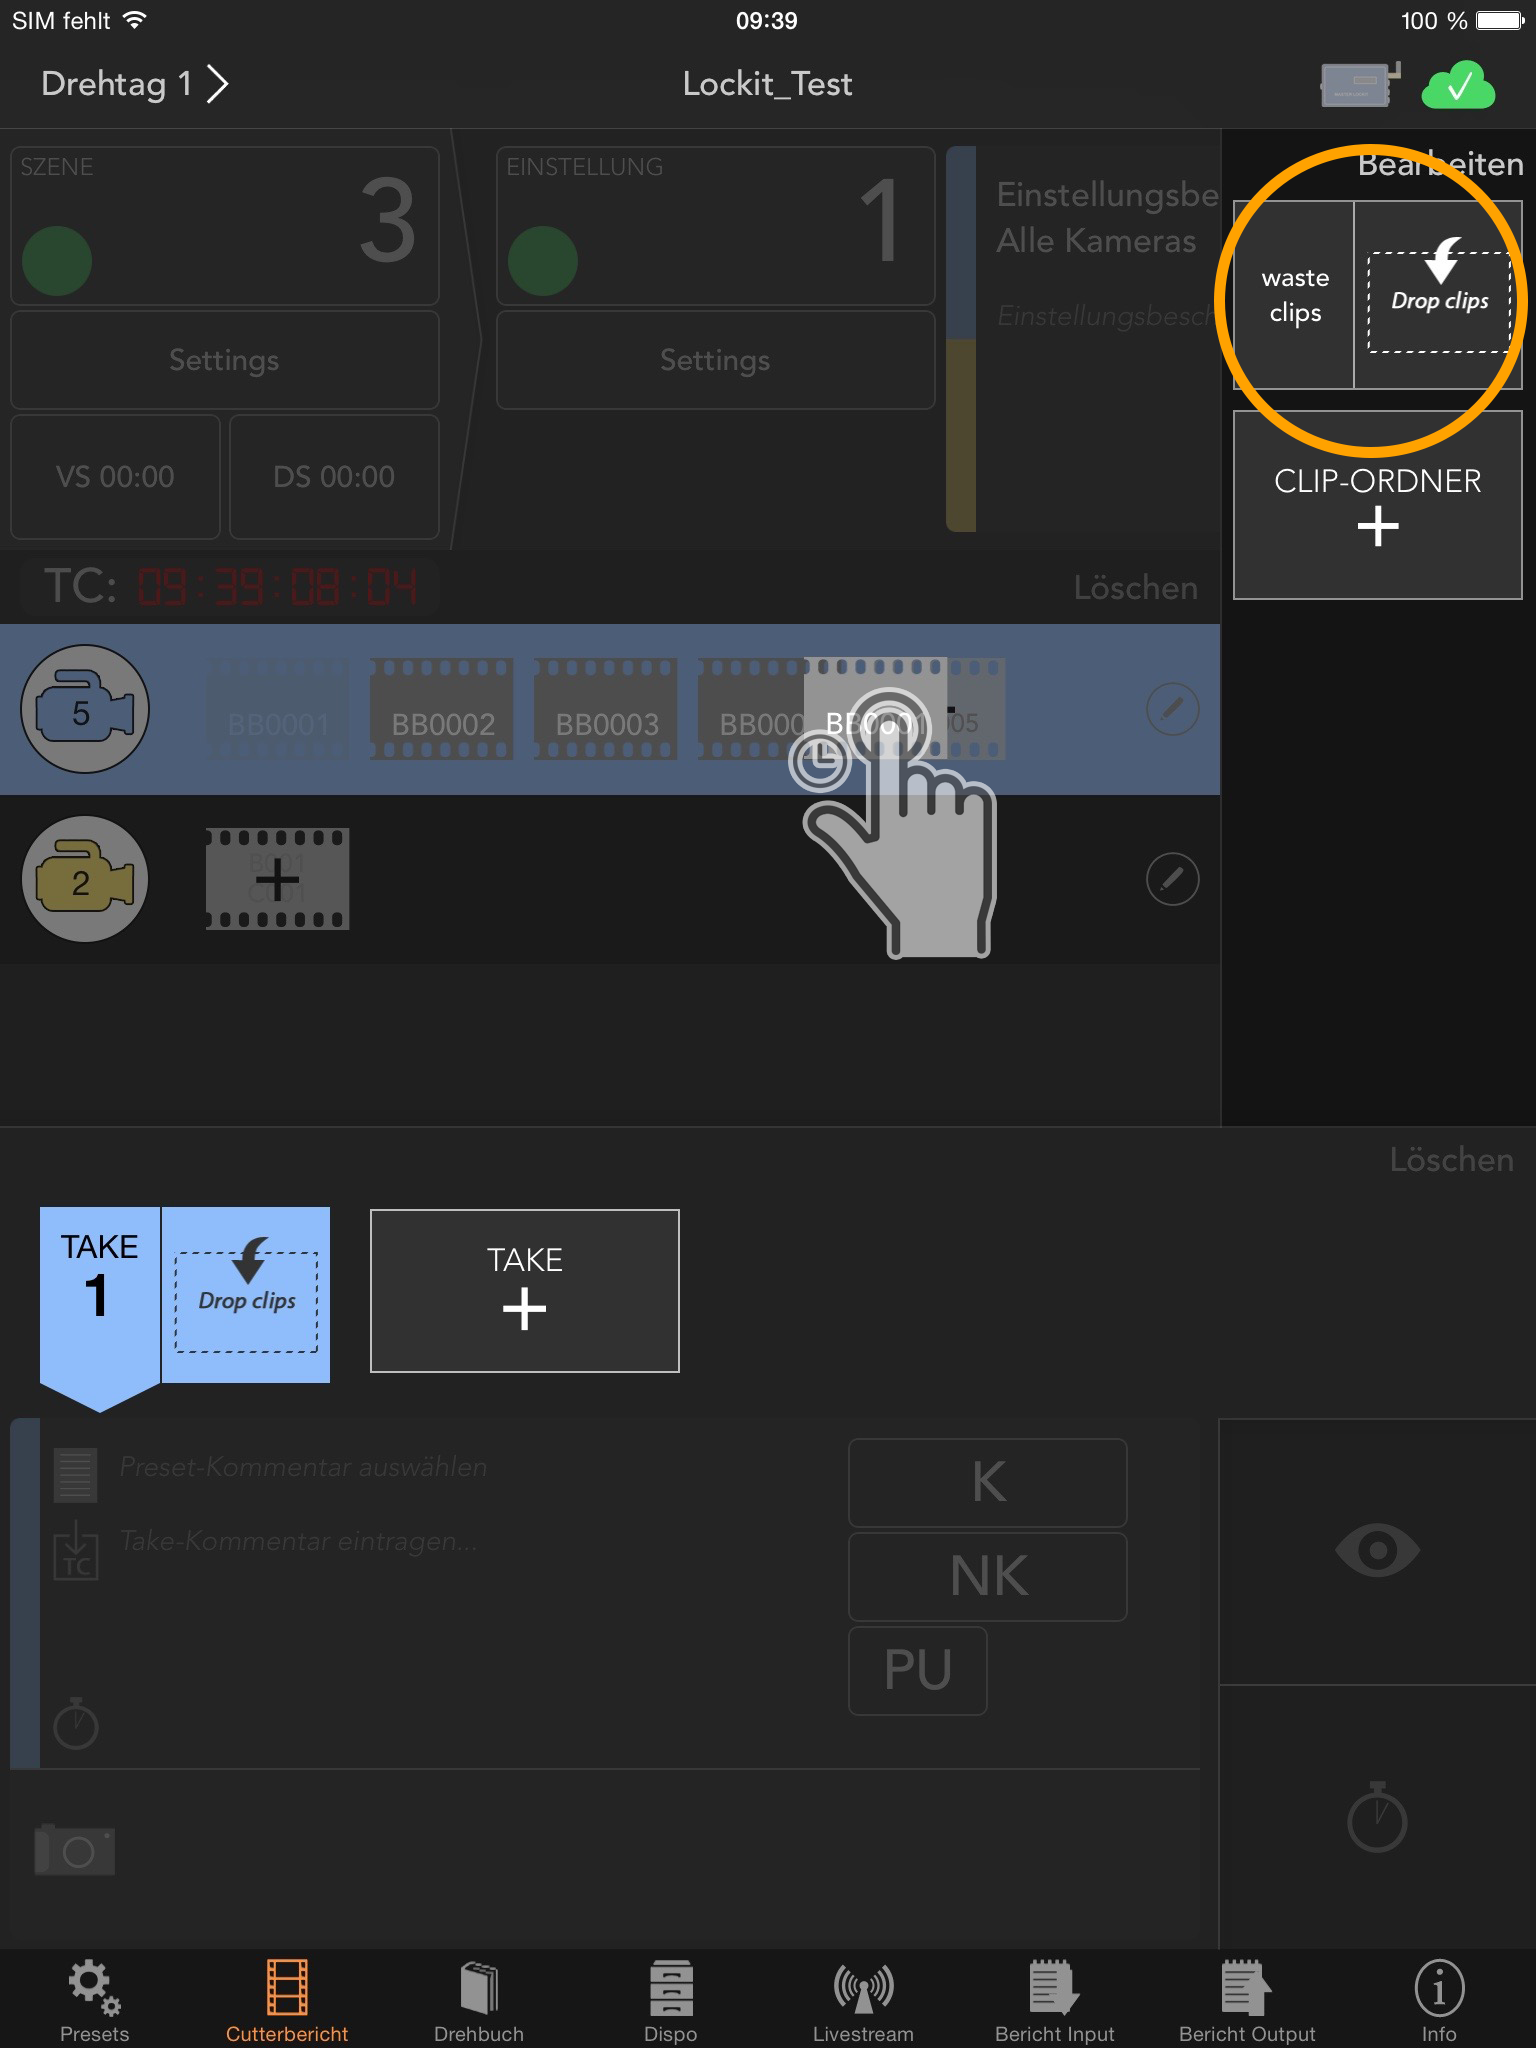
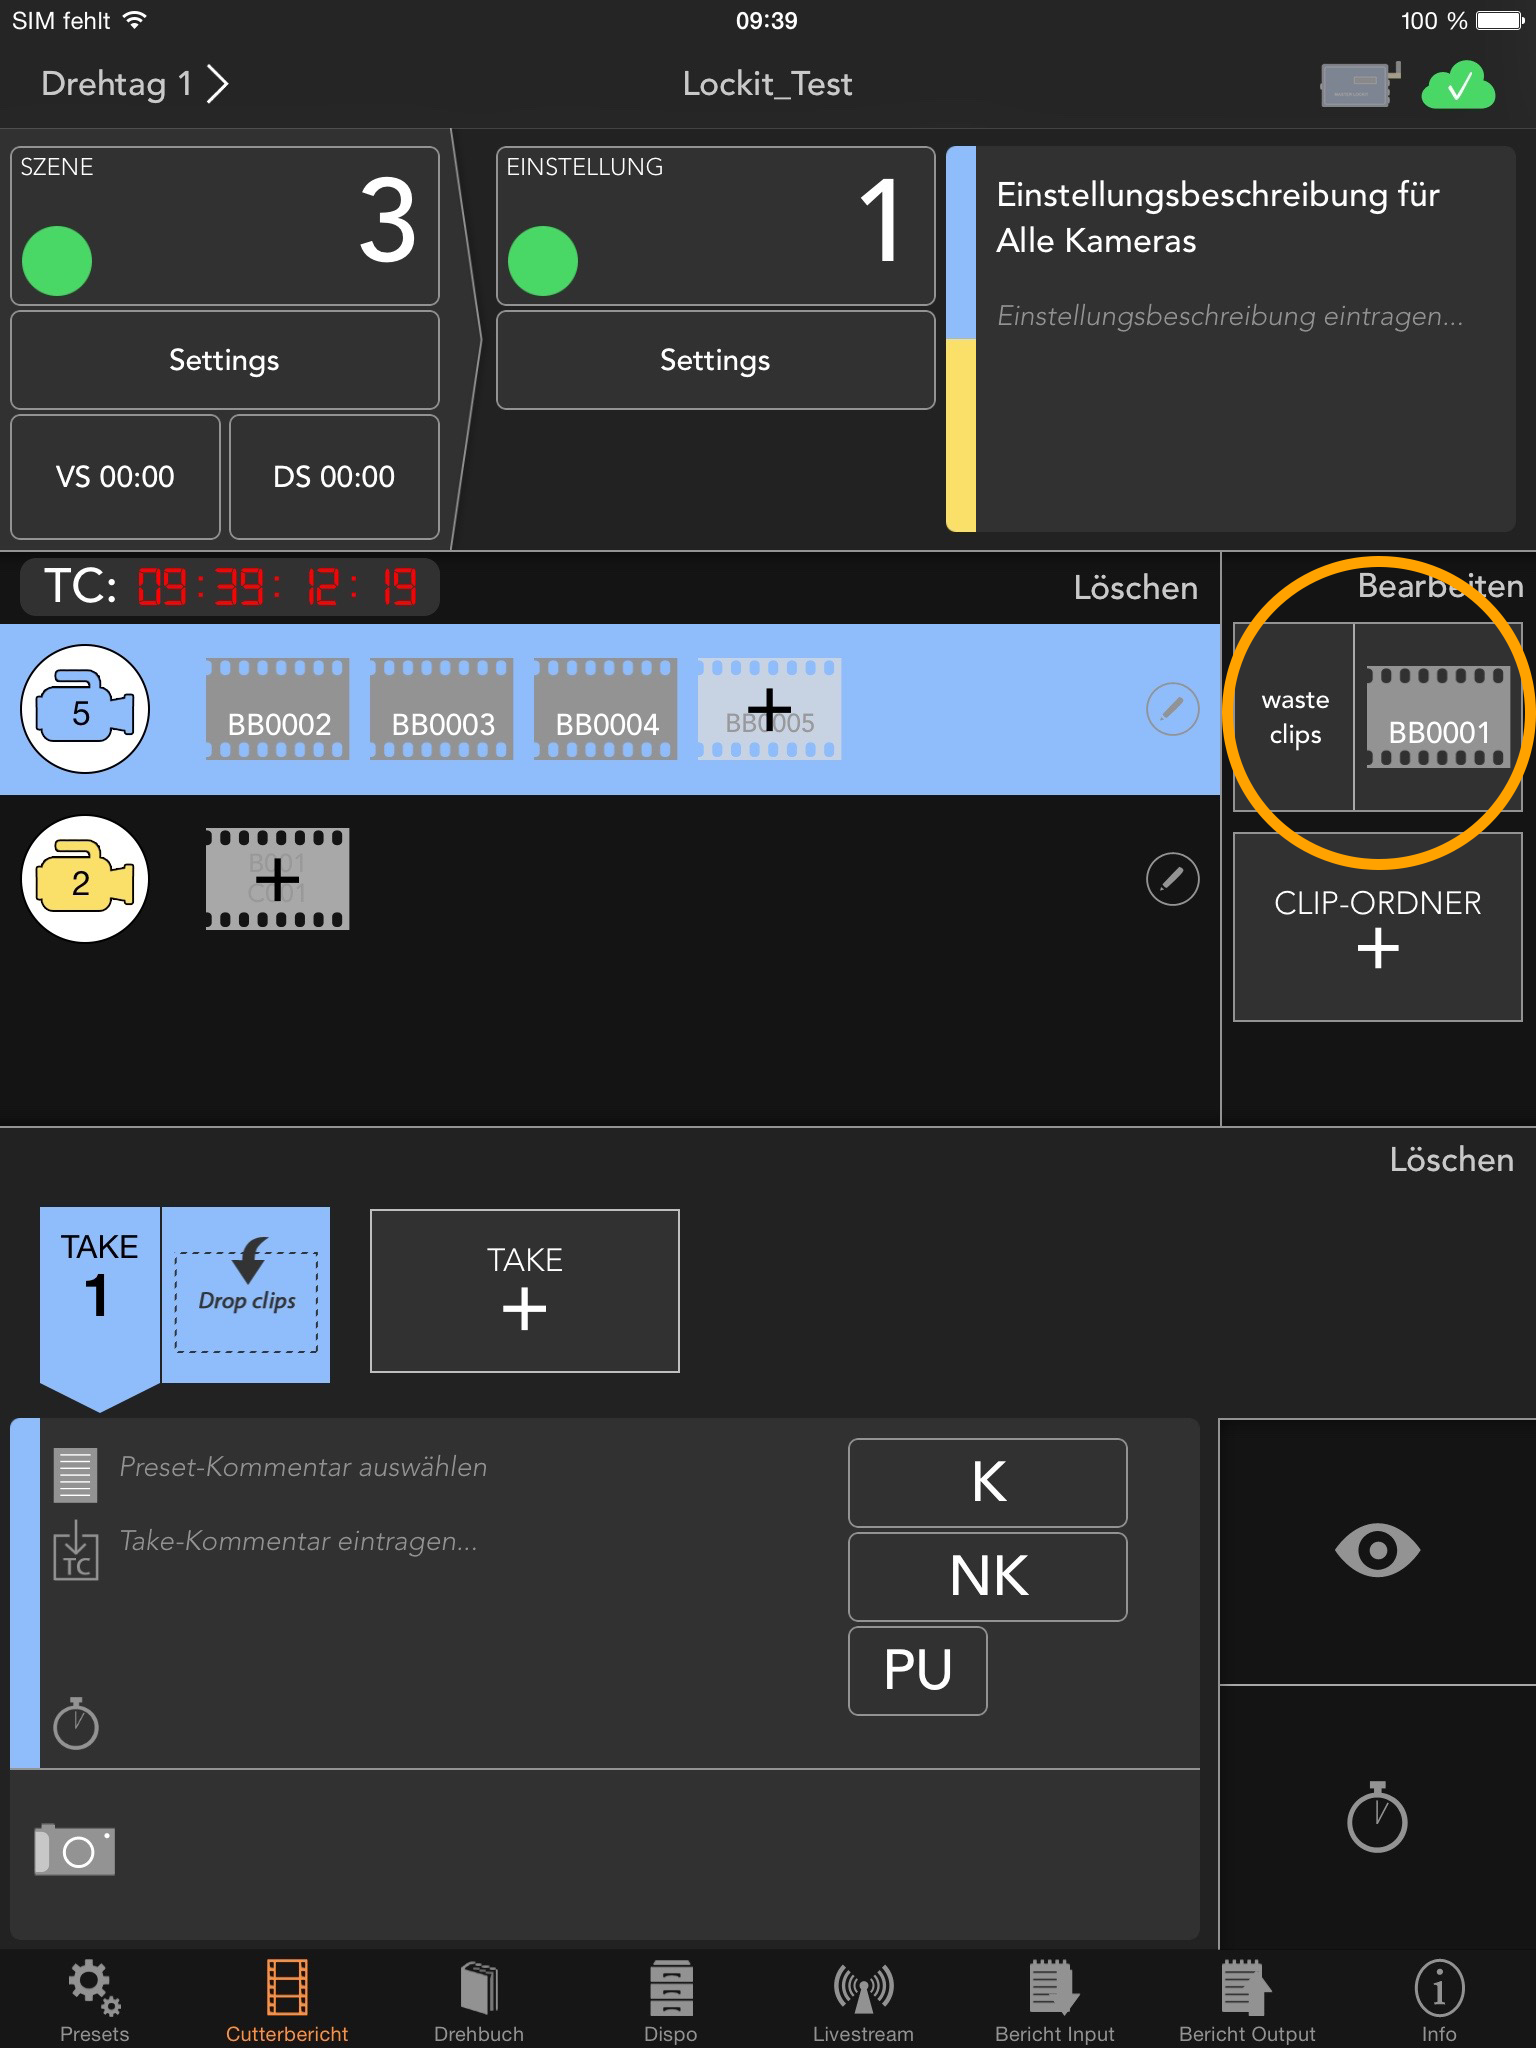
You can also create your own renamable clip folders. To do so, simply pull a clip via “Drag & Drop” onto the “+”-symbol and then name your new folder.


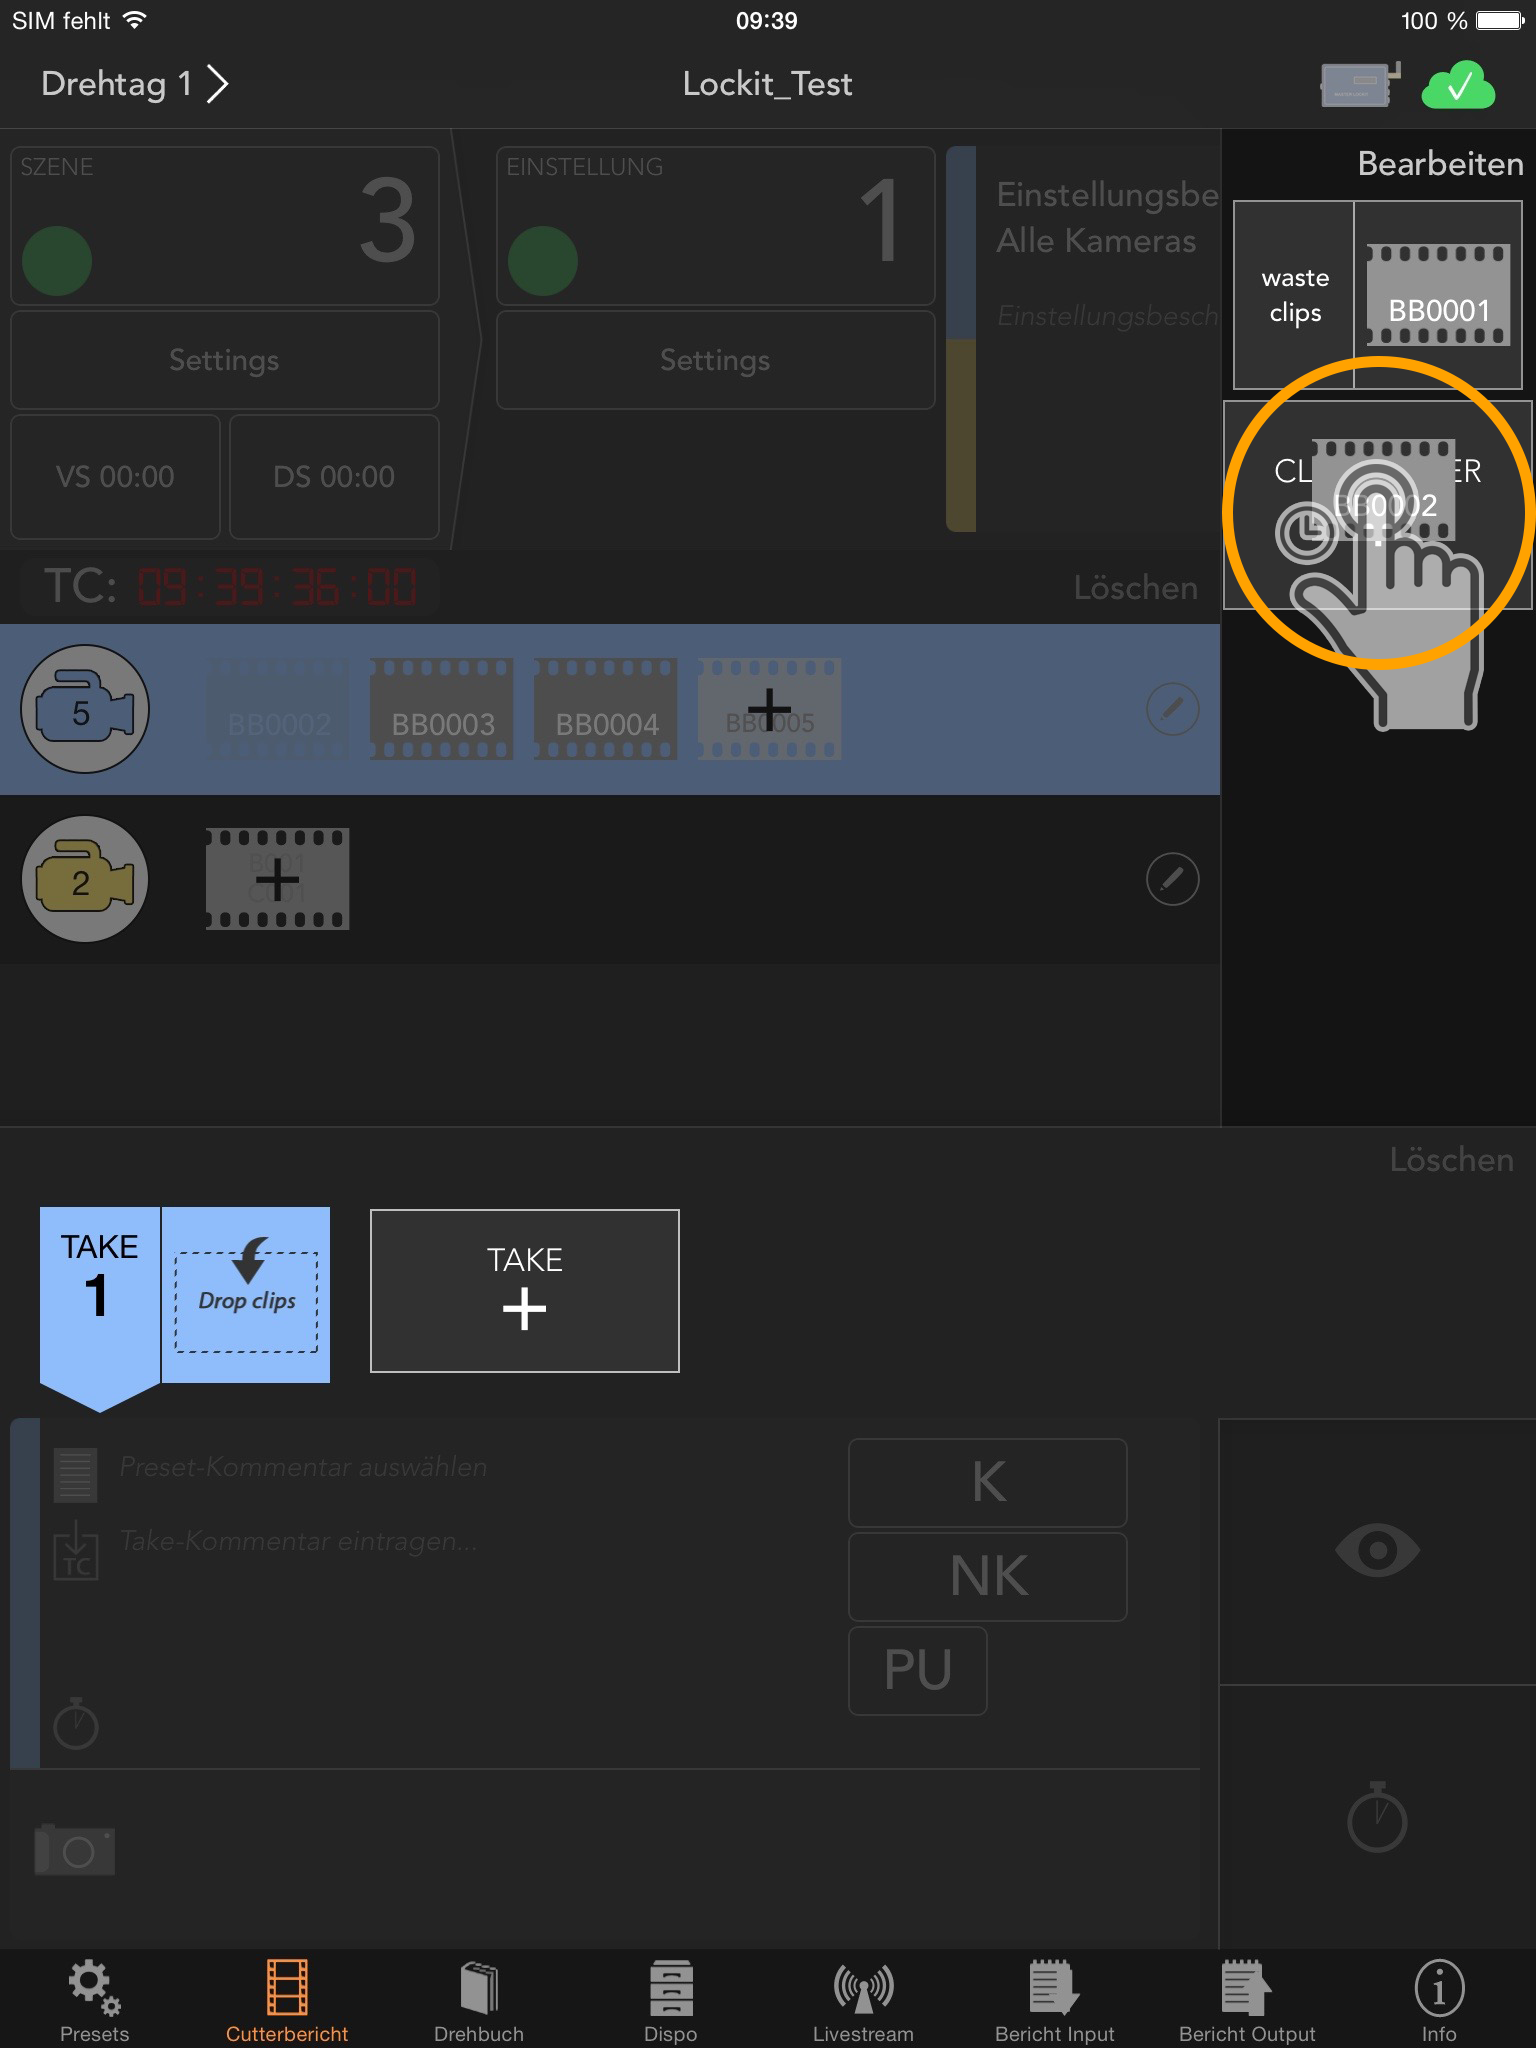
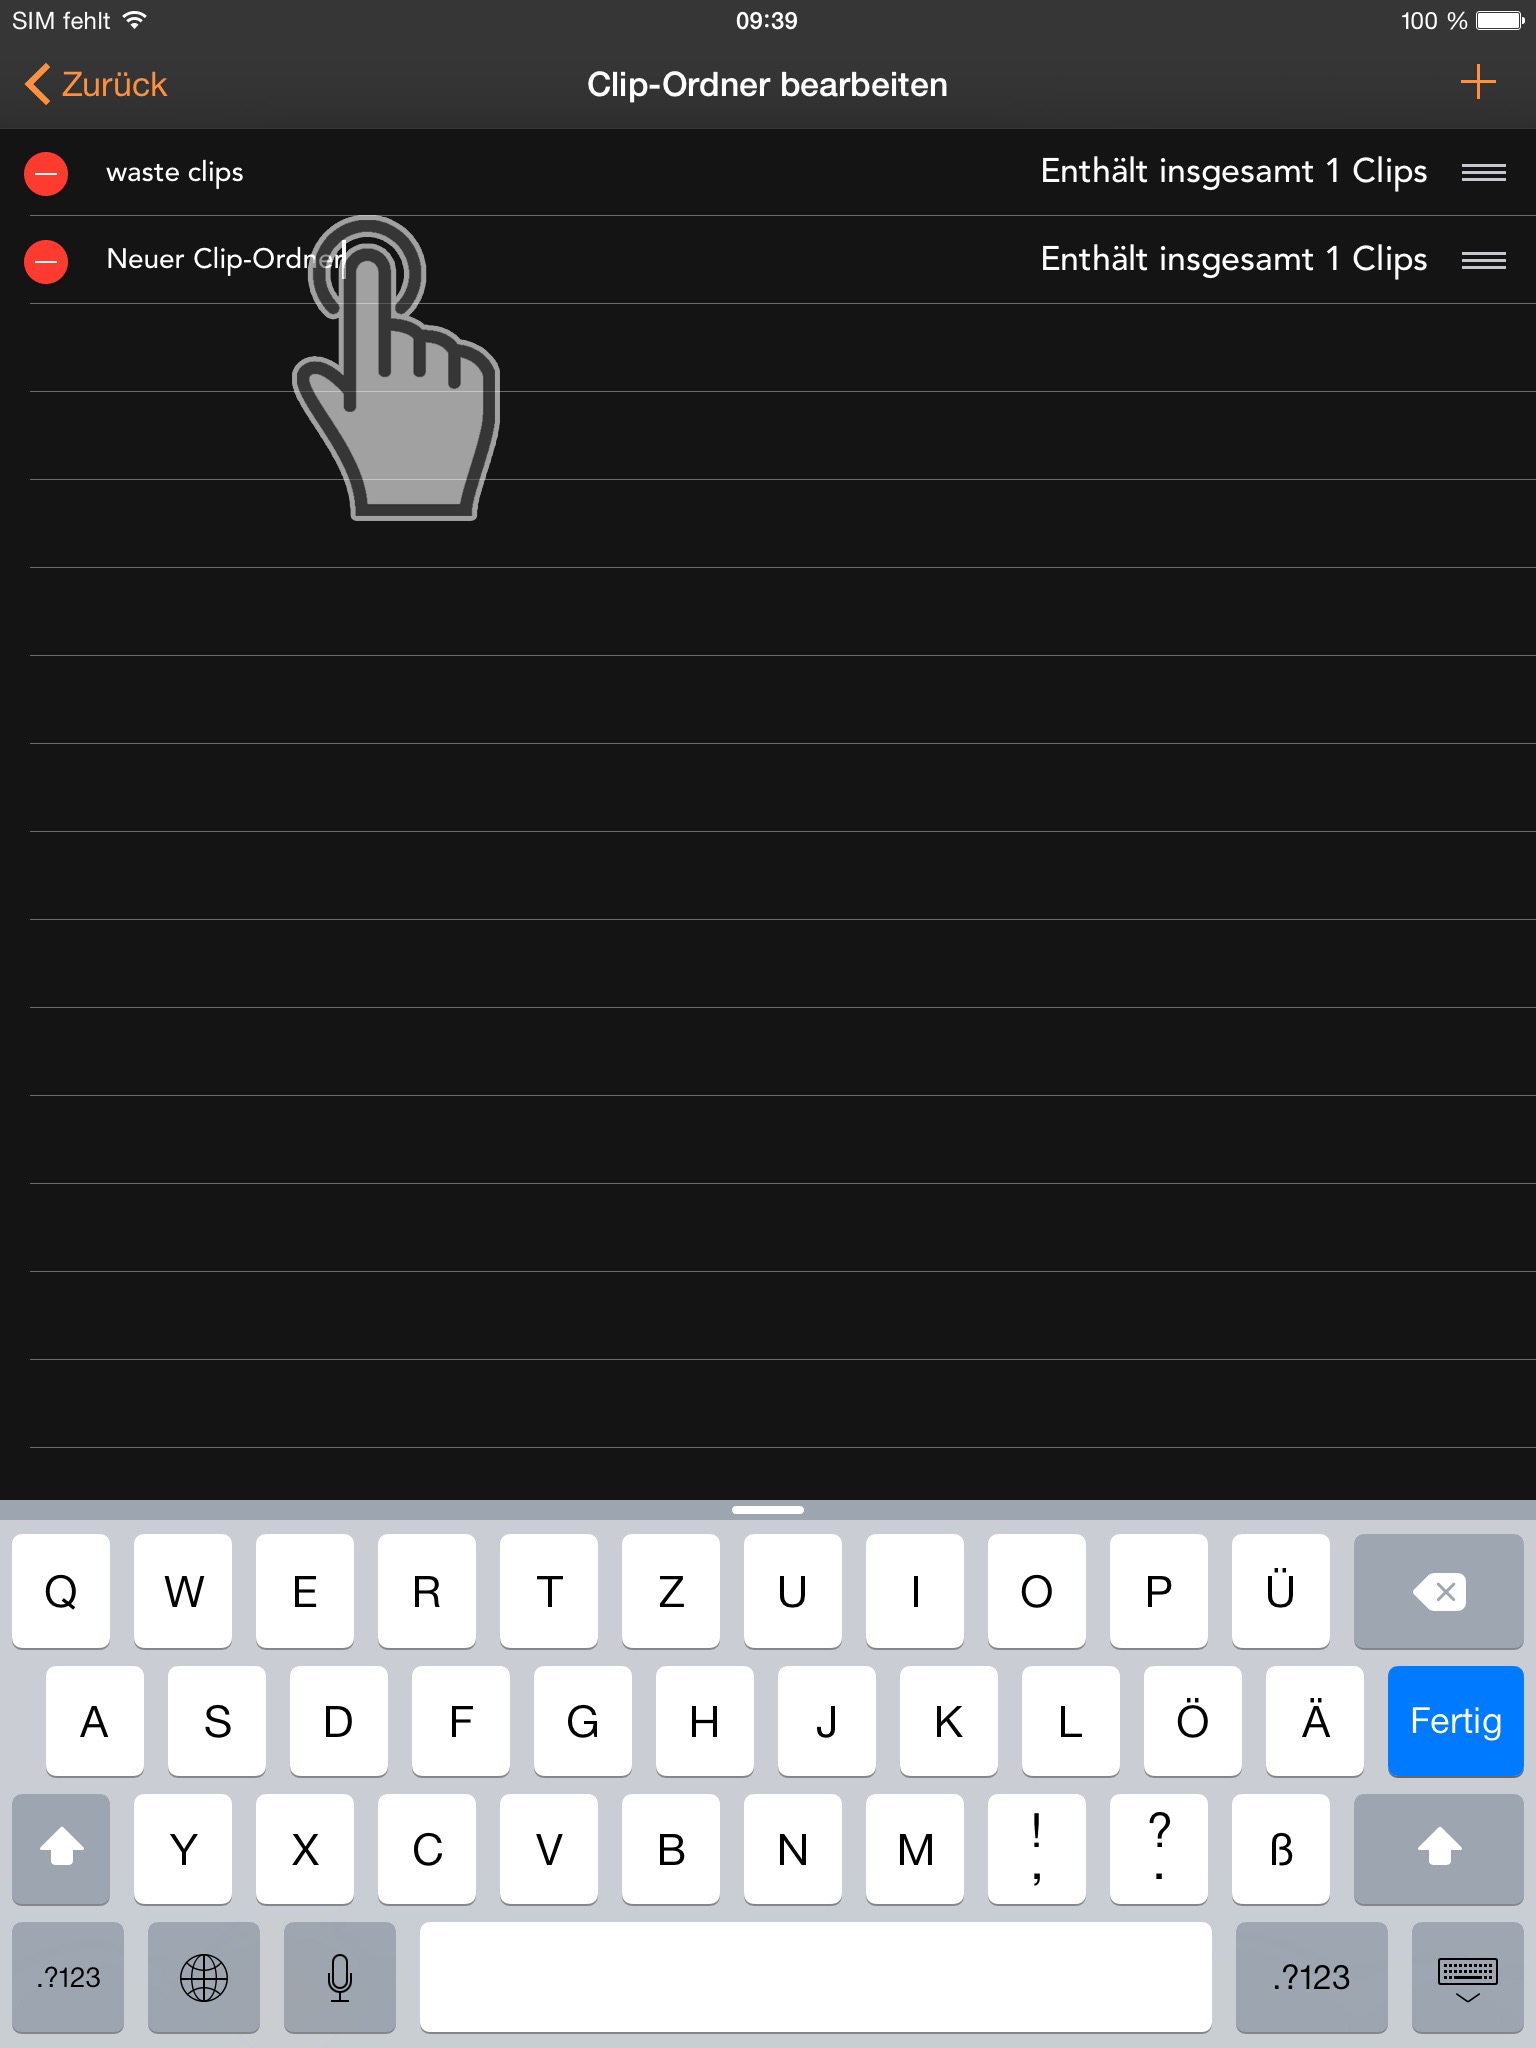
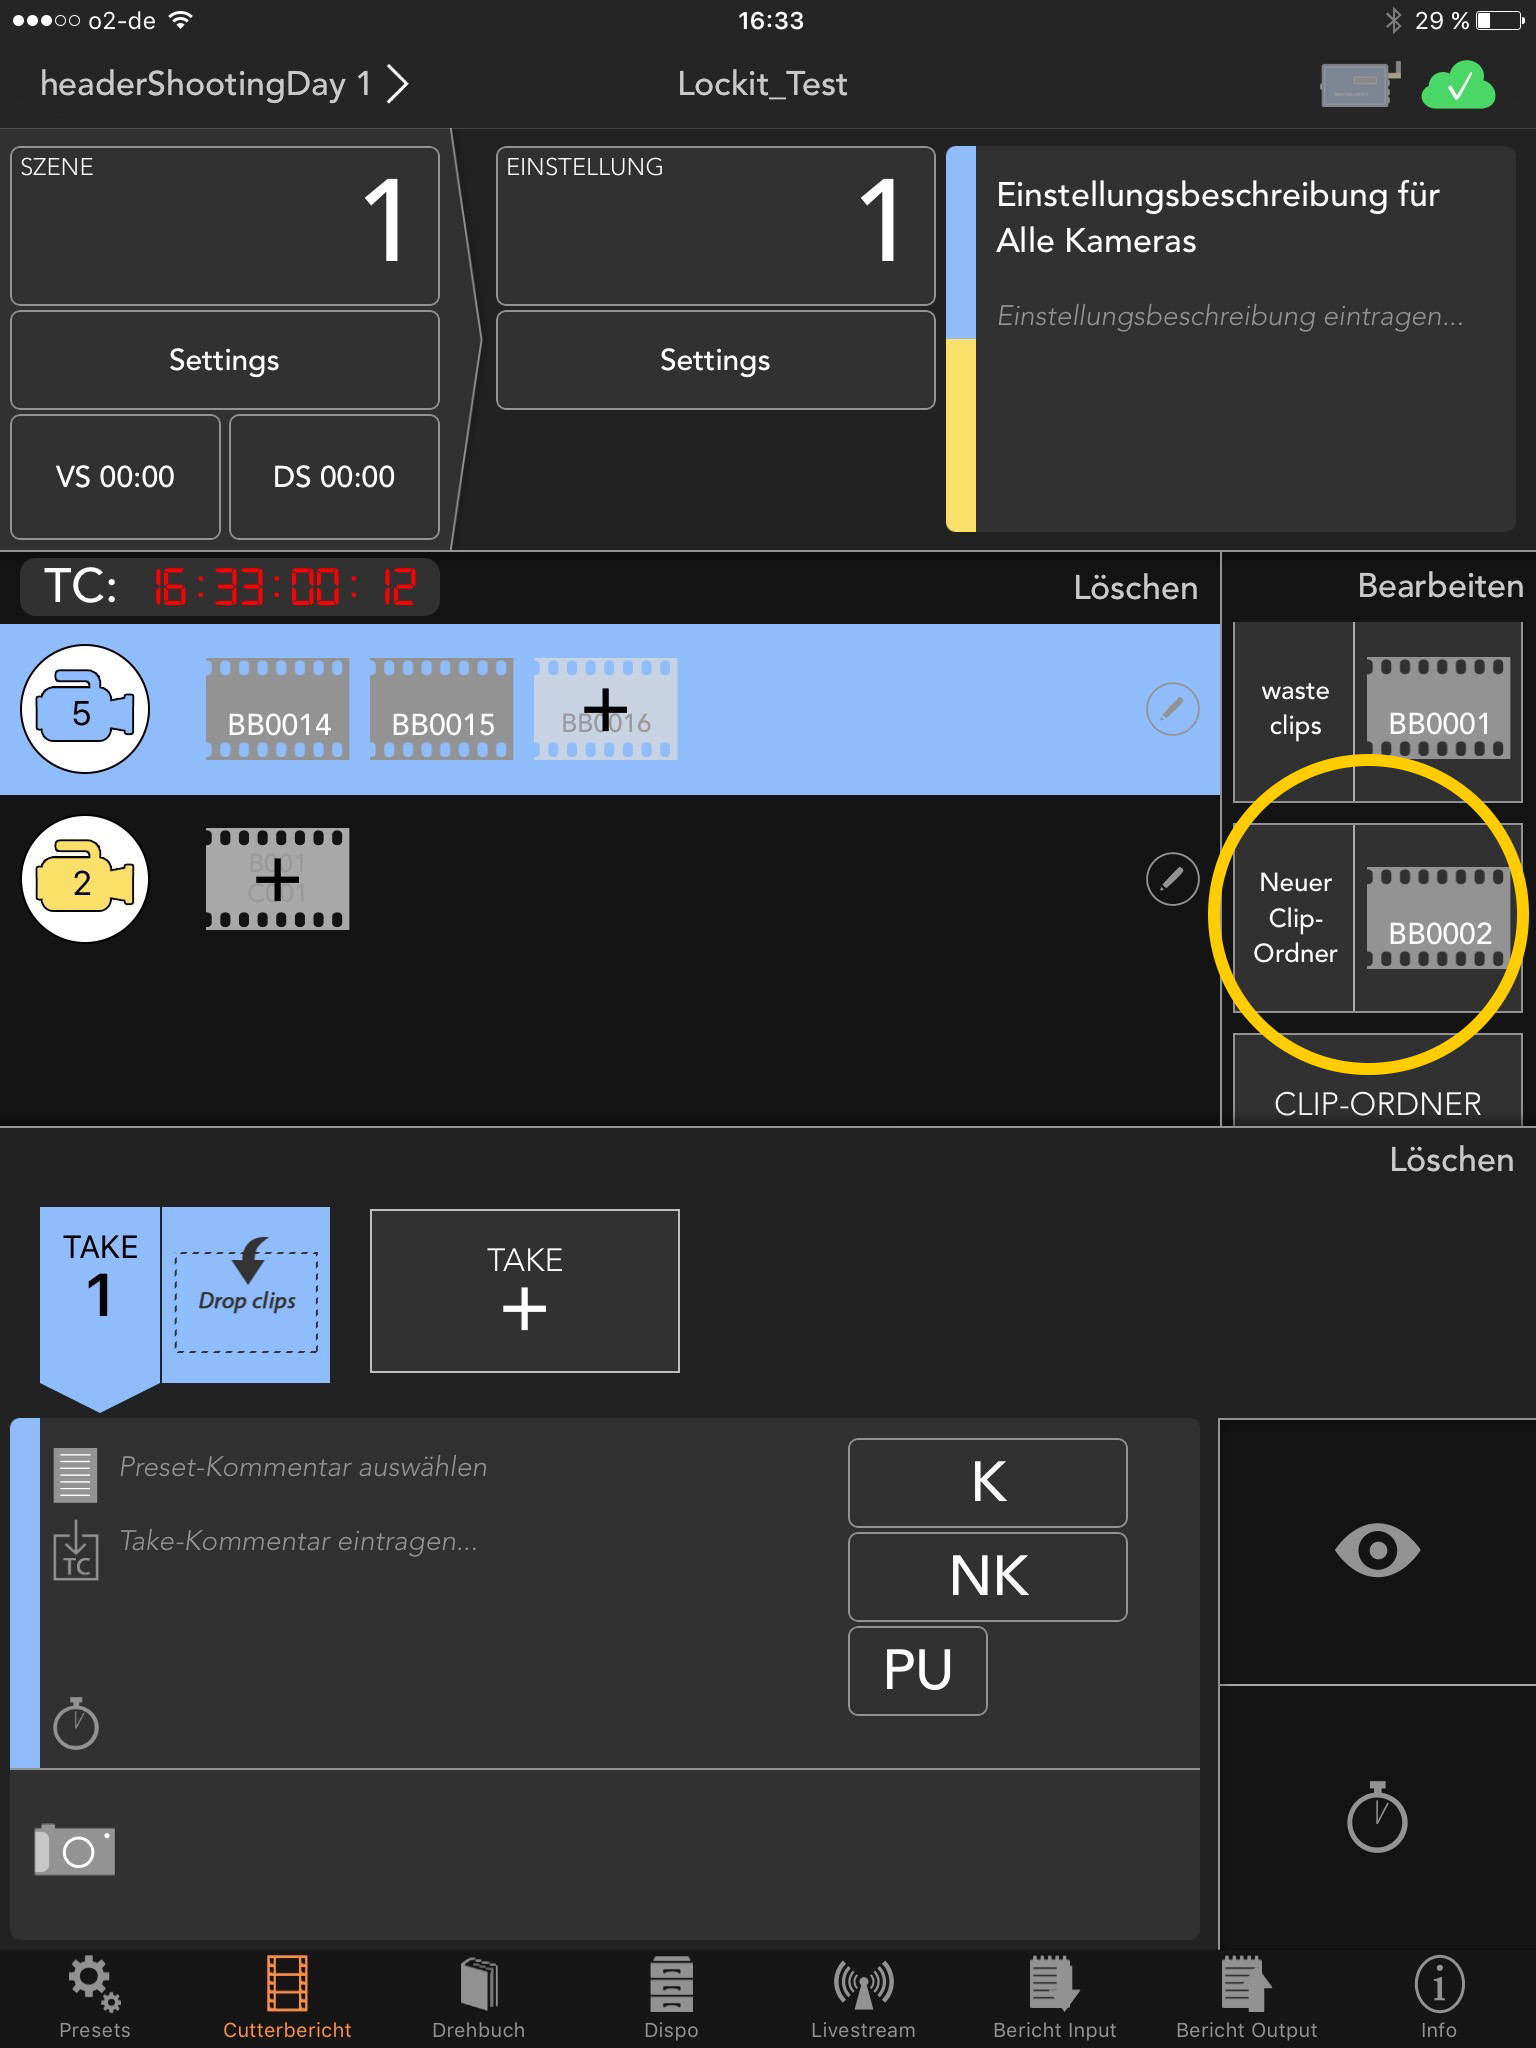
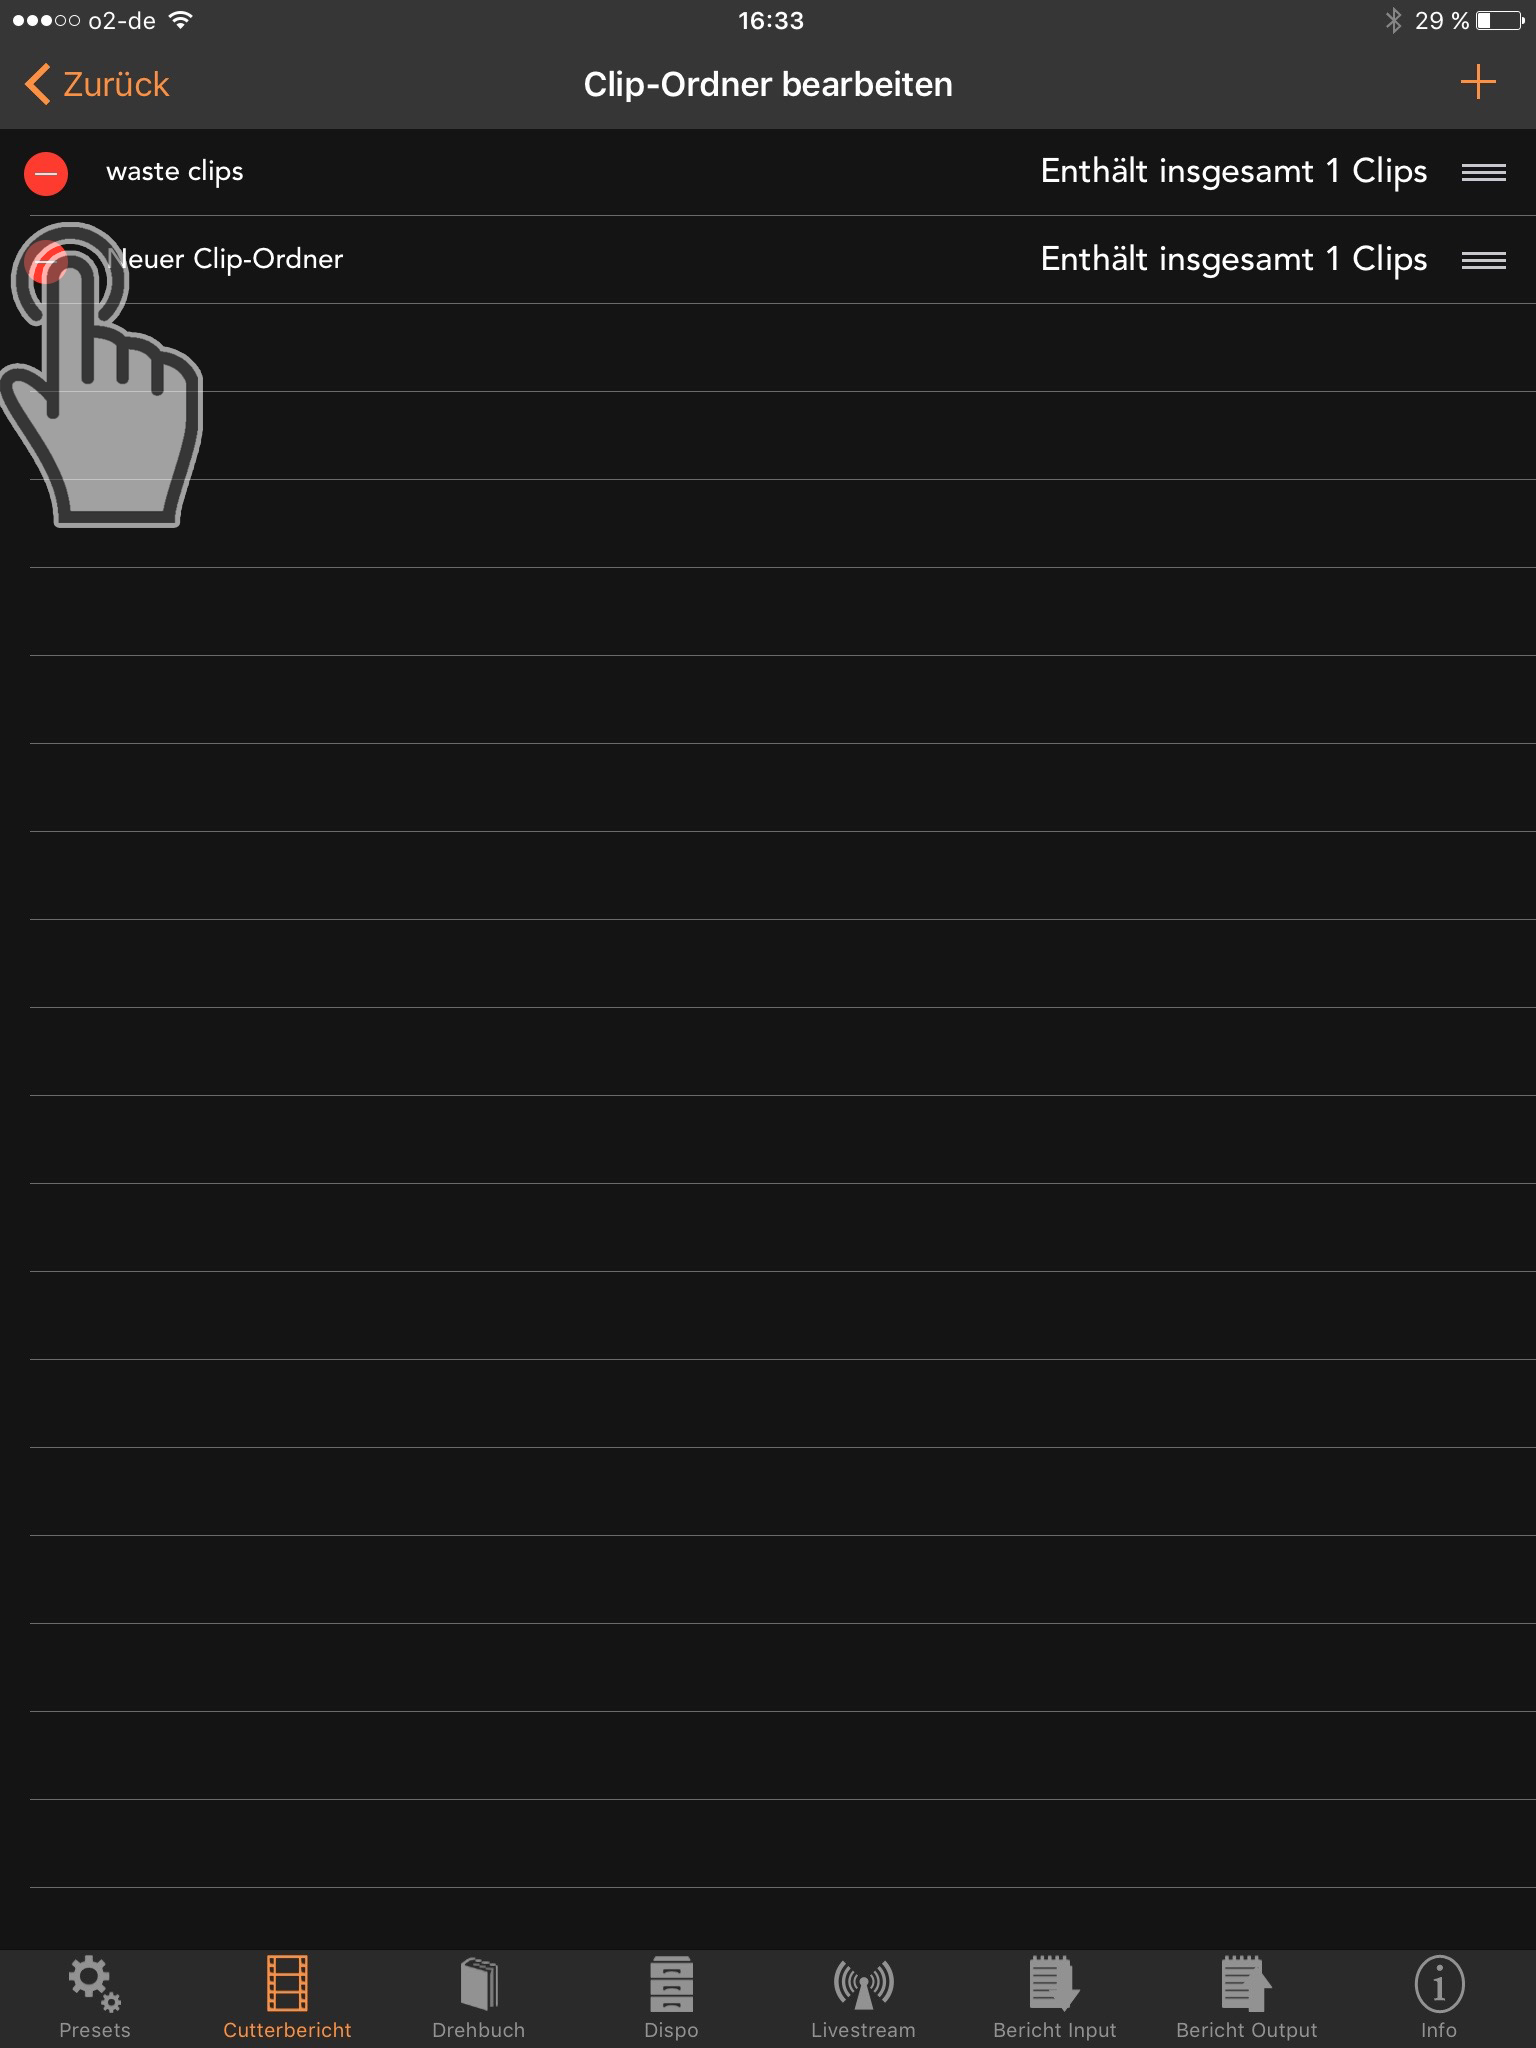
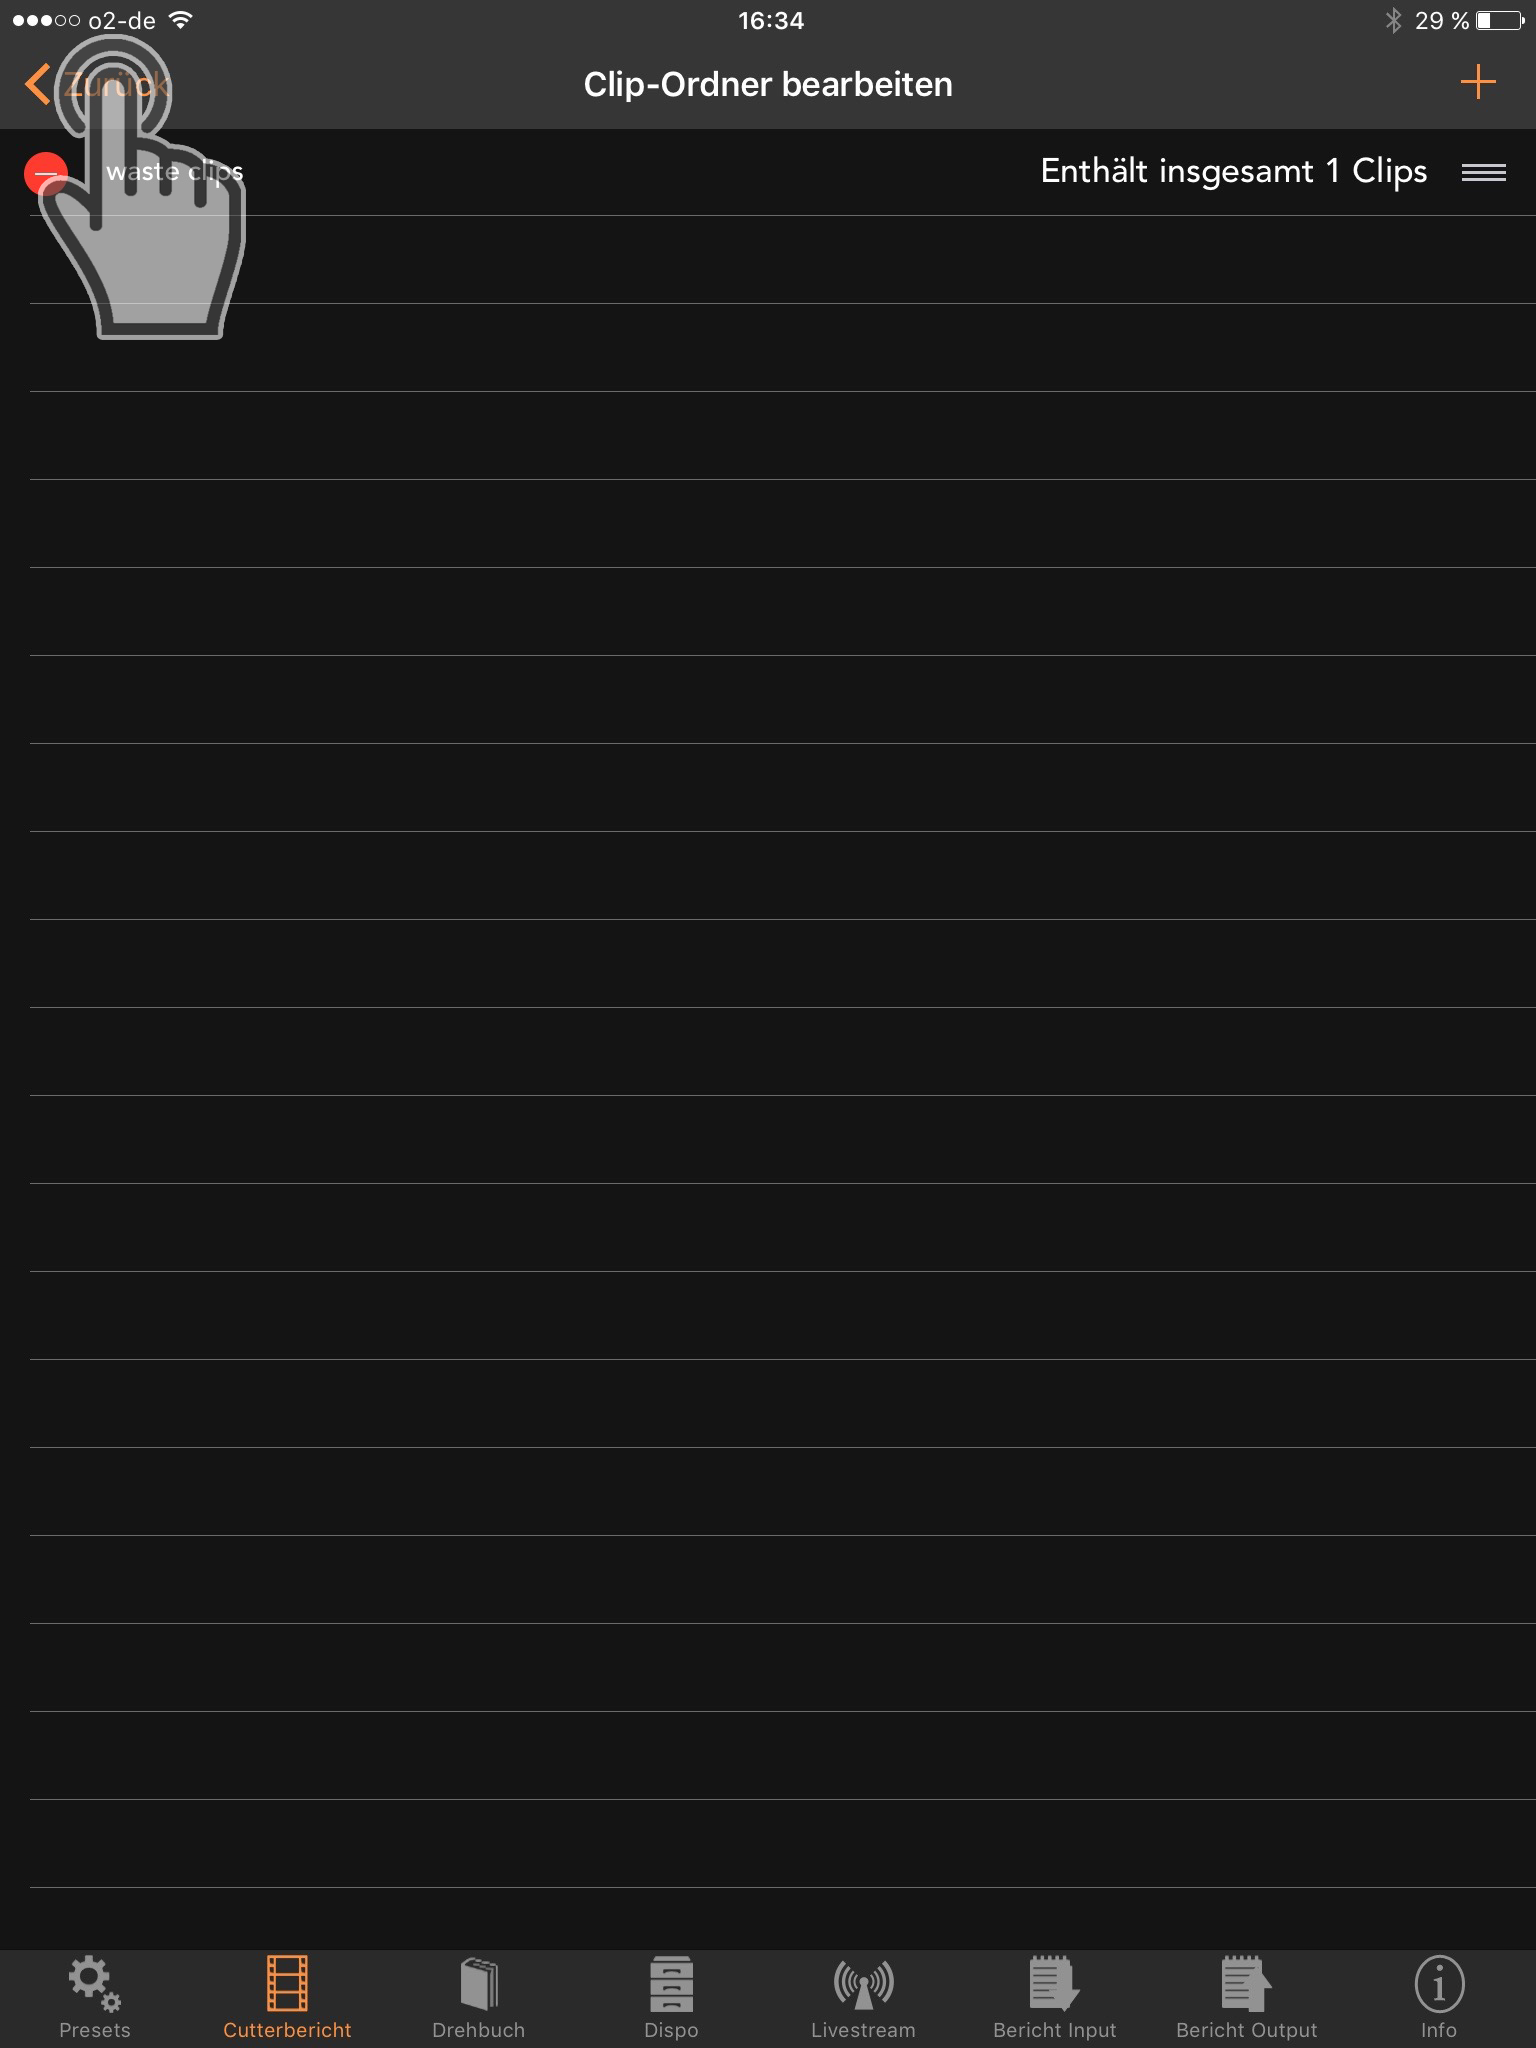
You can delete clip folders by clicking “Edit” and “-”. The clips inside the deleted folders will not be deleted but send back into the clip window.

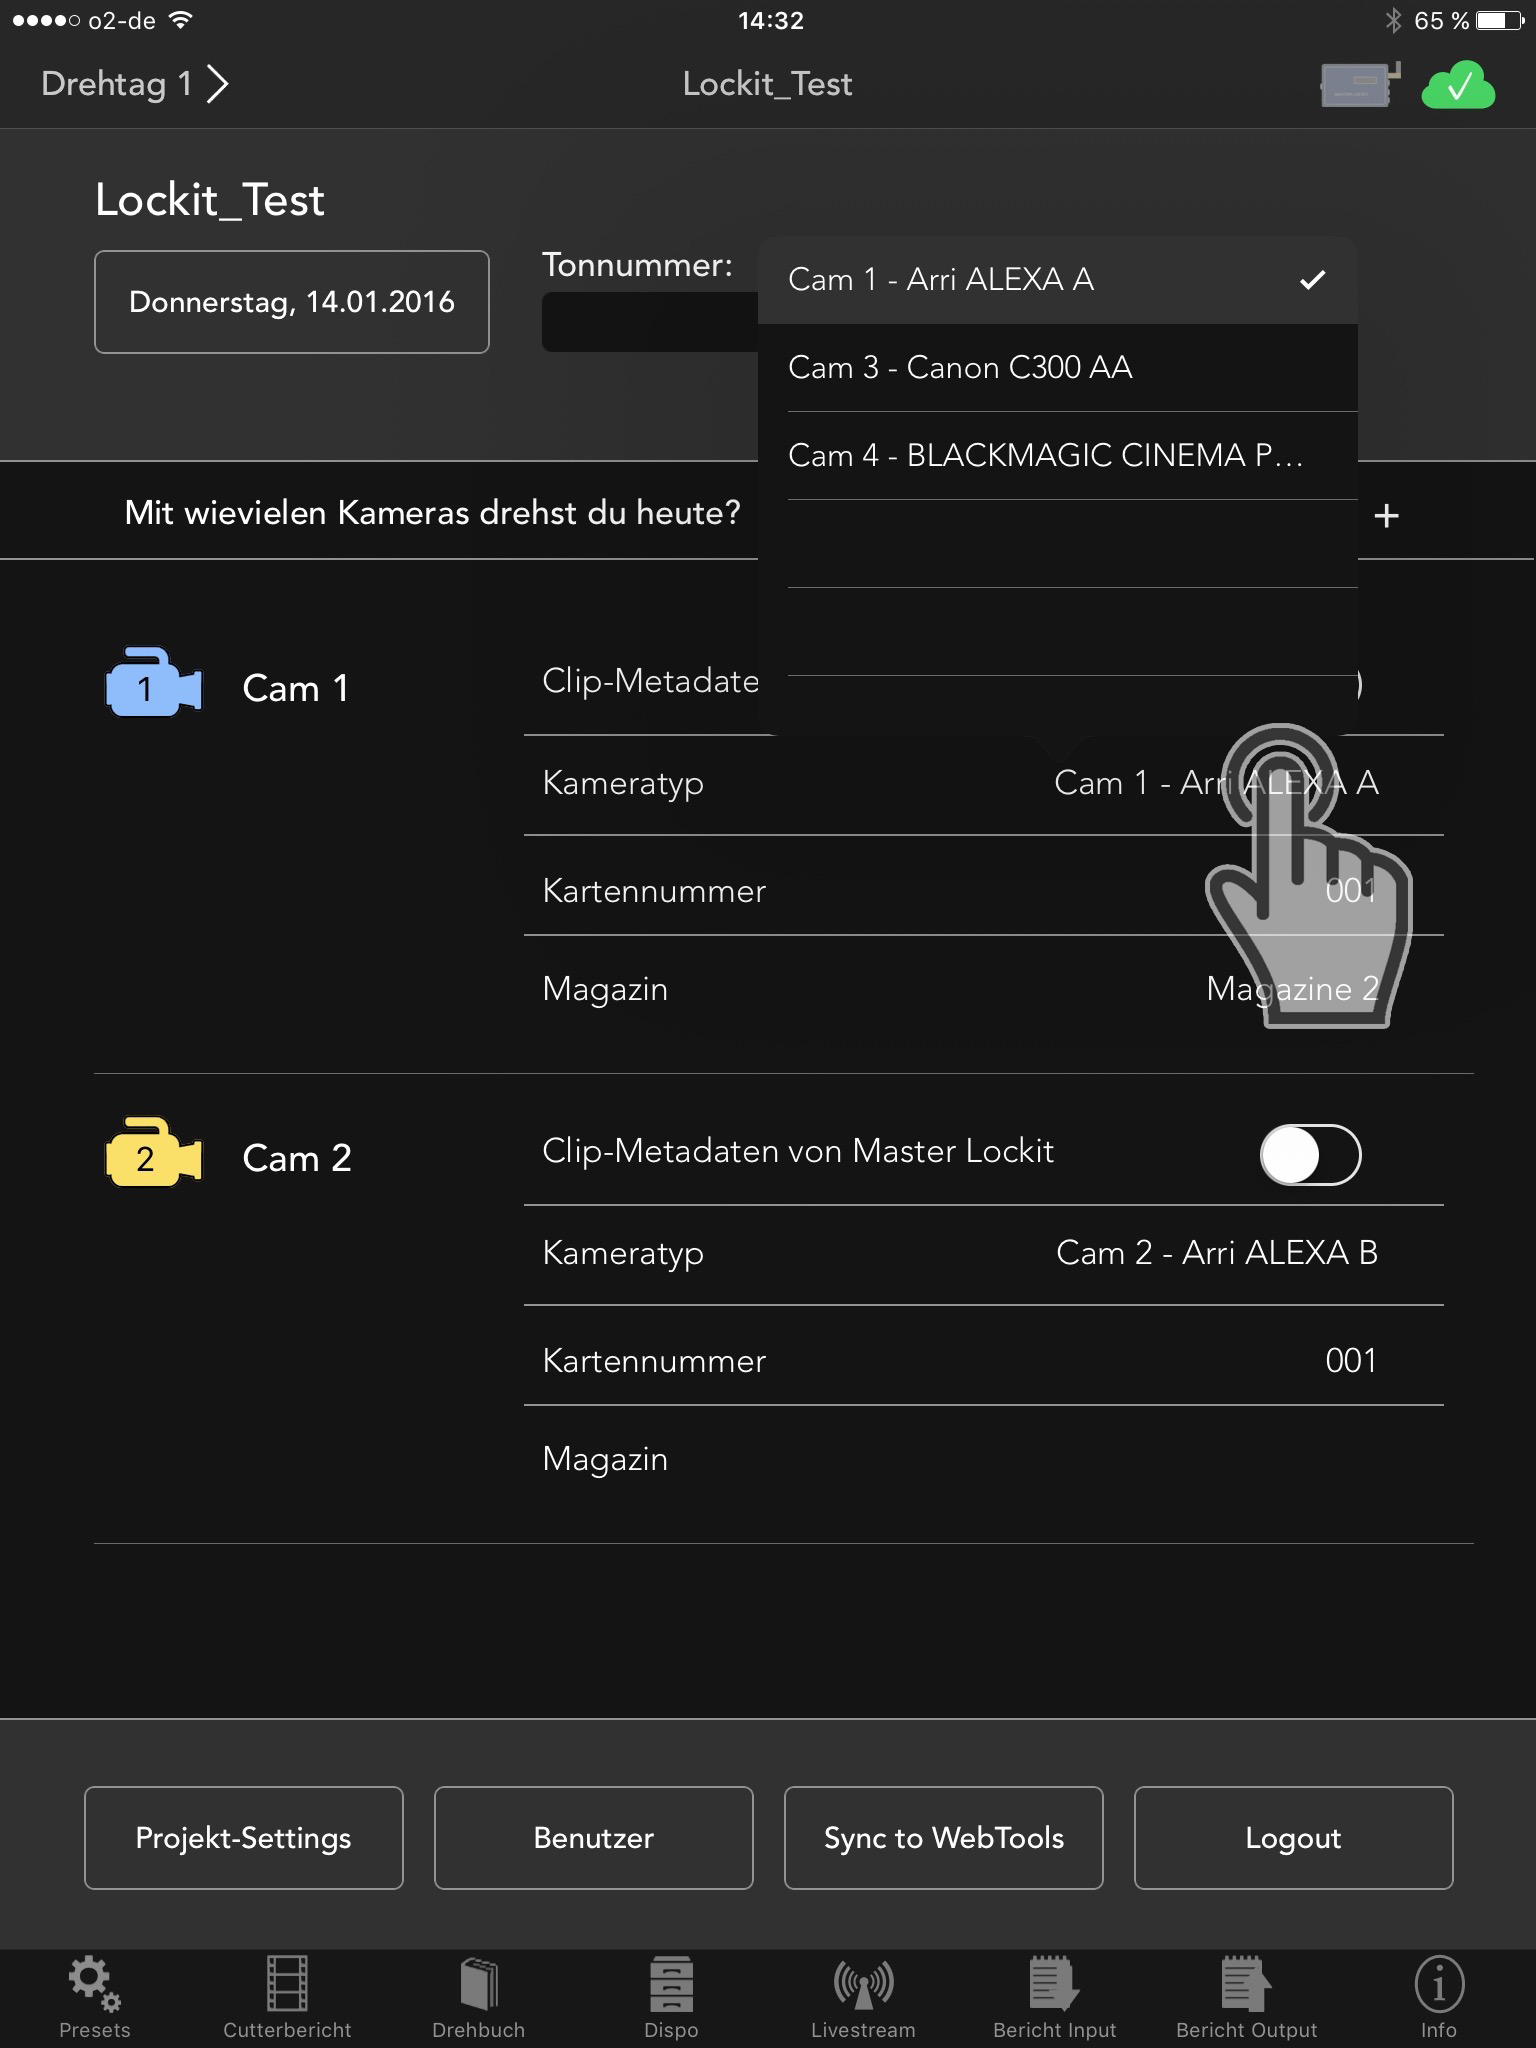
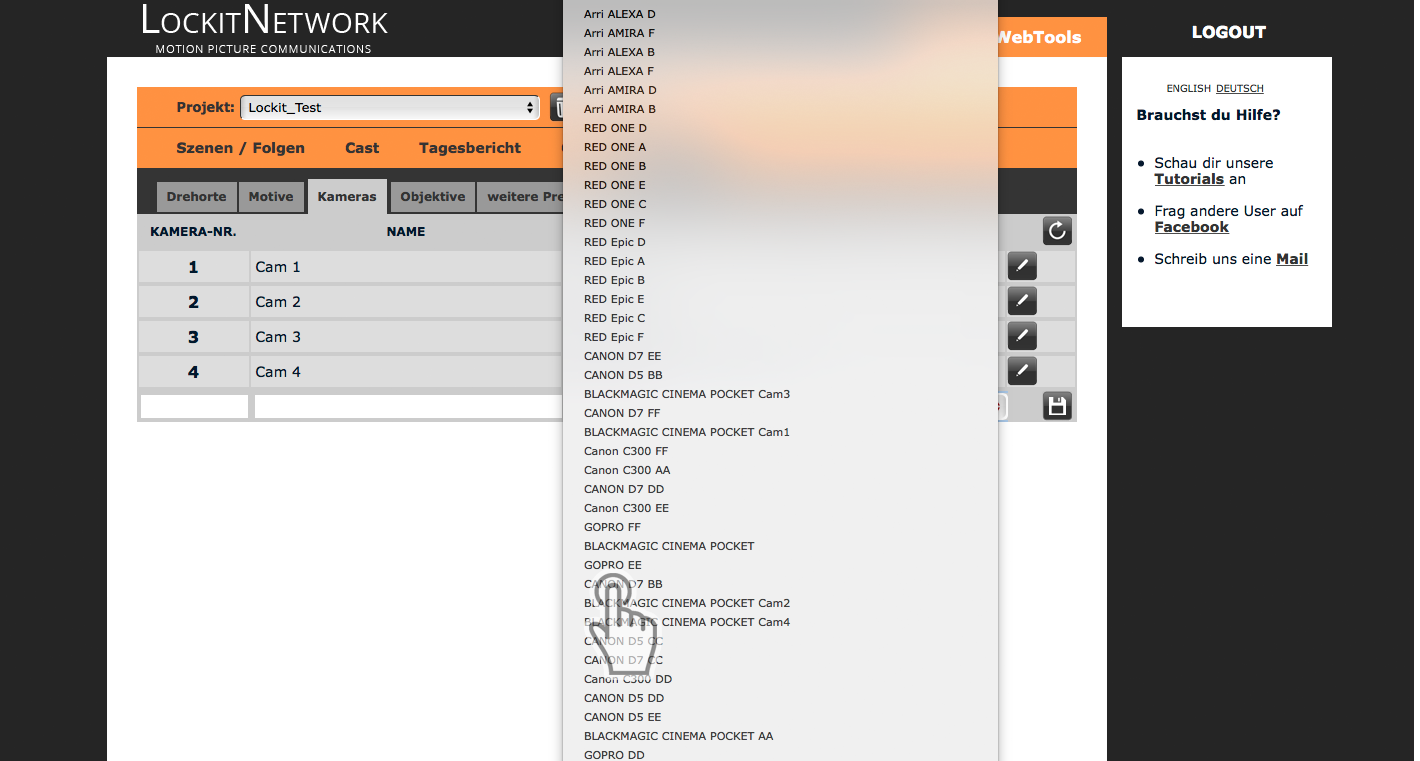
Create new cameras and types of cameras in the LockitWebTools. Go to the tab “Presets / Cameras” and press “+”, then name the camera as you wish to (e. g. “Camera 5”) and select the corresponding type of camera in the drop-down menu.
We are trying to keep the list up to date. If you ever work with a camera you can not find in the list drop us a message stating your clip naming scheme (e. g. “A001_C001”).

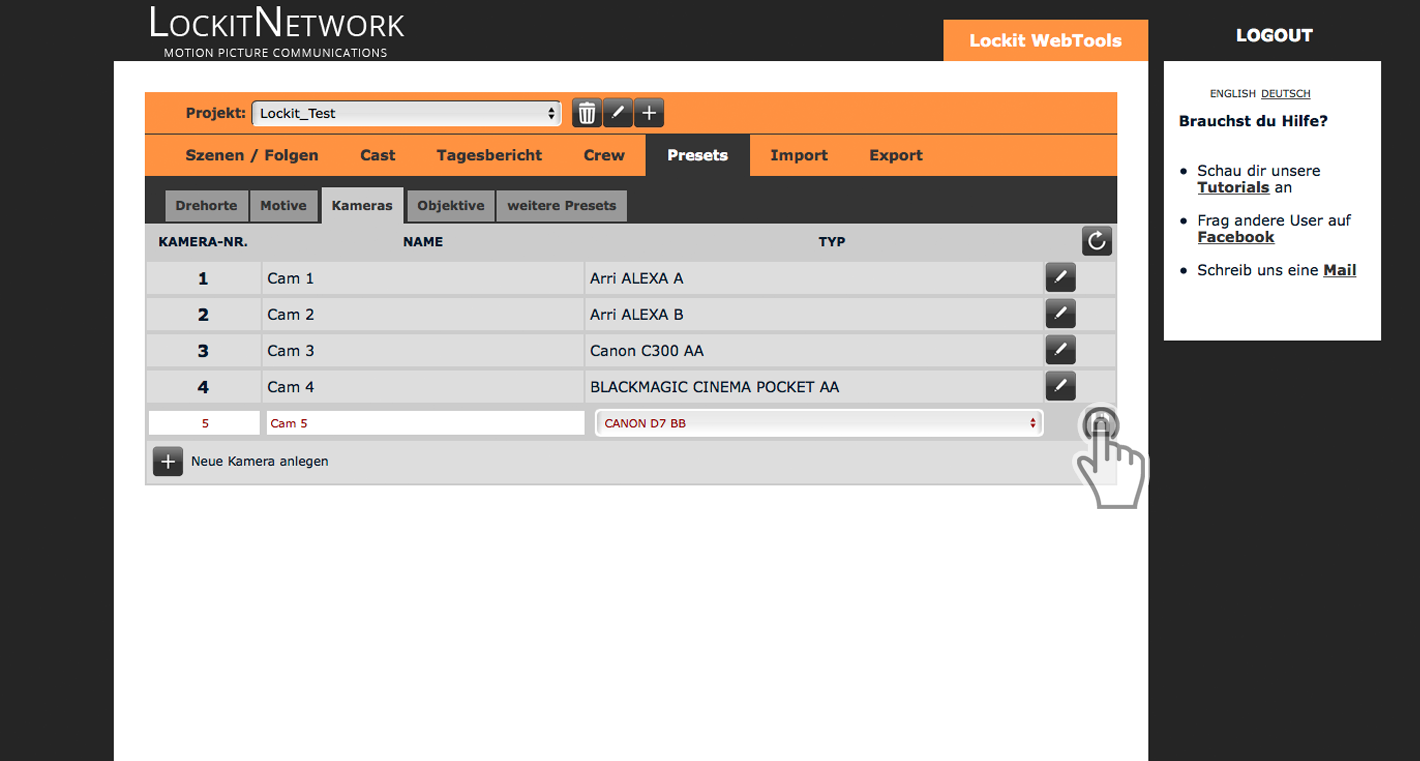
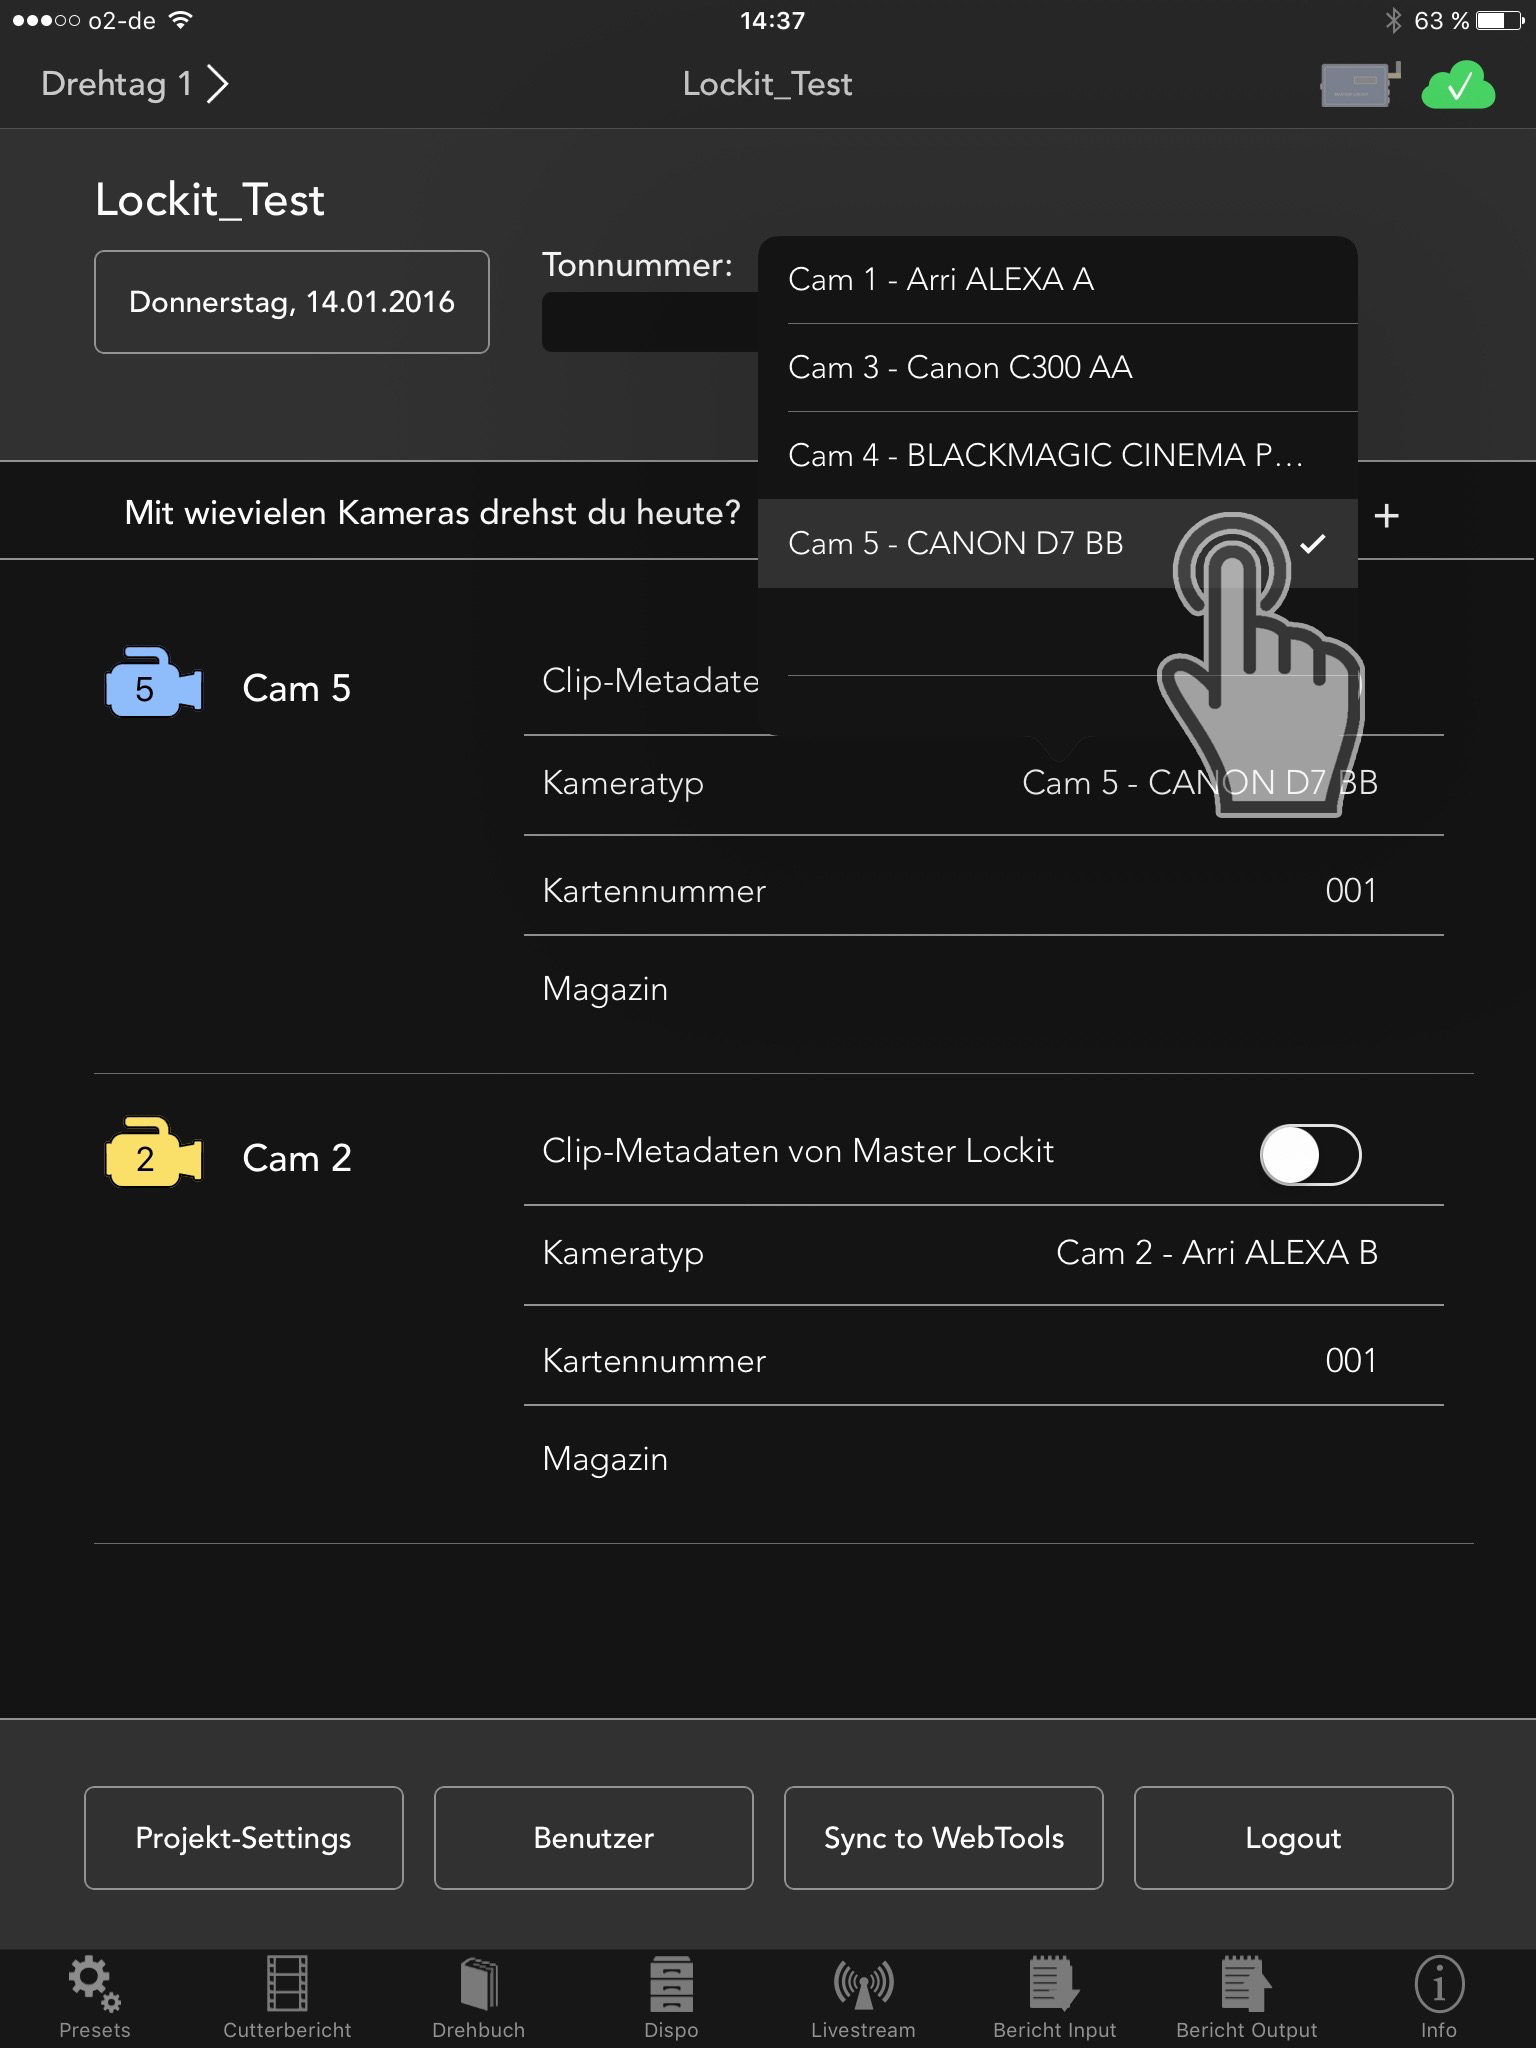
Back in the LockitScript App you first press “Sync to WebTools”. Now you can select the new type of camera.
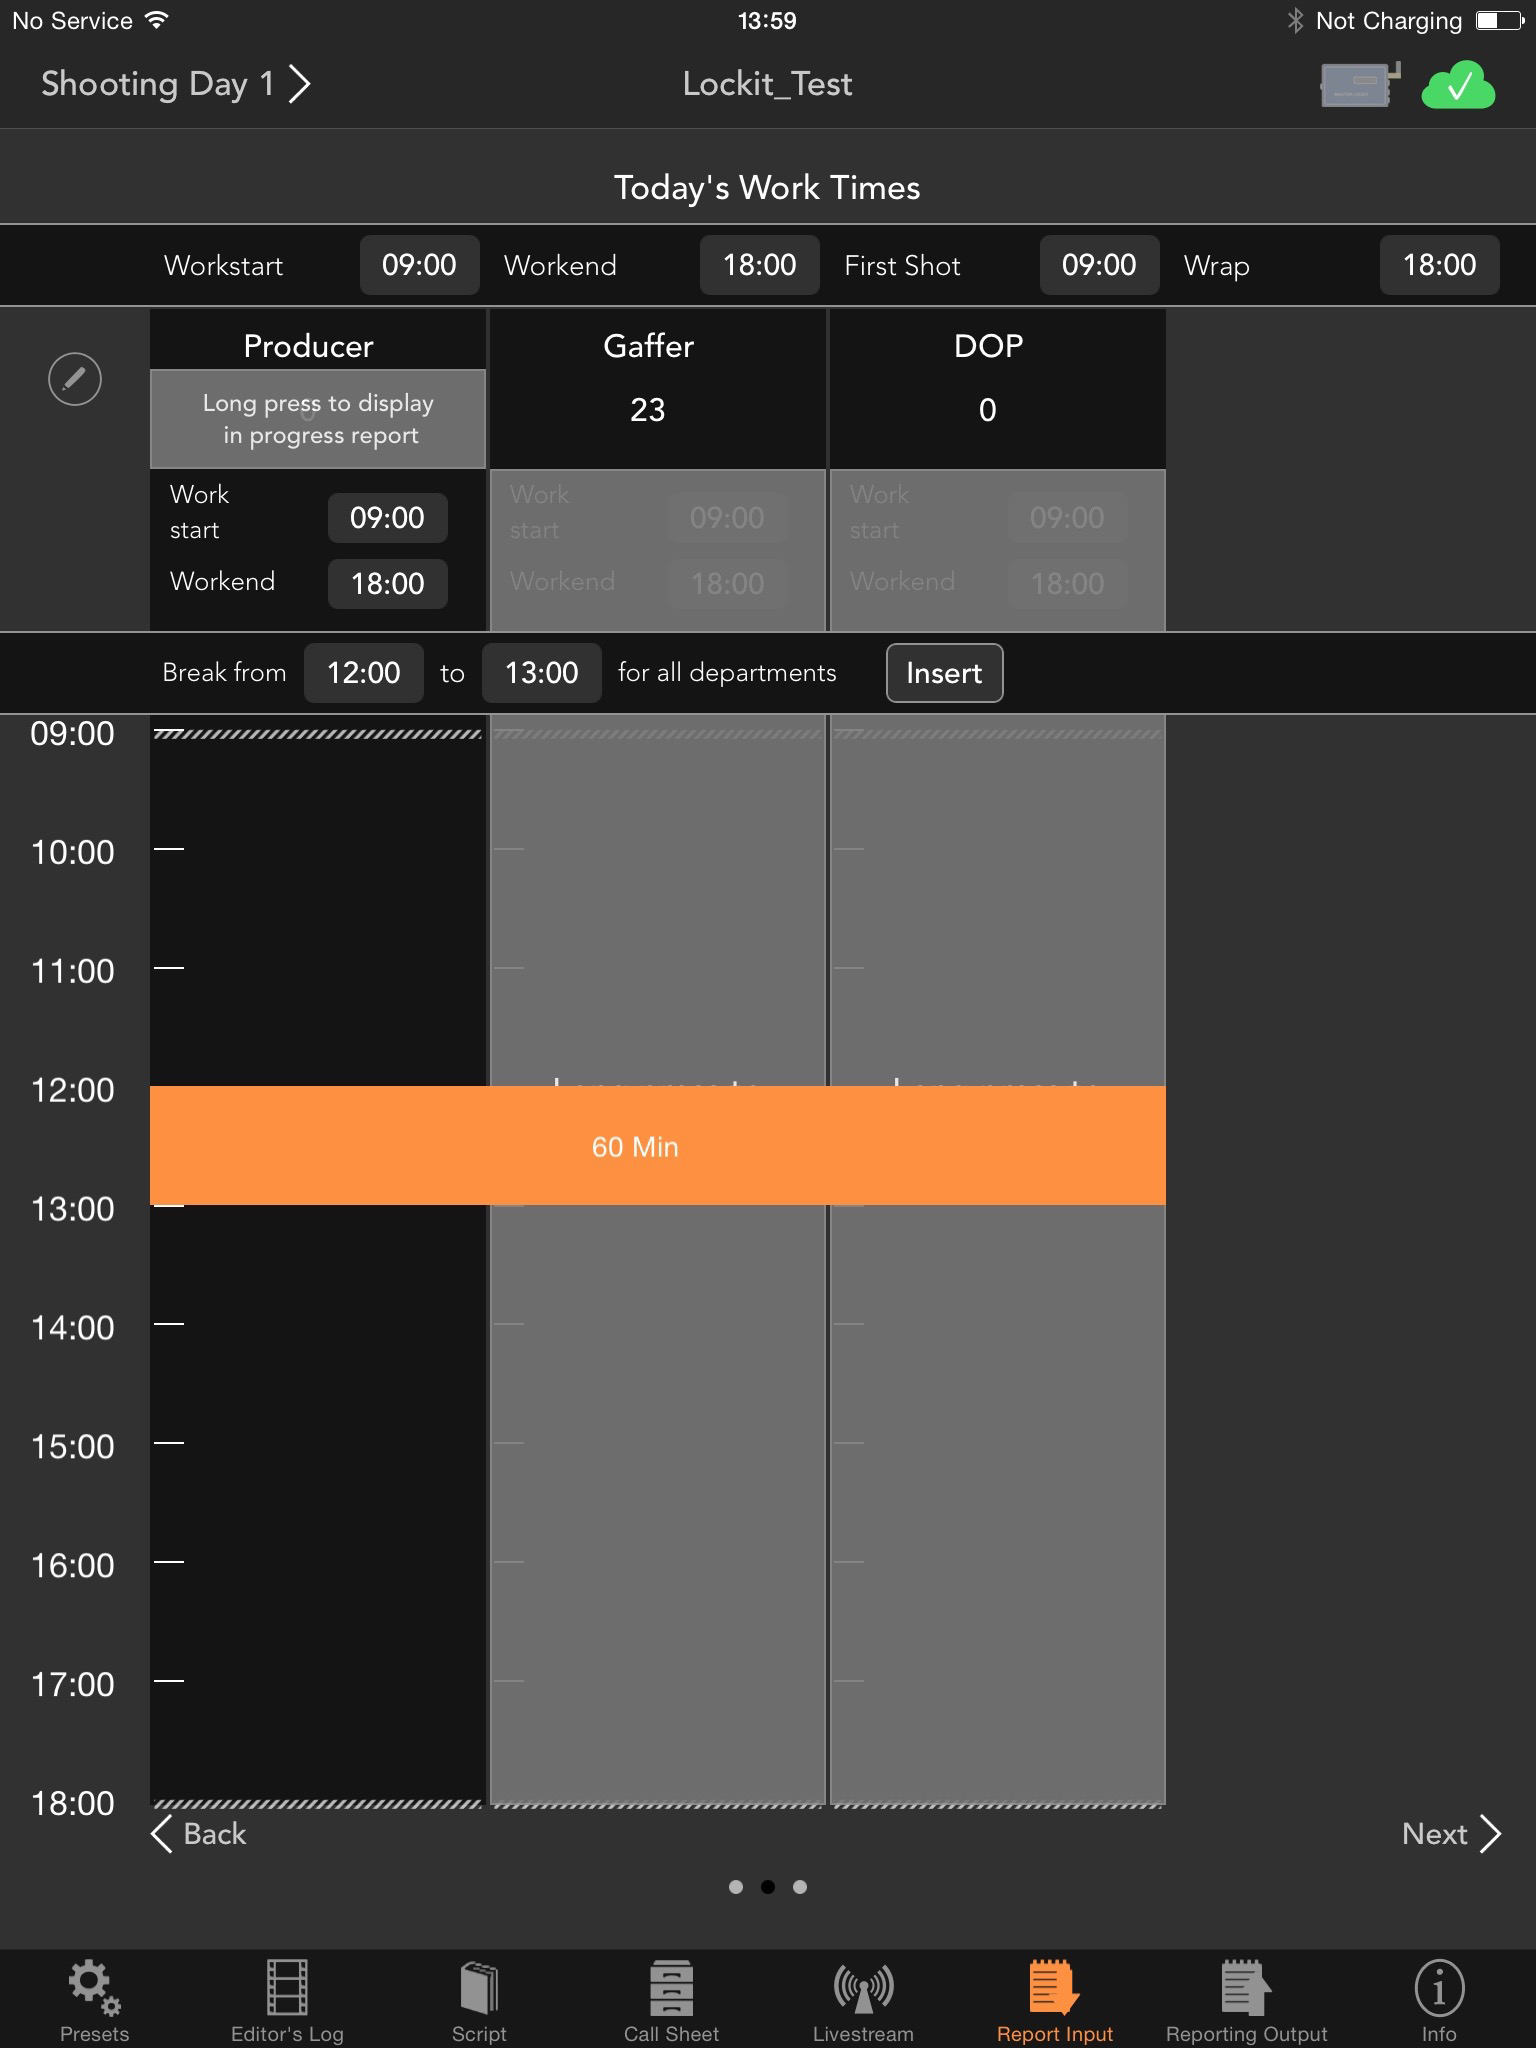
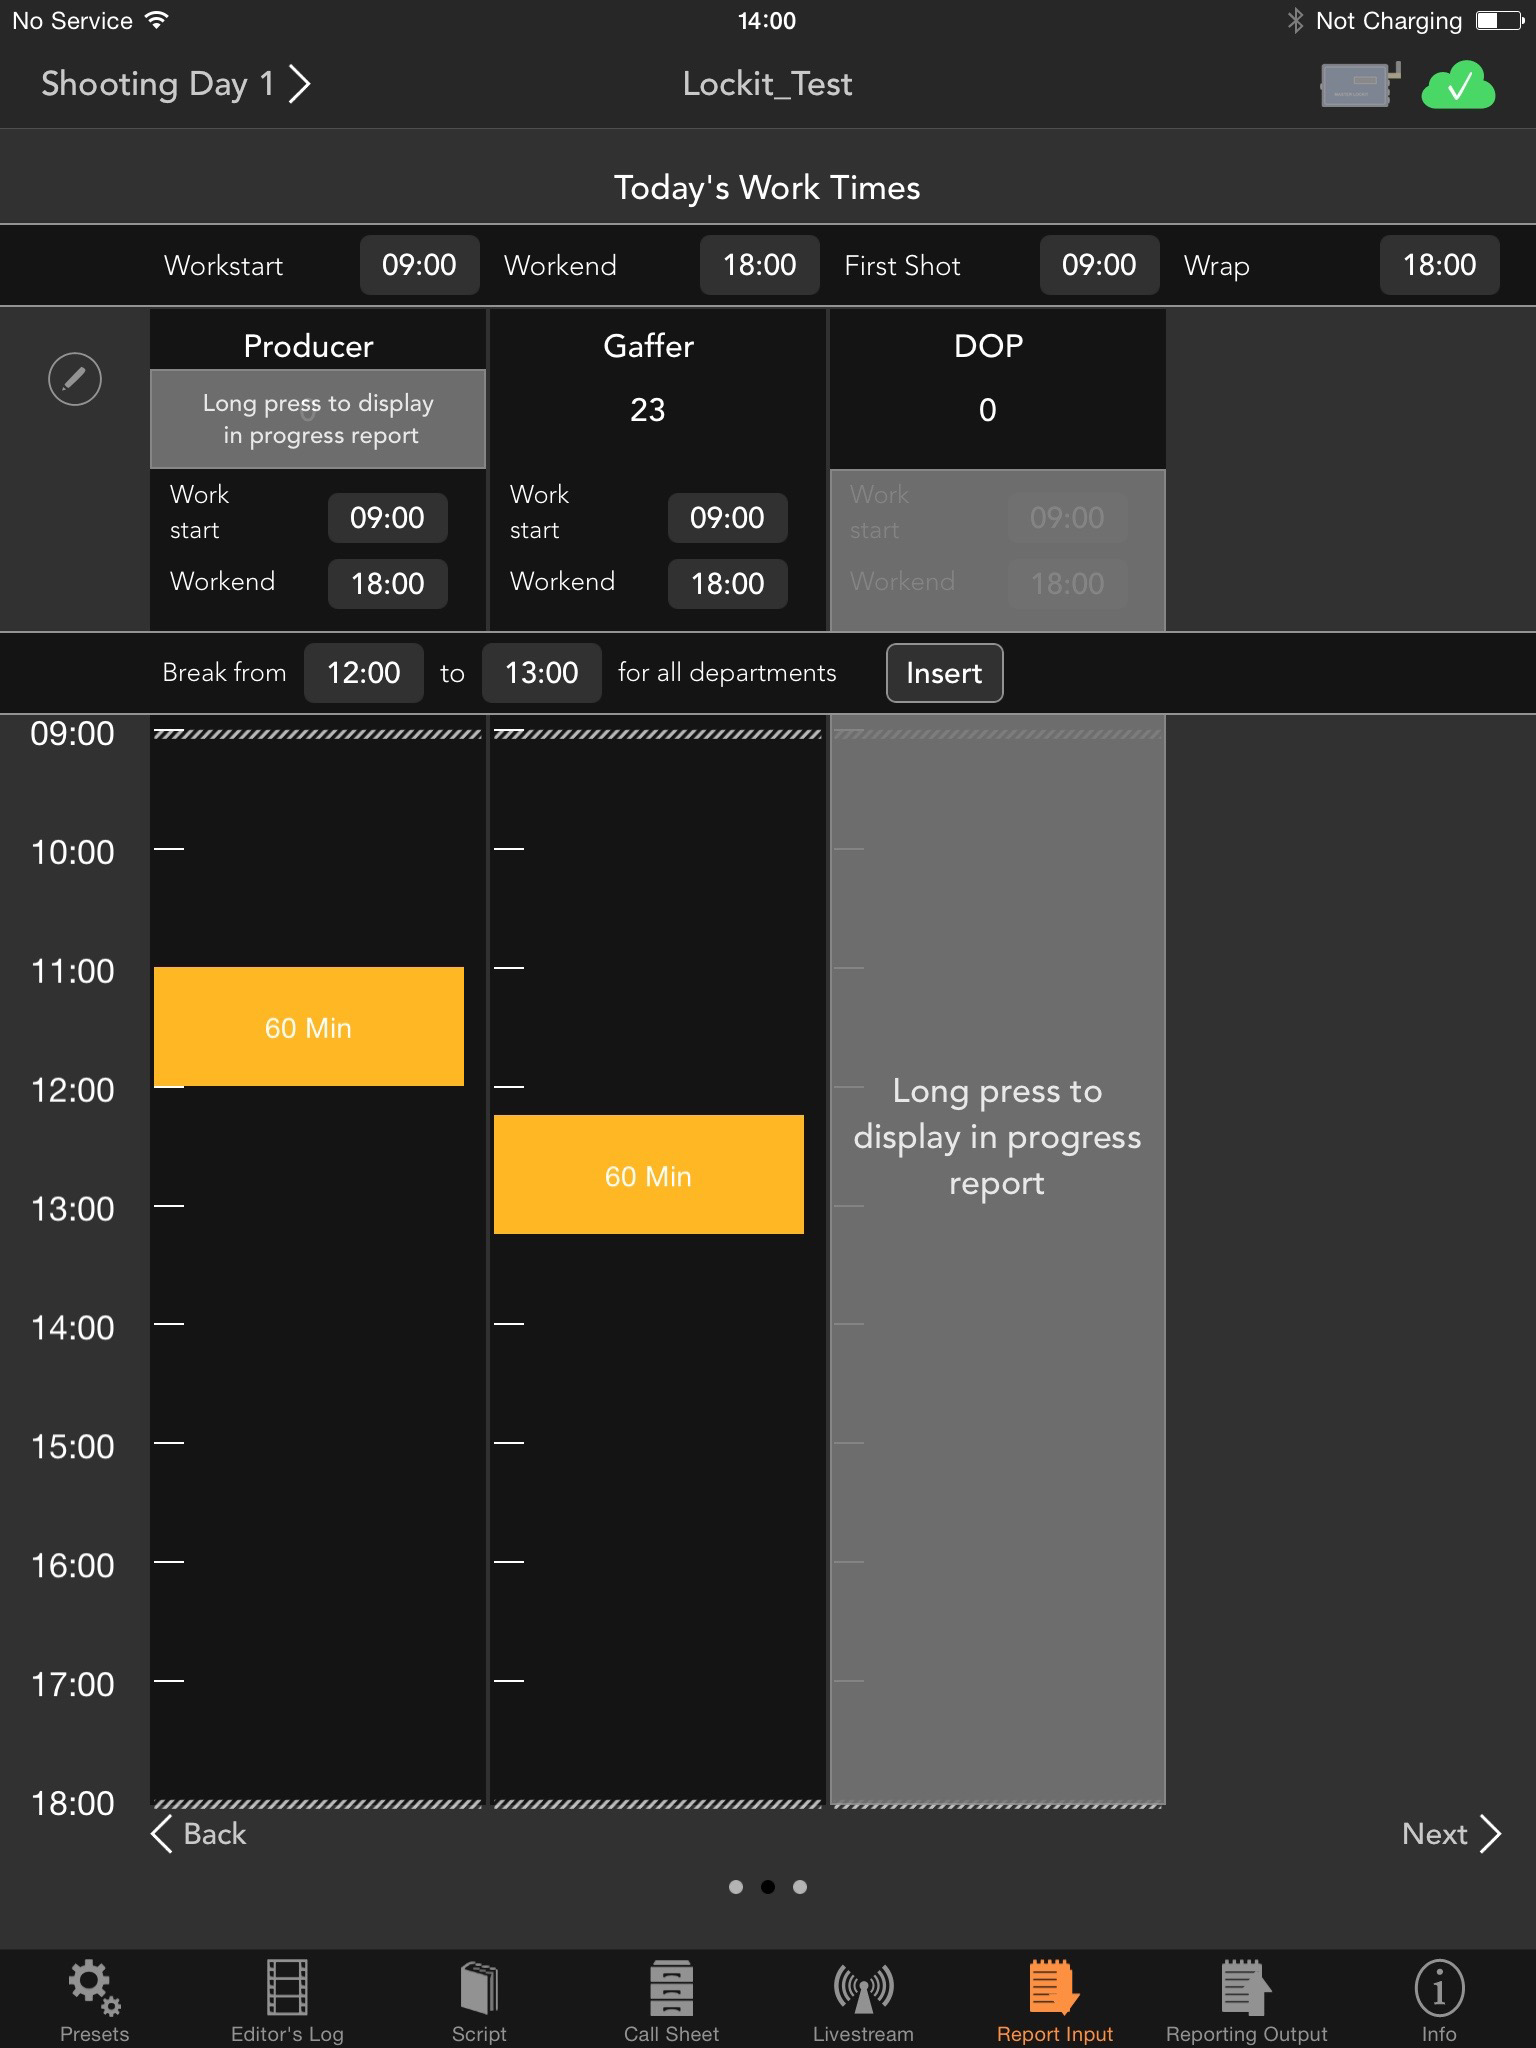
Enter working hours for the daily progress report.
Open the timekeeping screen by a swipe to the left in the tab “Report Input”.
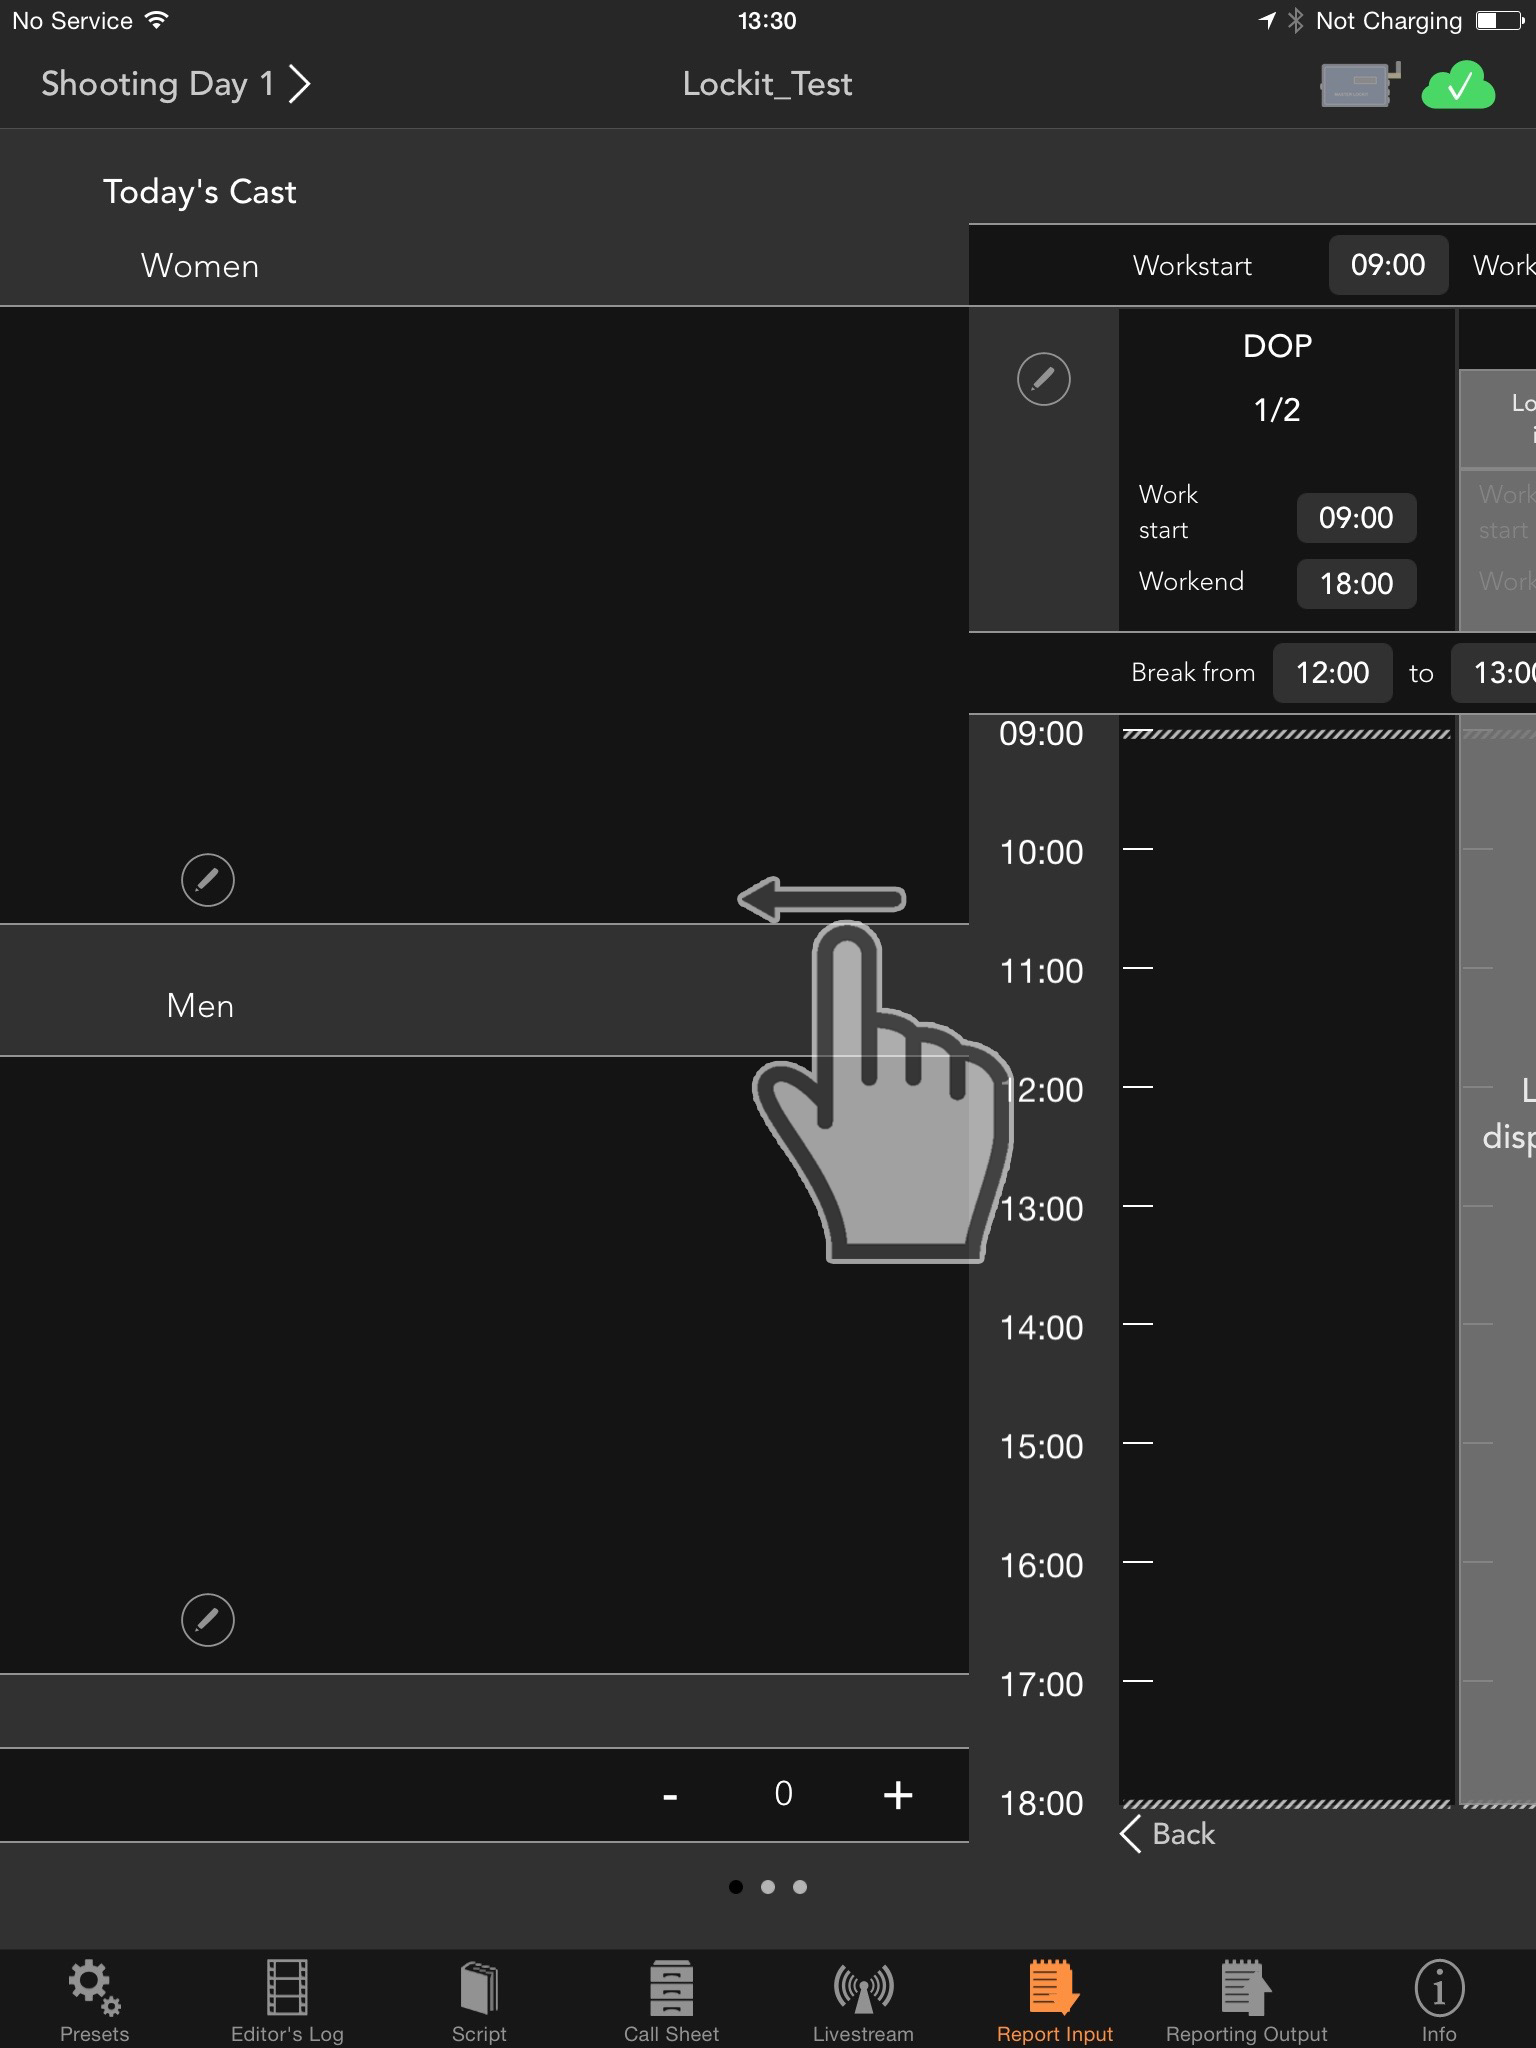
Tap the “pencil”-symbol top left and add all departments you wish to track to the list. Create new departments using the LockitWebTools.
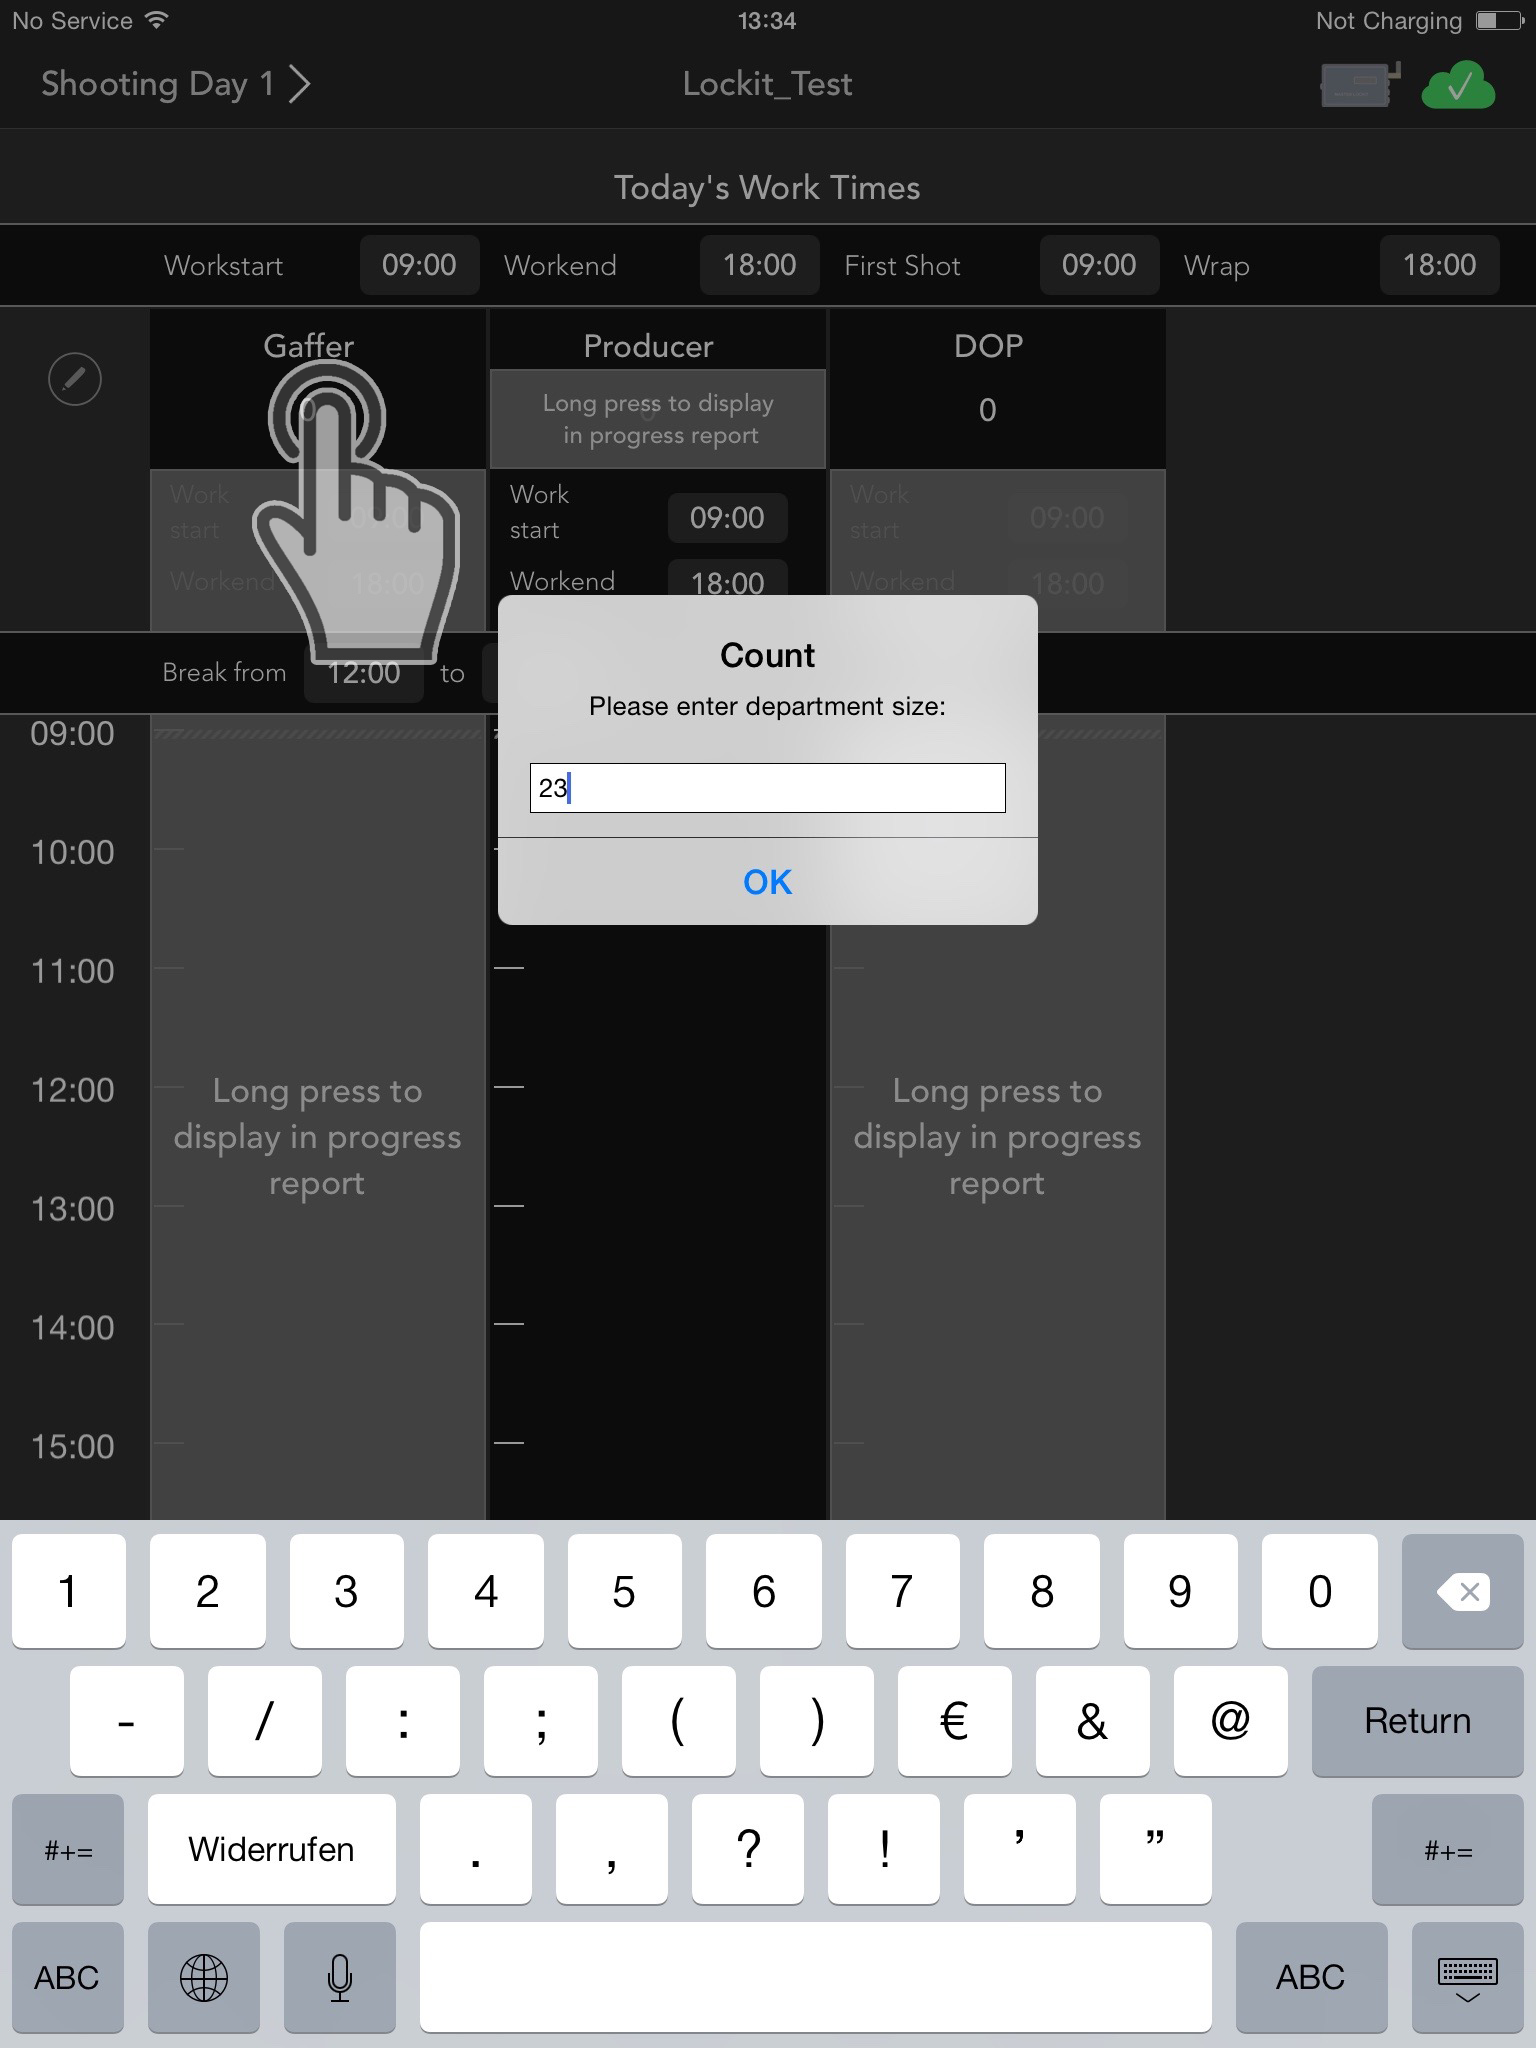
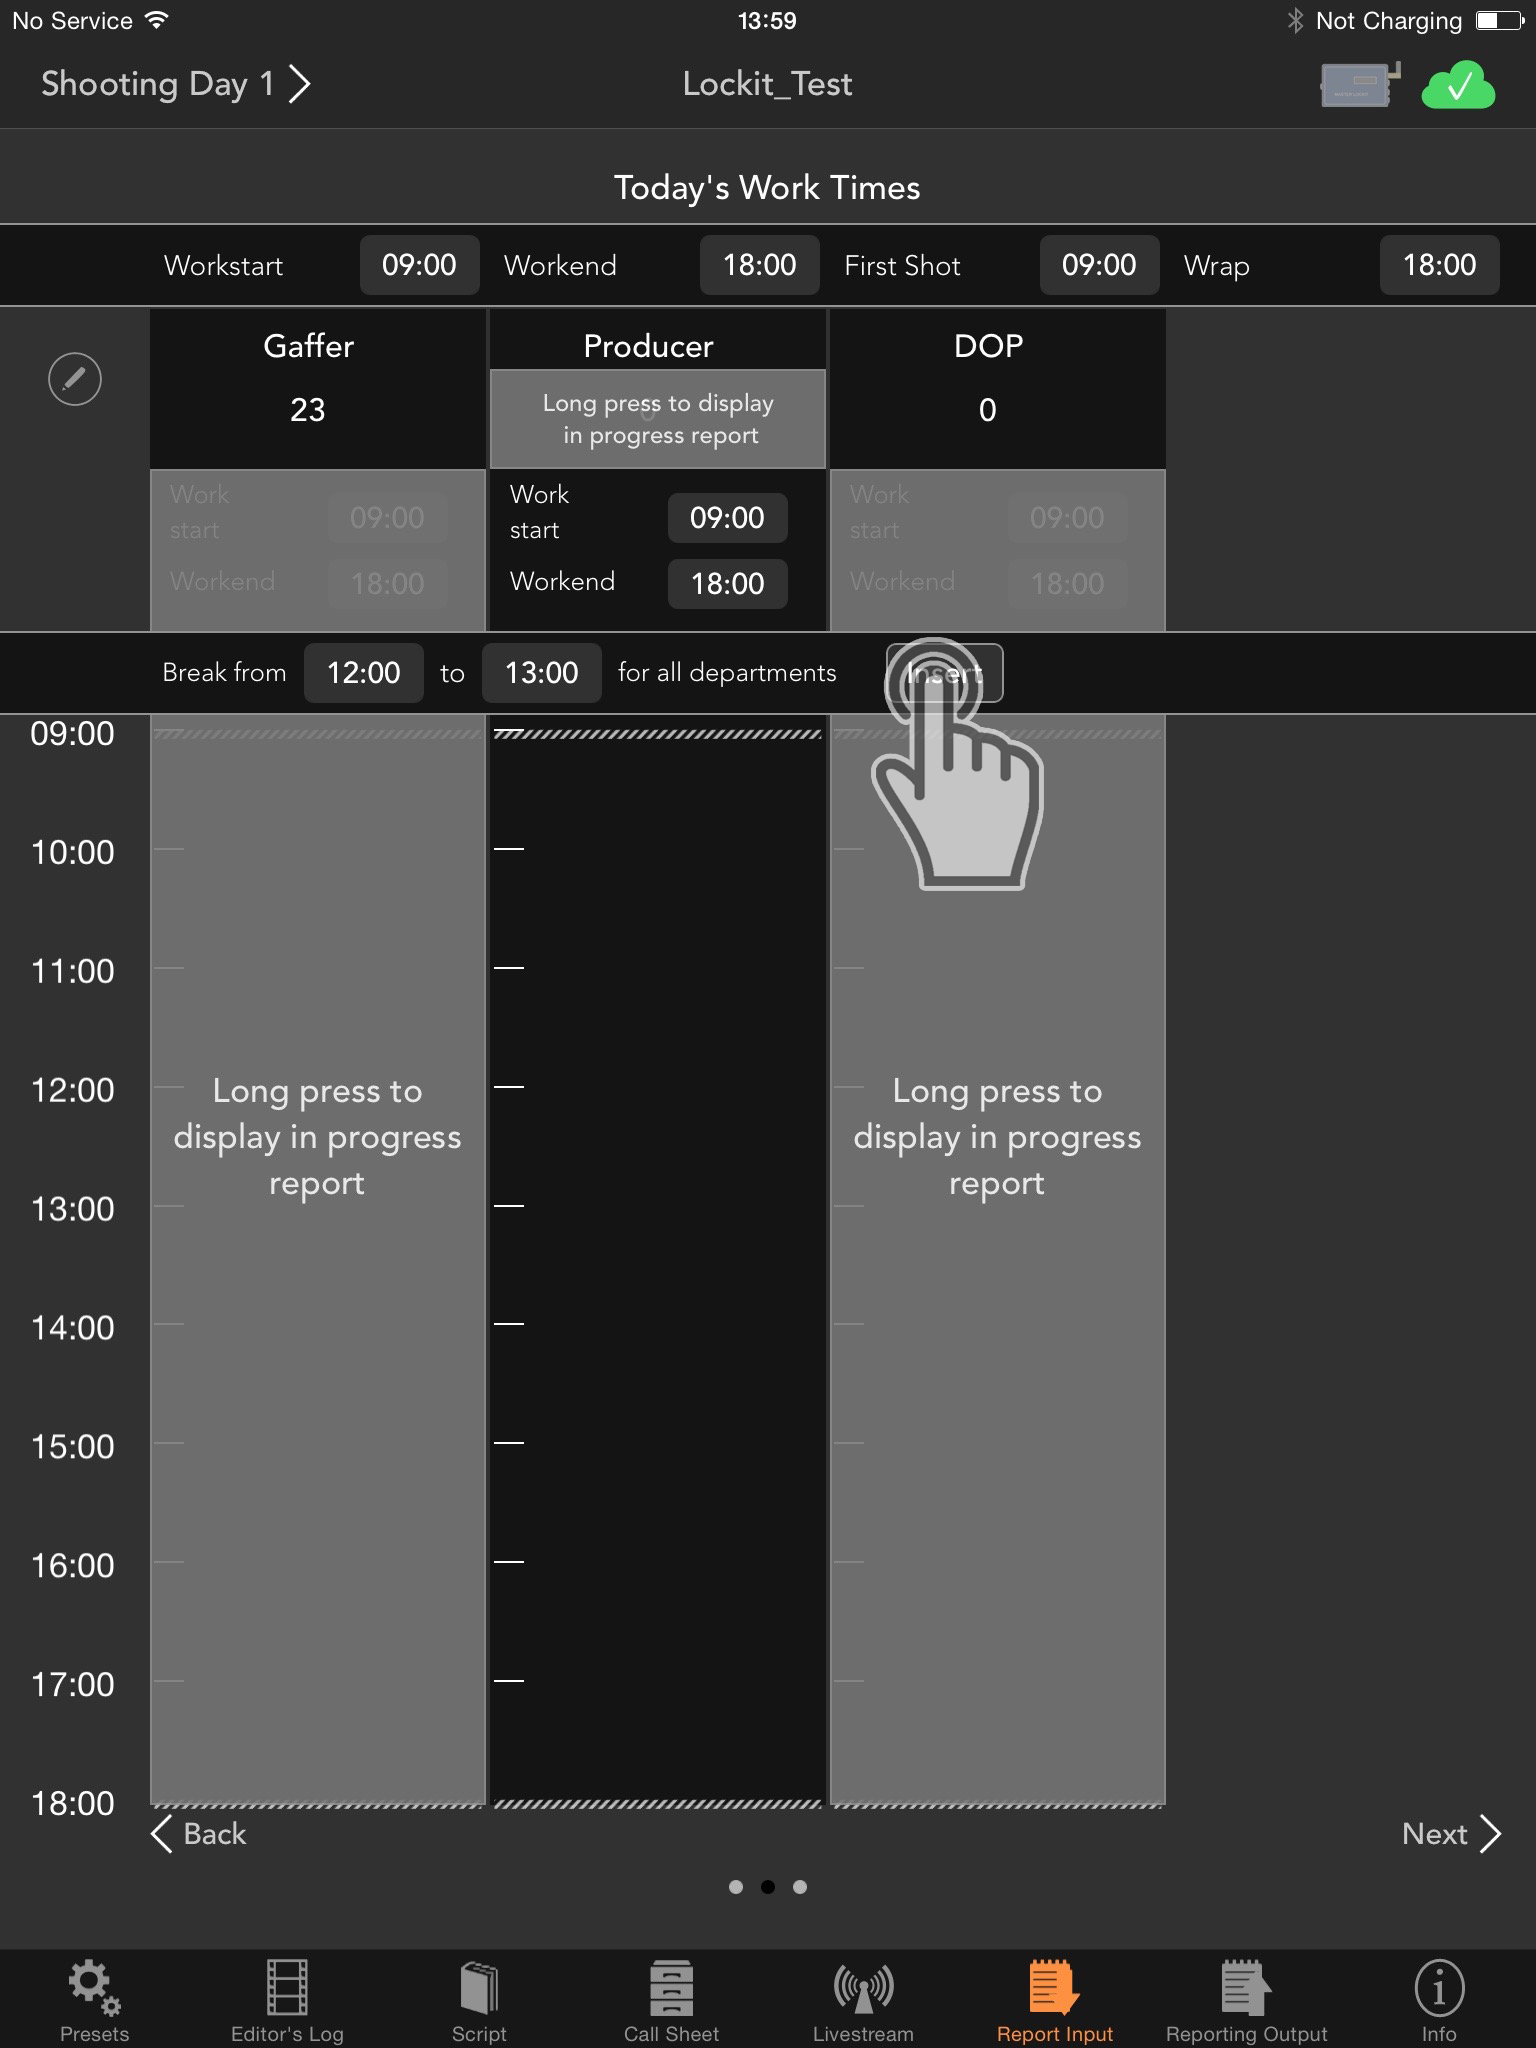
You then decide for which departments you want to track the number of crew members, do the timekeeping or both. Activate (or deactivate) the respective button by pushing it for about a second.
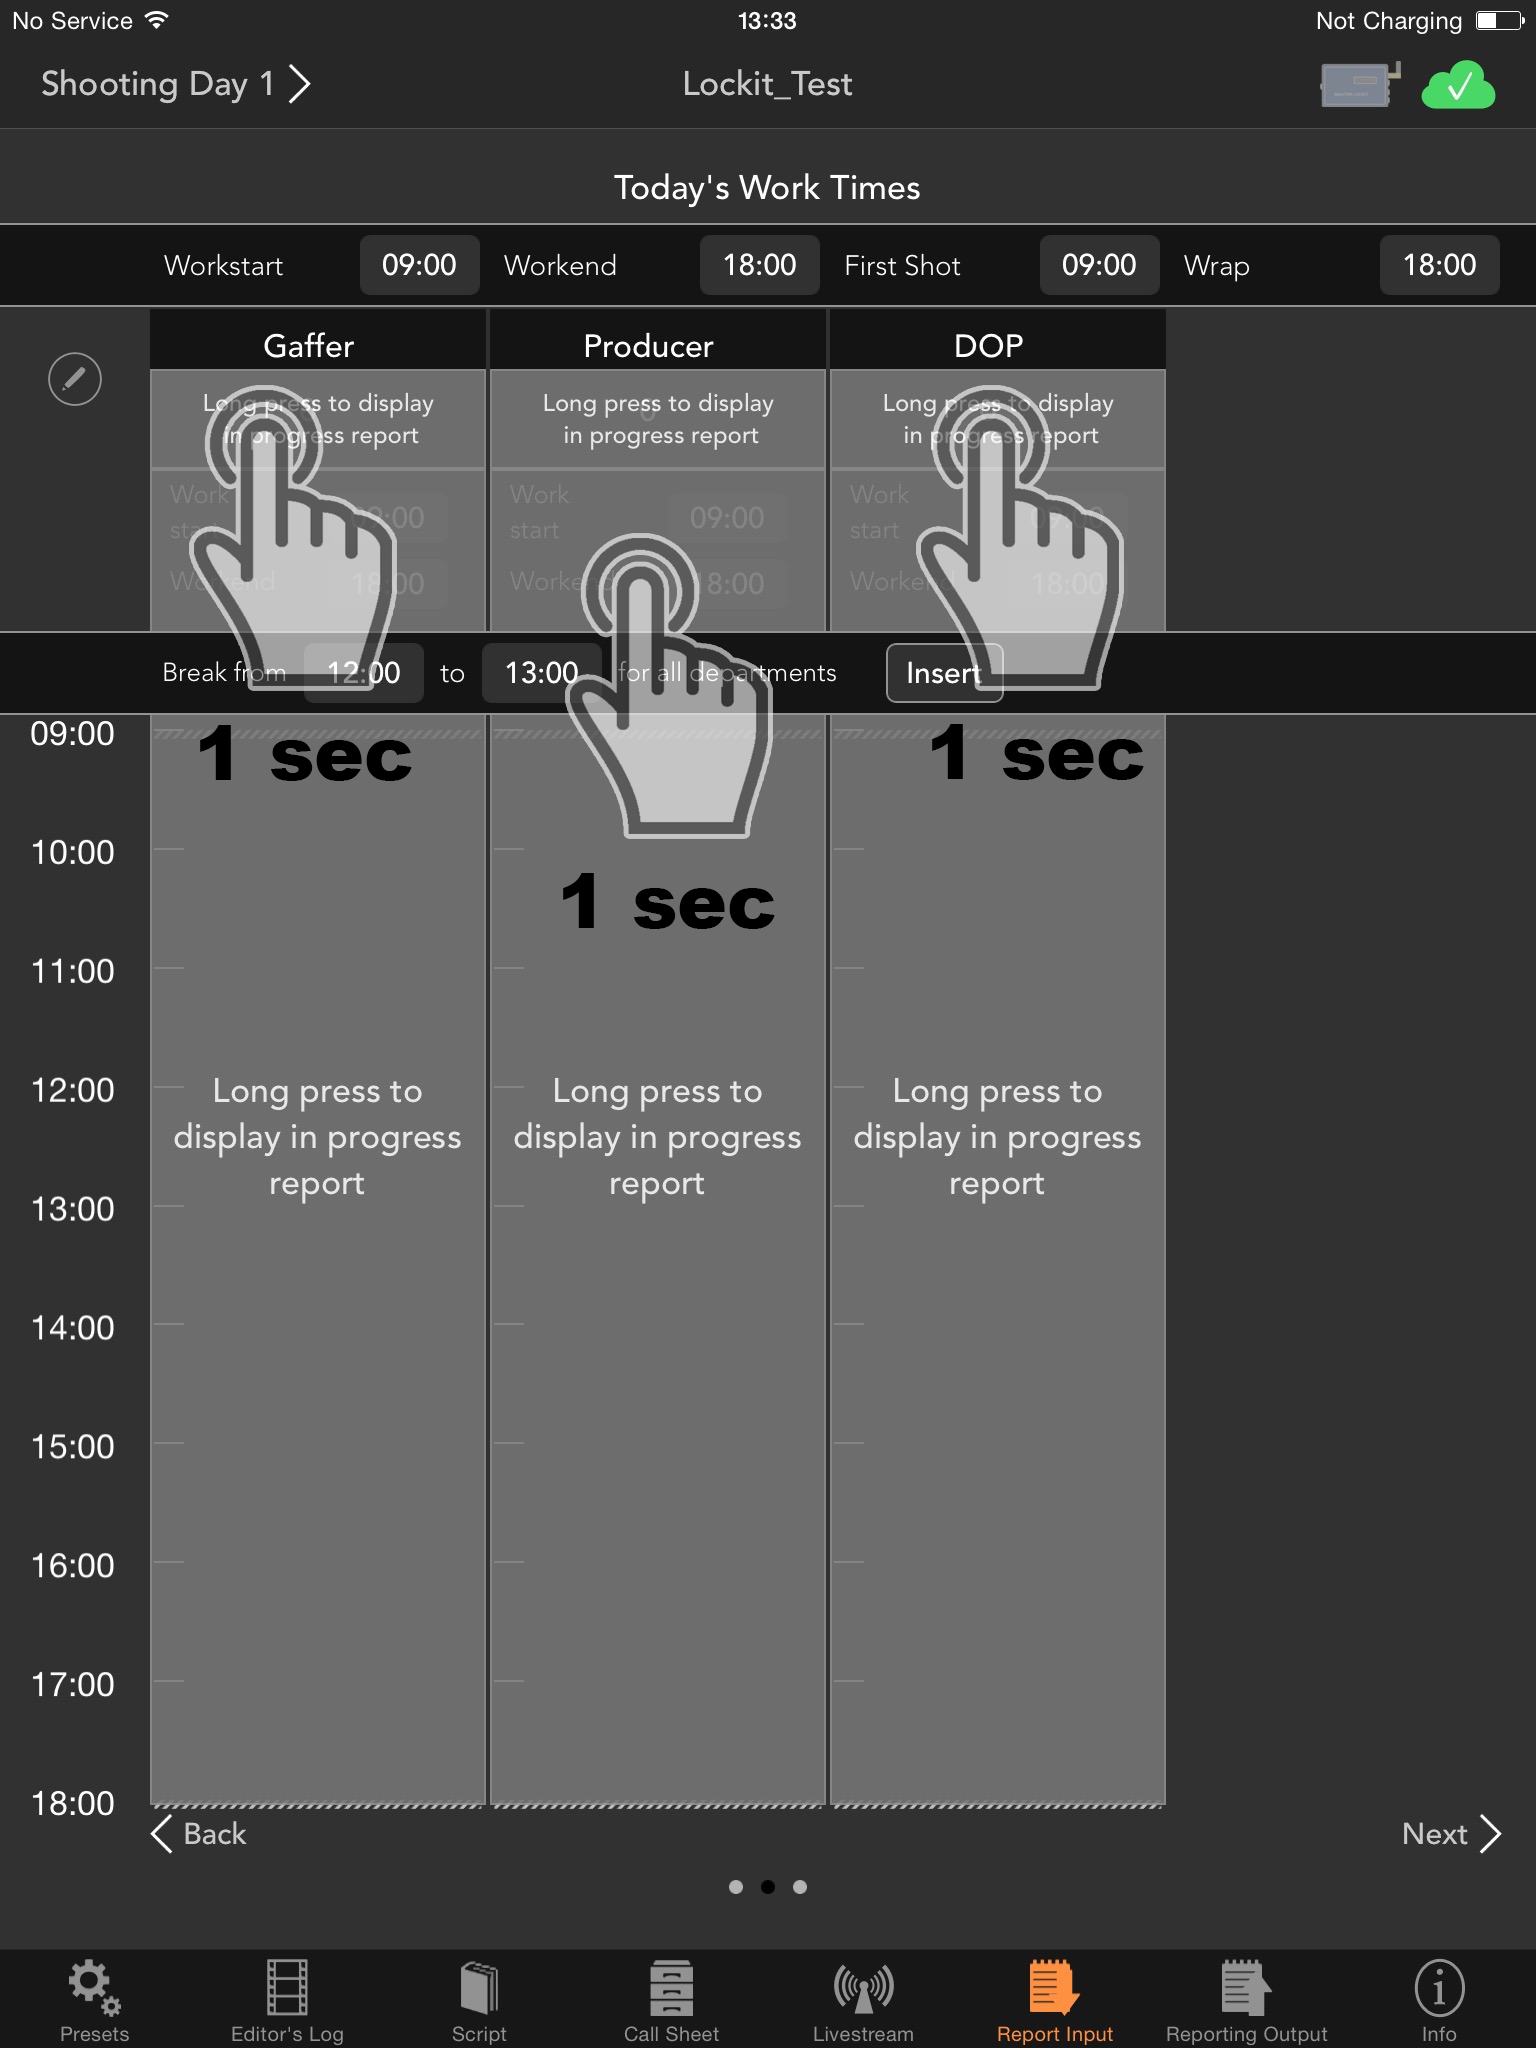
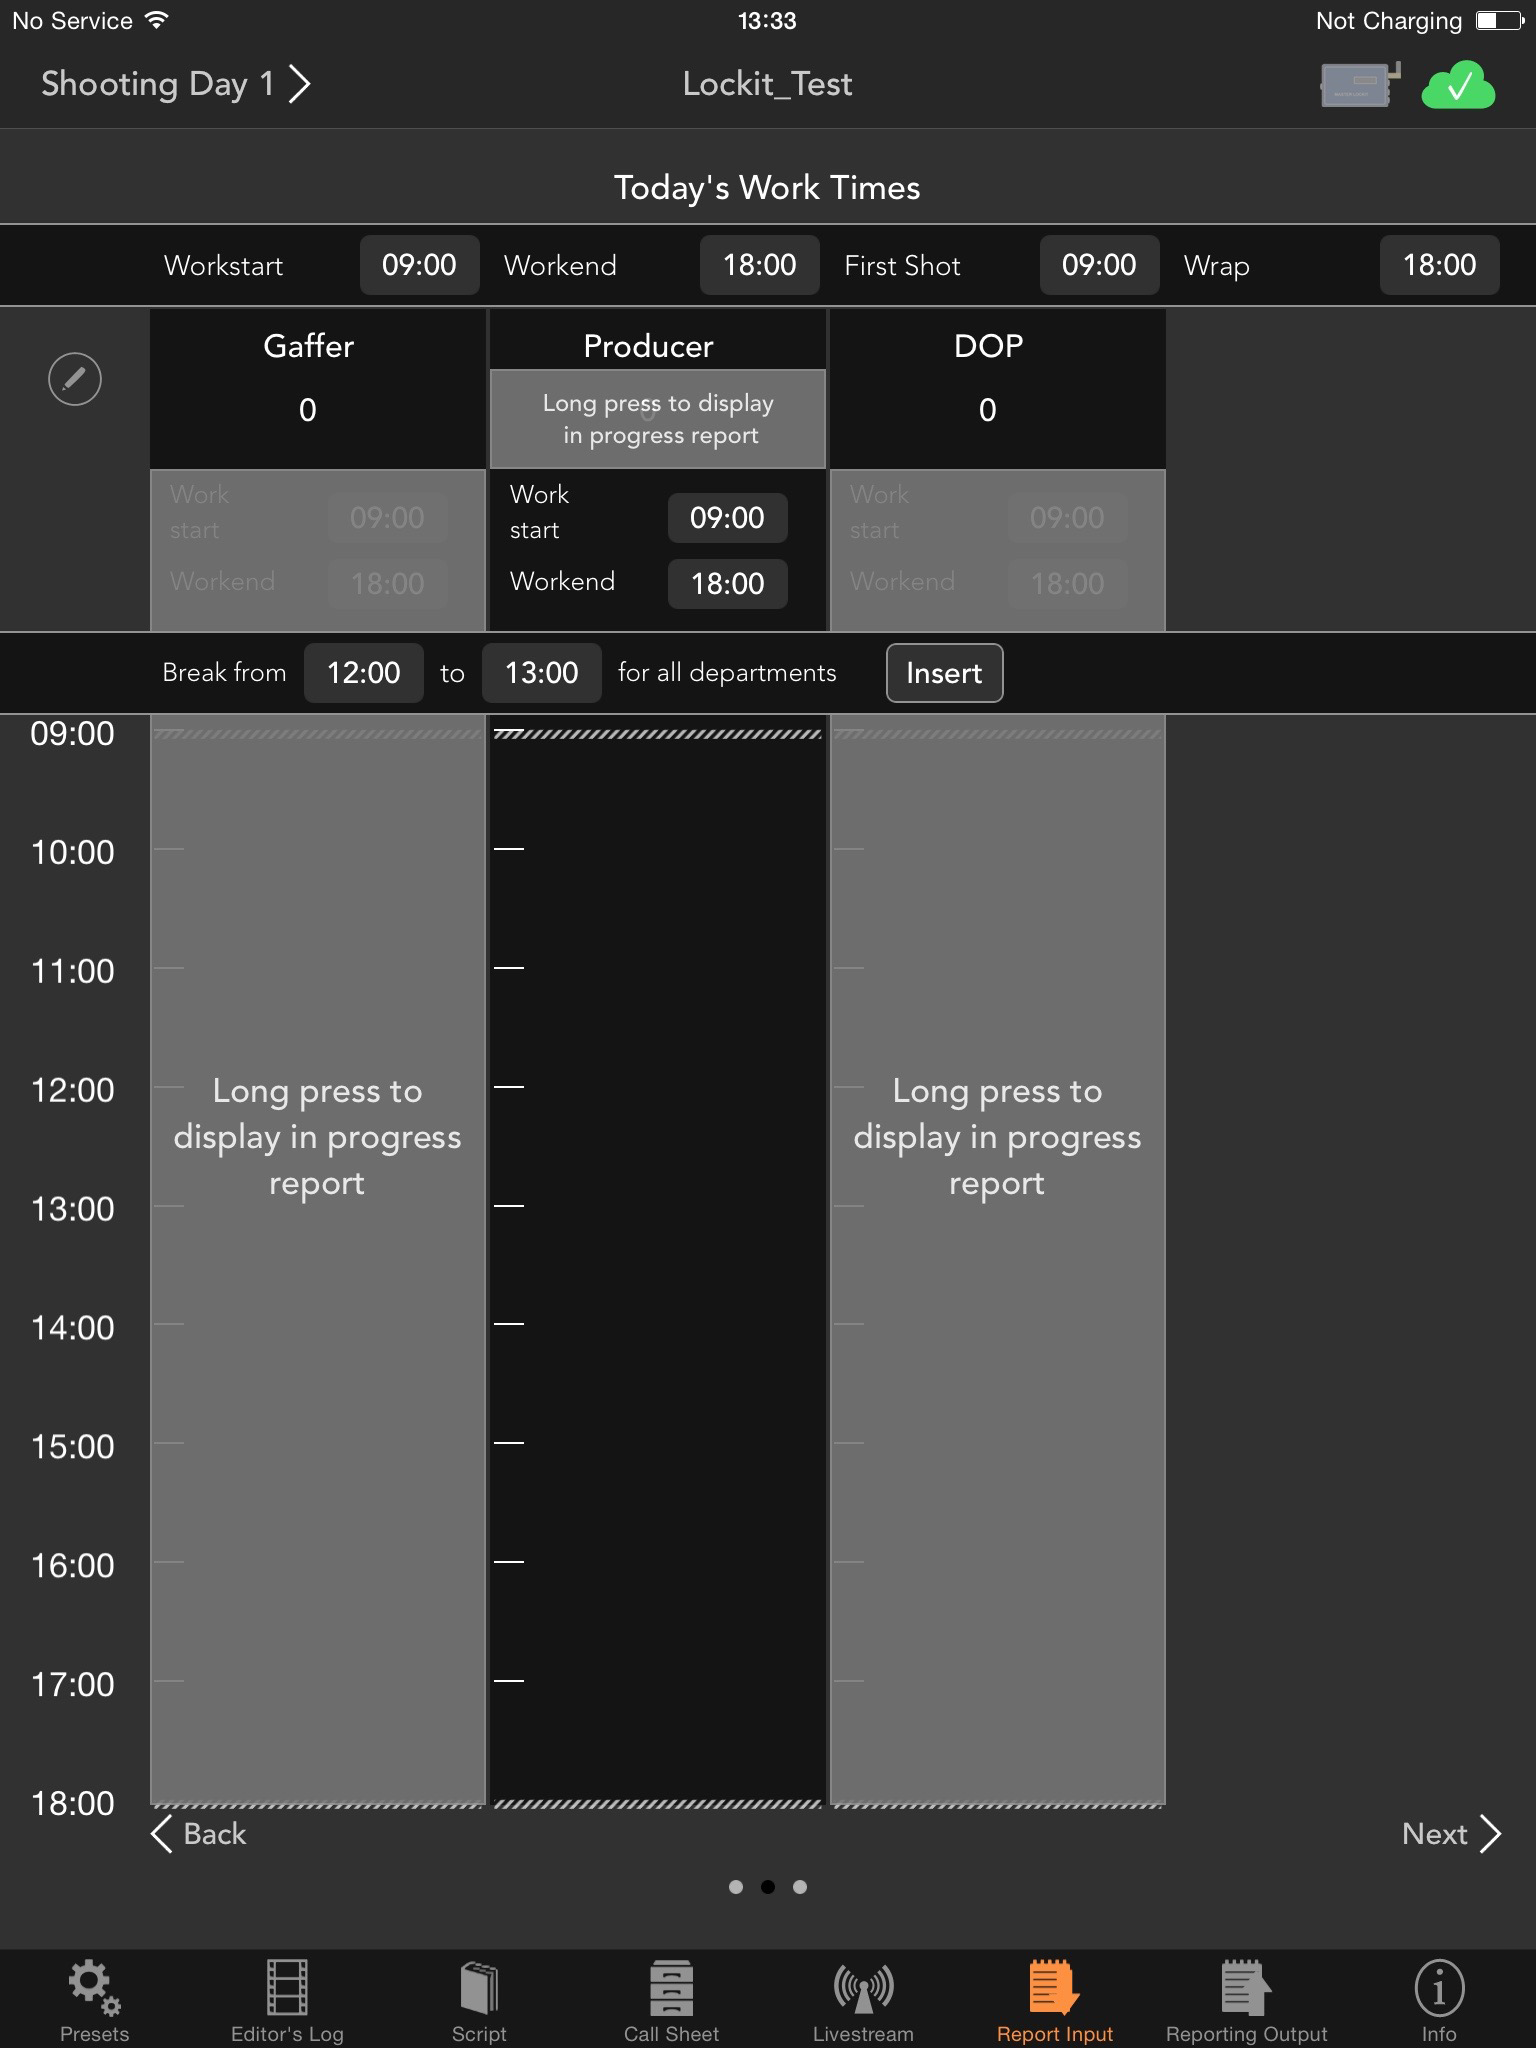
You may now use the little wheel to set the time. Use the keyboard in the pop-up to enter the number of crew members.
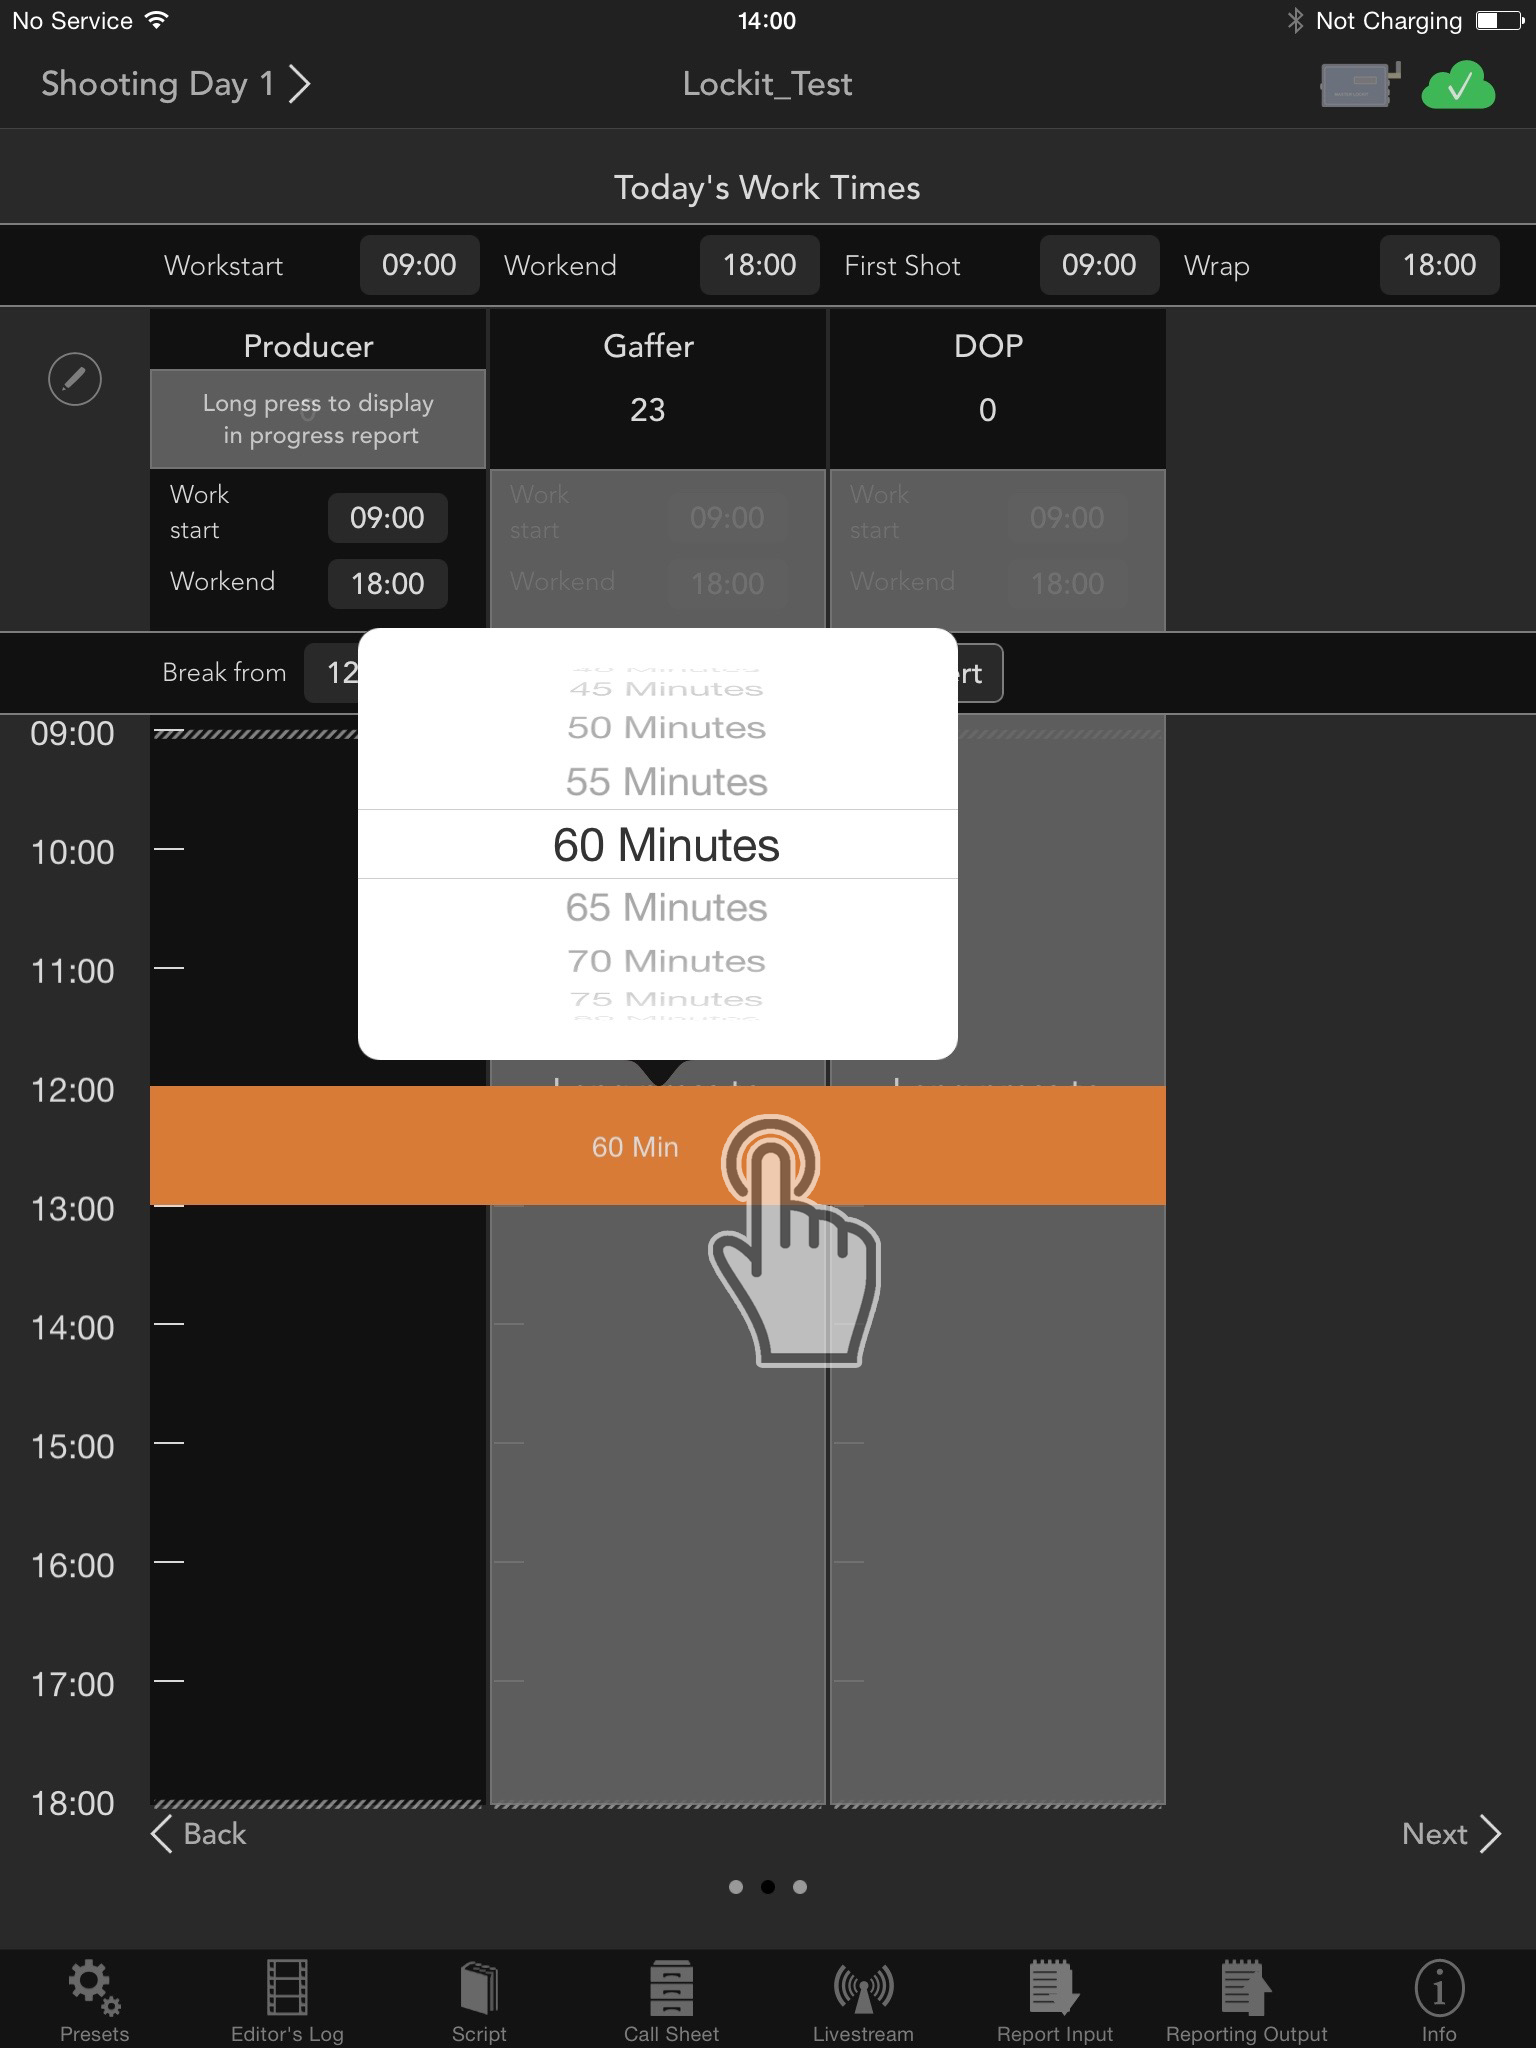
To enter a general pause that applies for every department, select the time using the little wheel and then press “Insert”.
If necessary, just pre- or postpone the break by swiping it up- or downward.
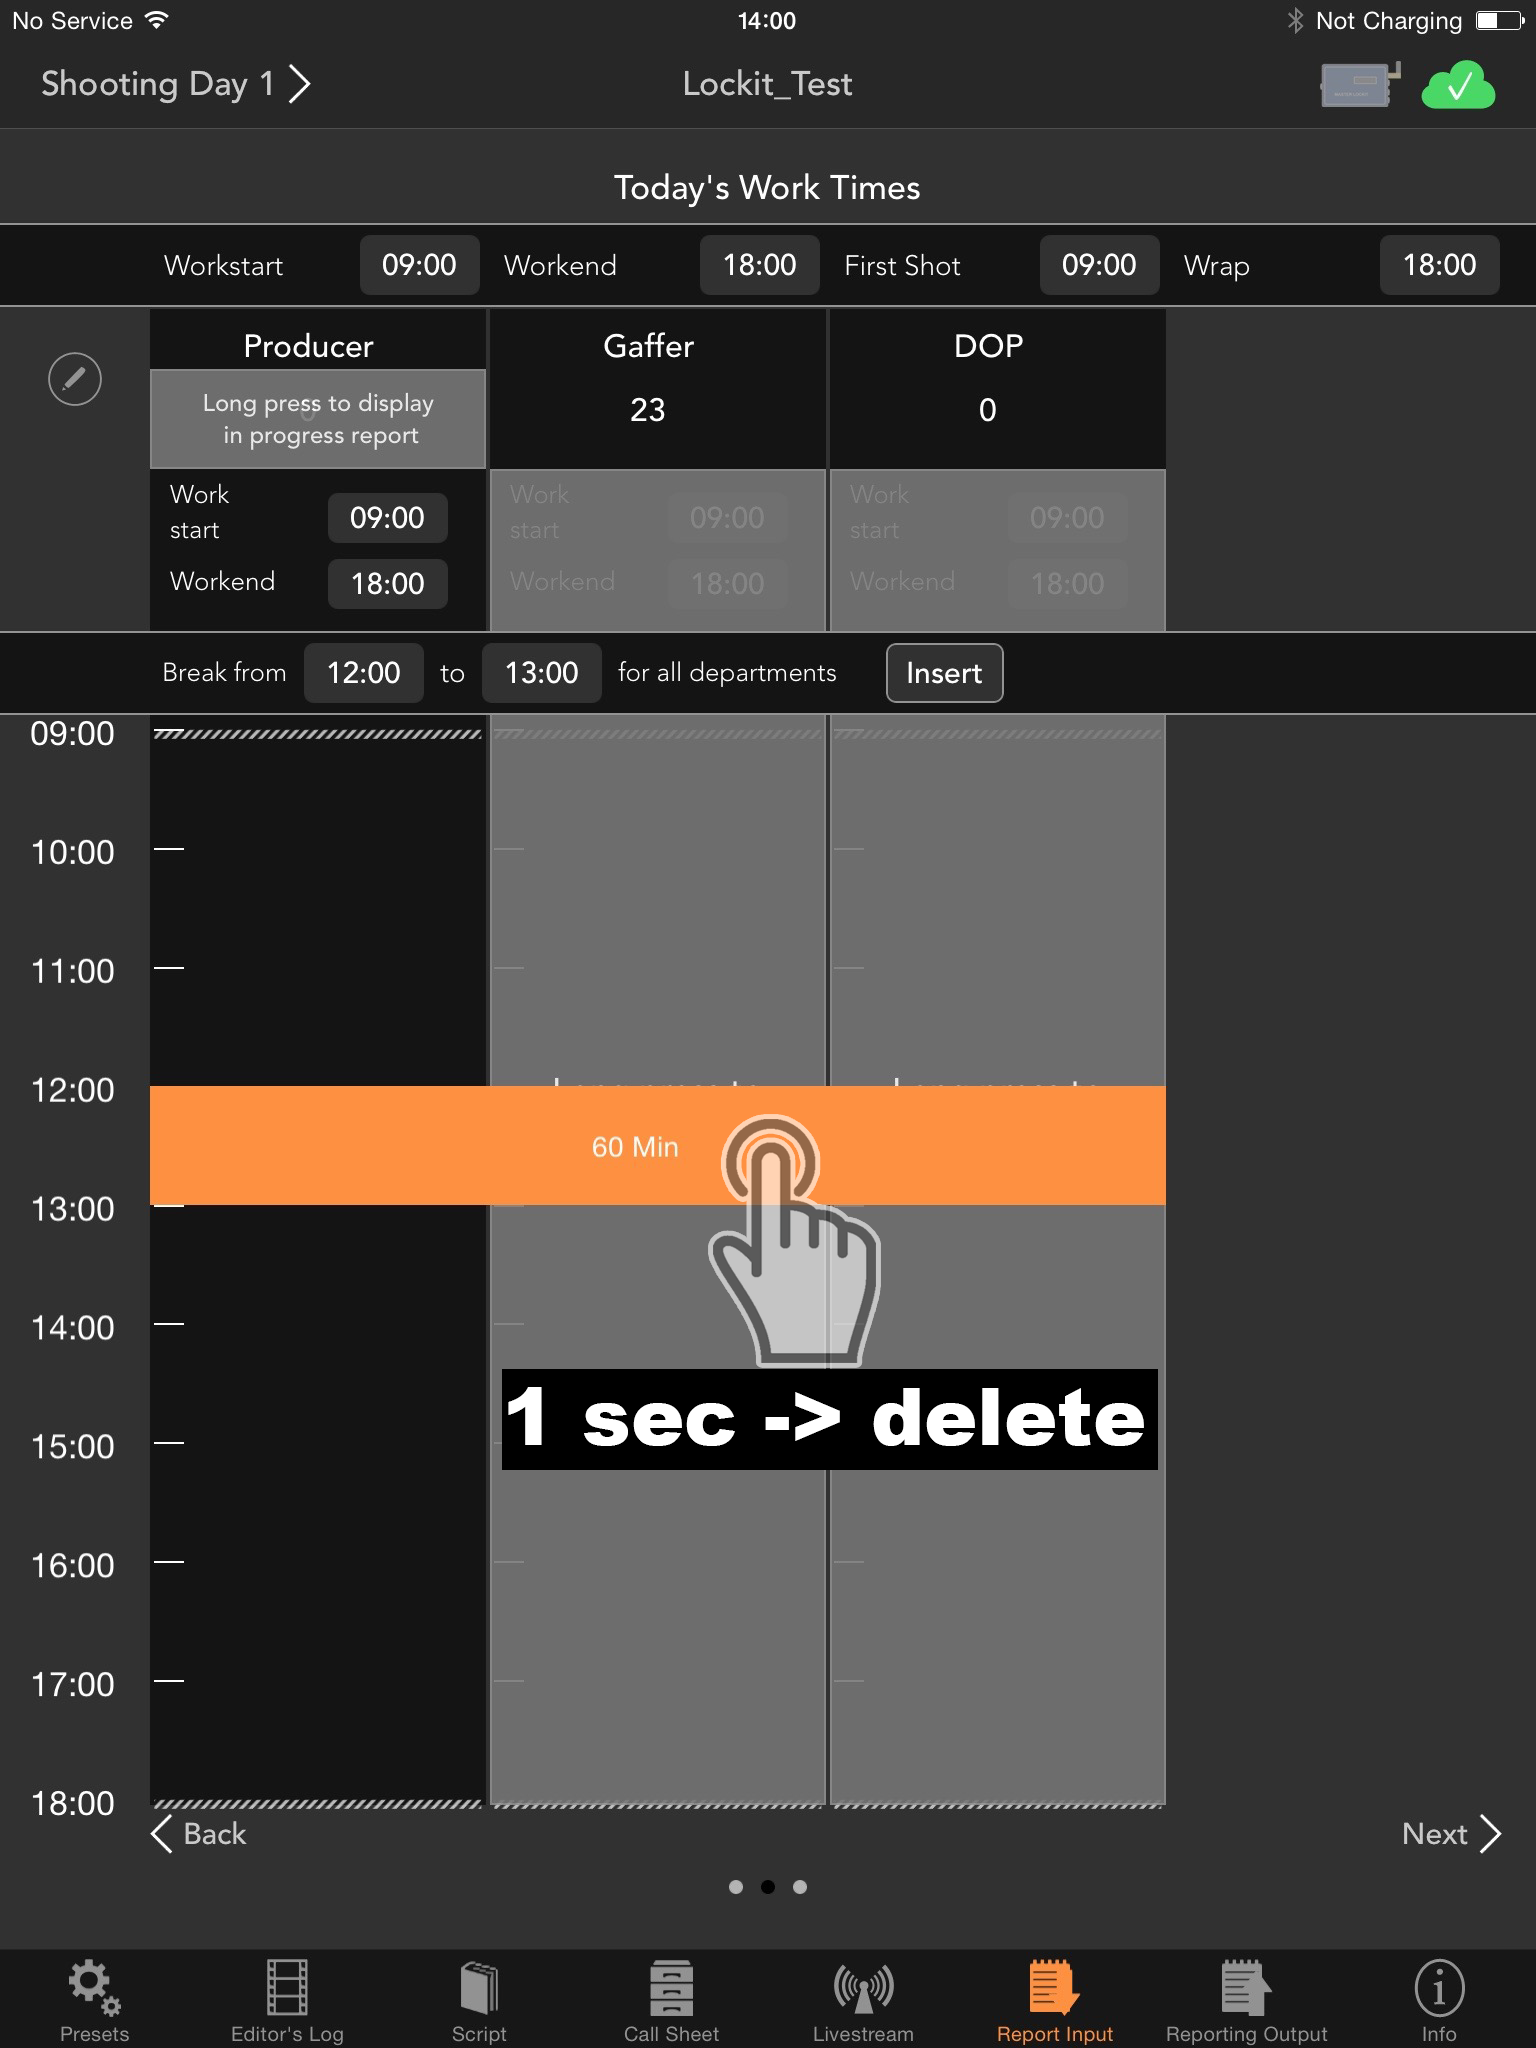
You may of course extend or shorten the break by tapping on it and adapt the intended time within the pop-up or delete it completely by pushing it for a second.
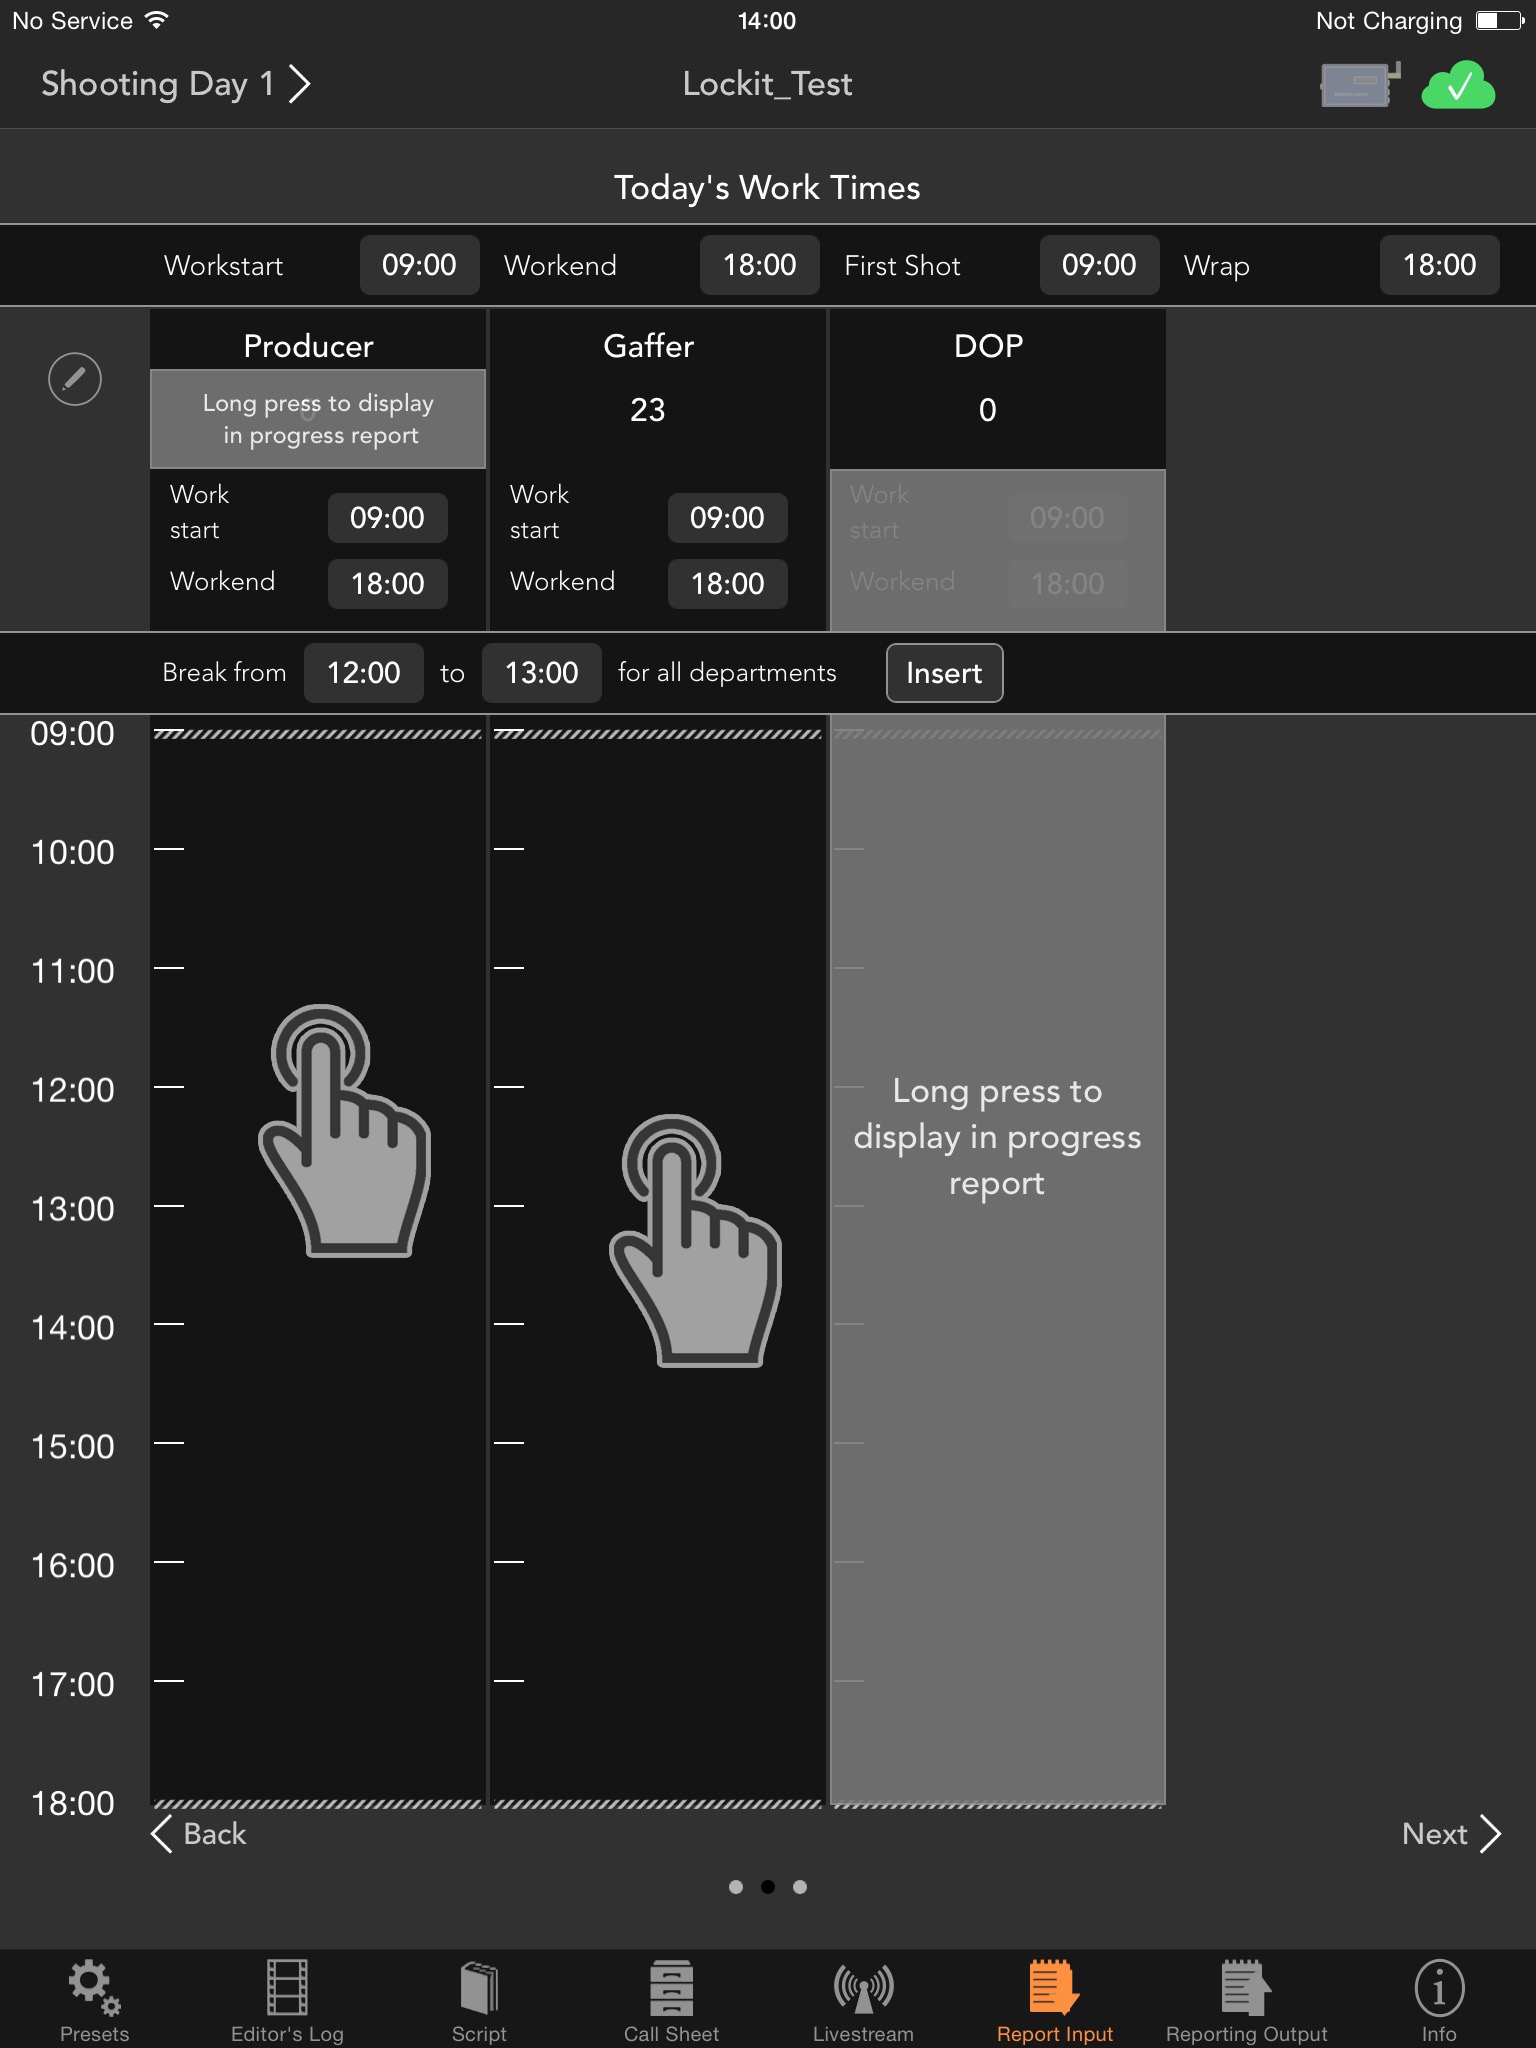
You can also record the breaks of every single department. To do so, simply tap into the time bar to create a break.
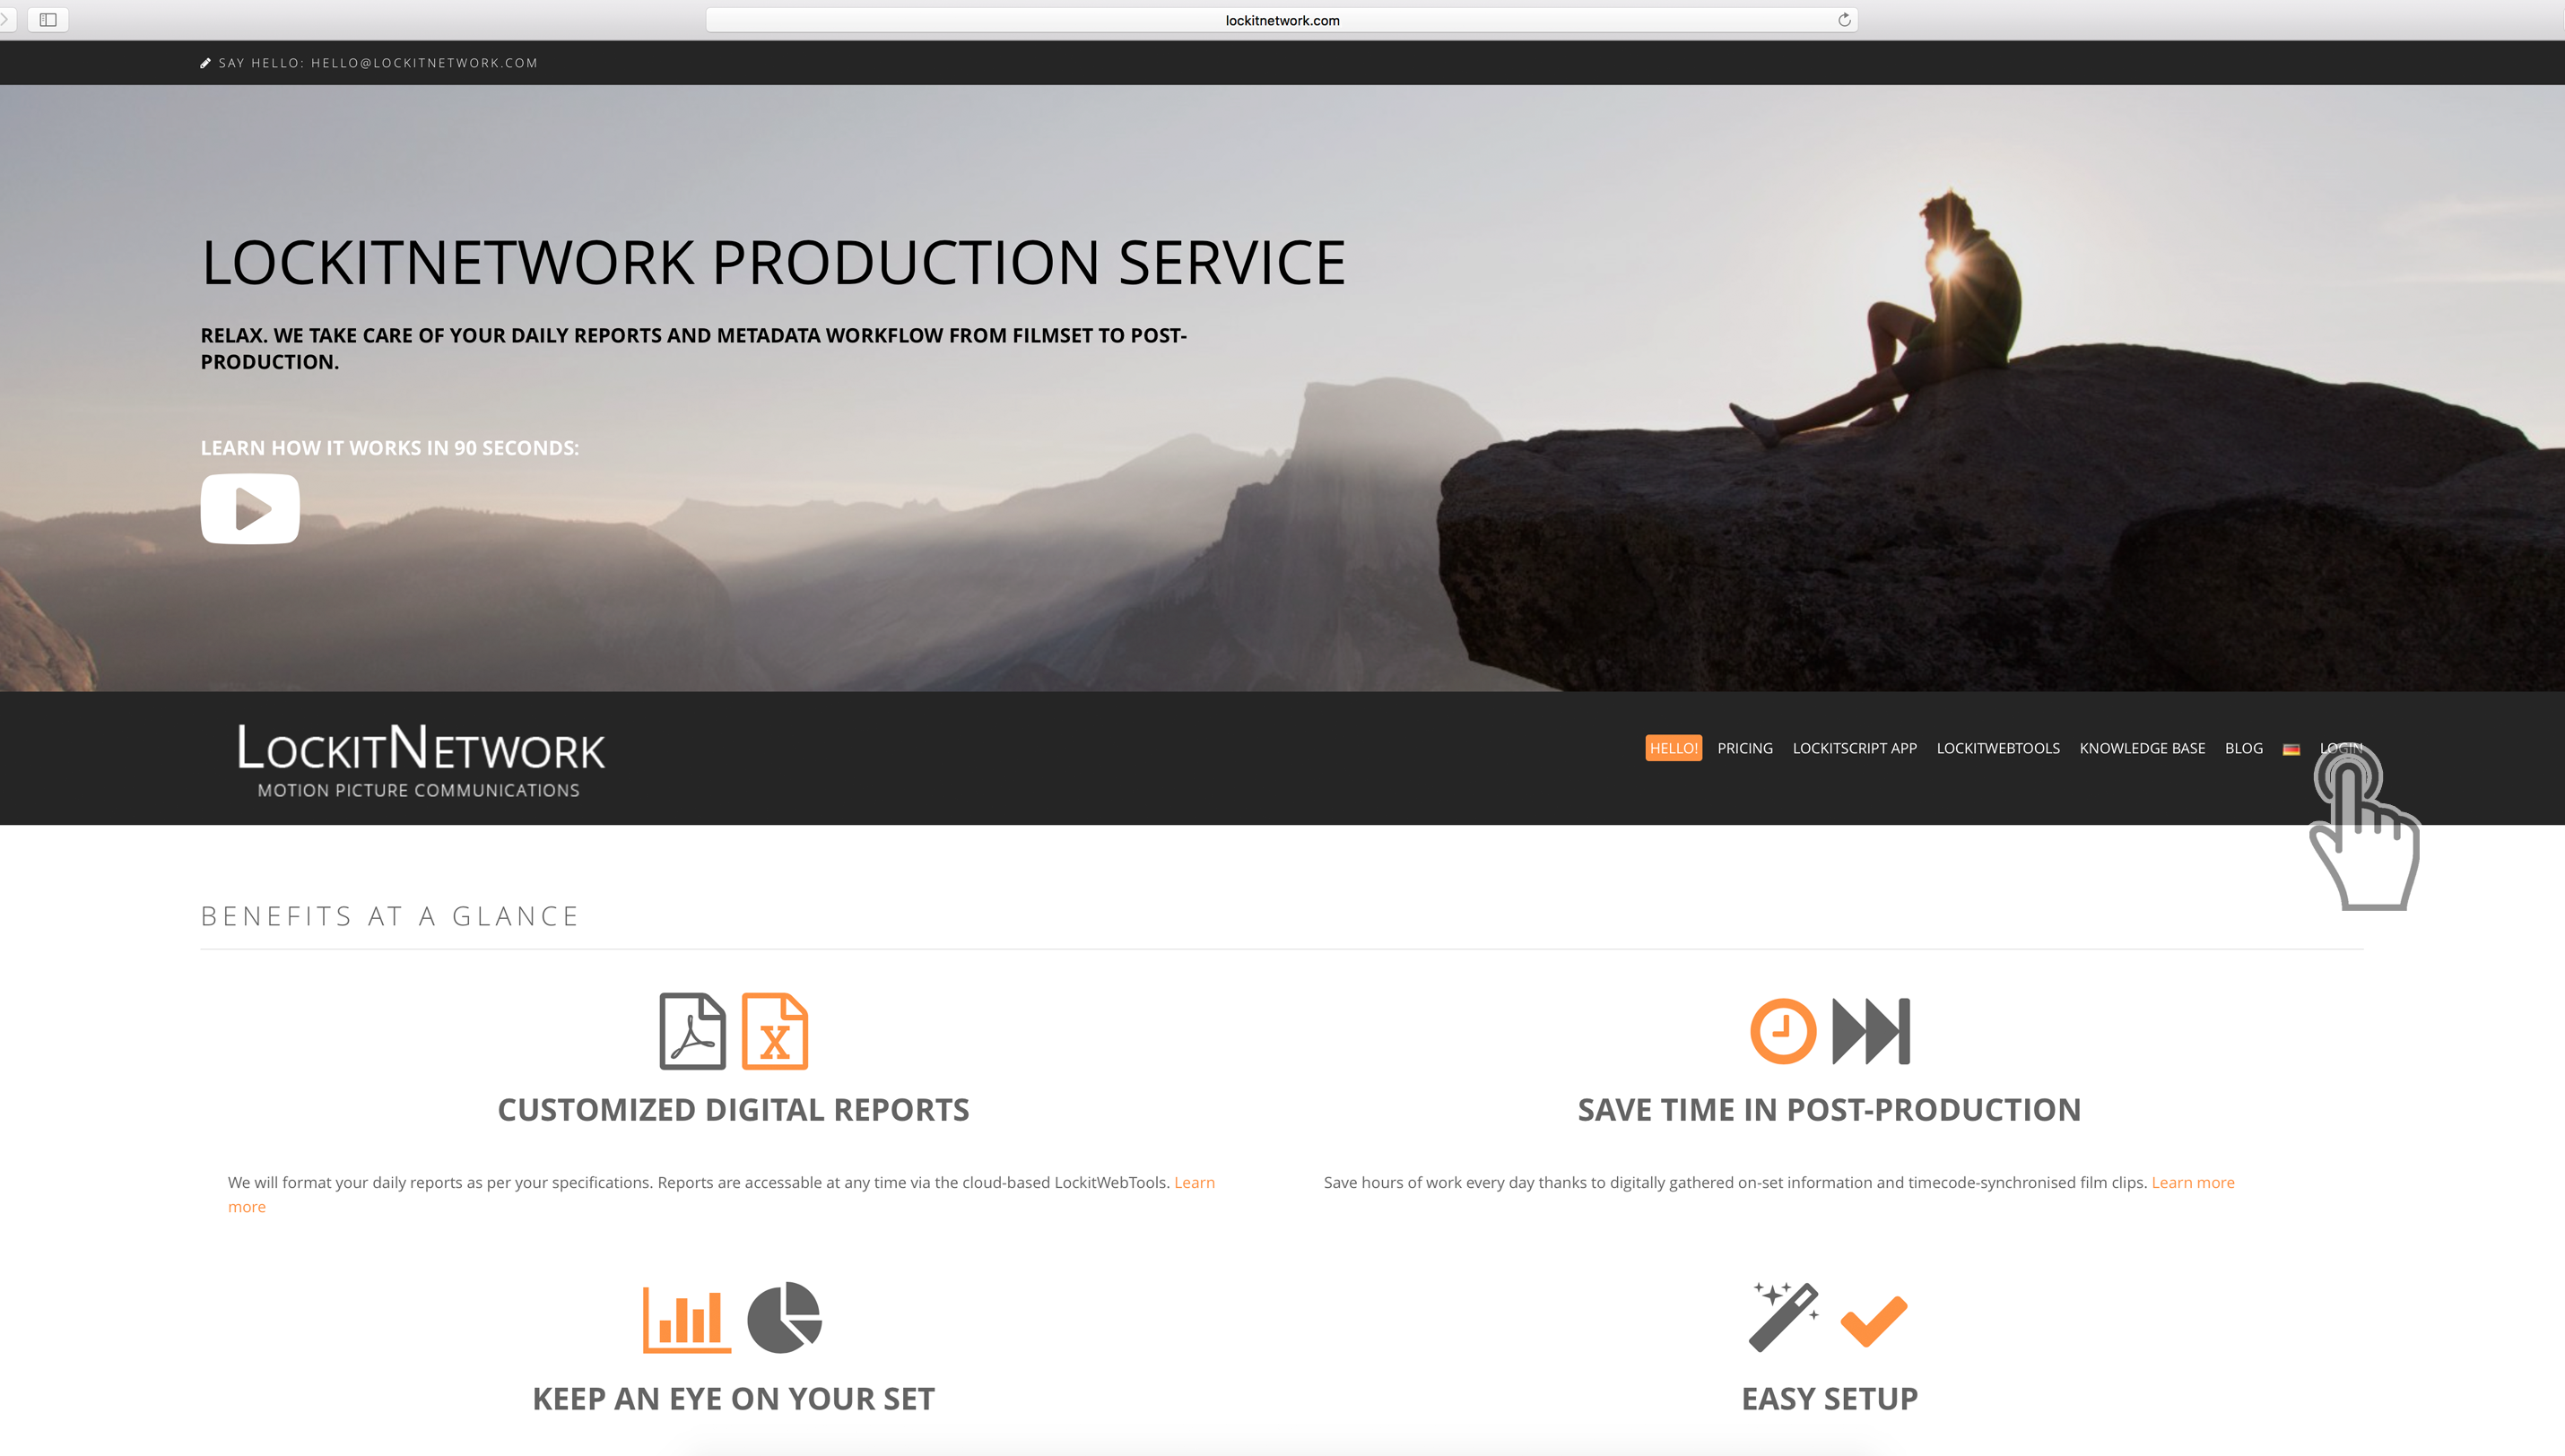
WebTools Import
Get Started!
Prepare your projects easily in a browser and synchronise information with the LockitScript app afterwards. The most efficient way to get started is our time-saving importing module.

Upload a growing number of popular script writing and pre-production software files into the LockitWebTools. Our import module extracts scene information such as scene, ERT /ART, sets, IN/OUT, DAY/NIGHT… and you can start working right away!
Final Draft Script
Adobe Story Script
Excel / CSV
Fuzzlecheck-File
Pre-Producer Import
PDF script and call sheet
Tutorials
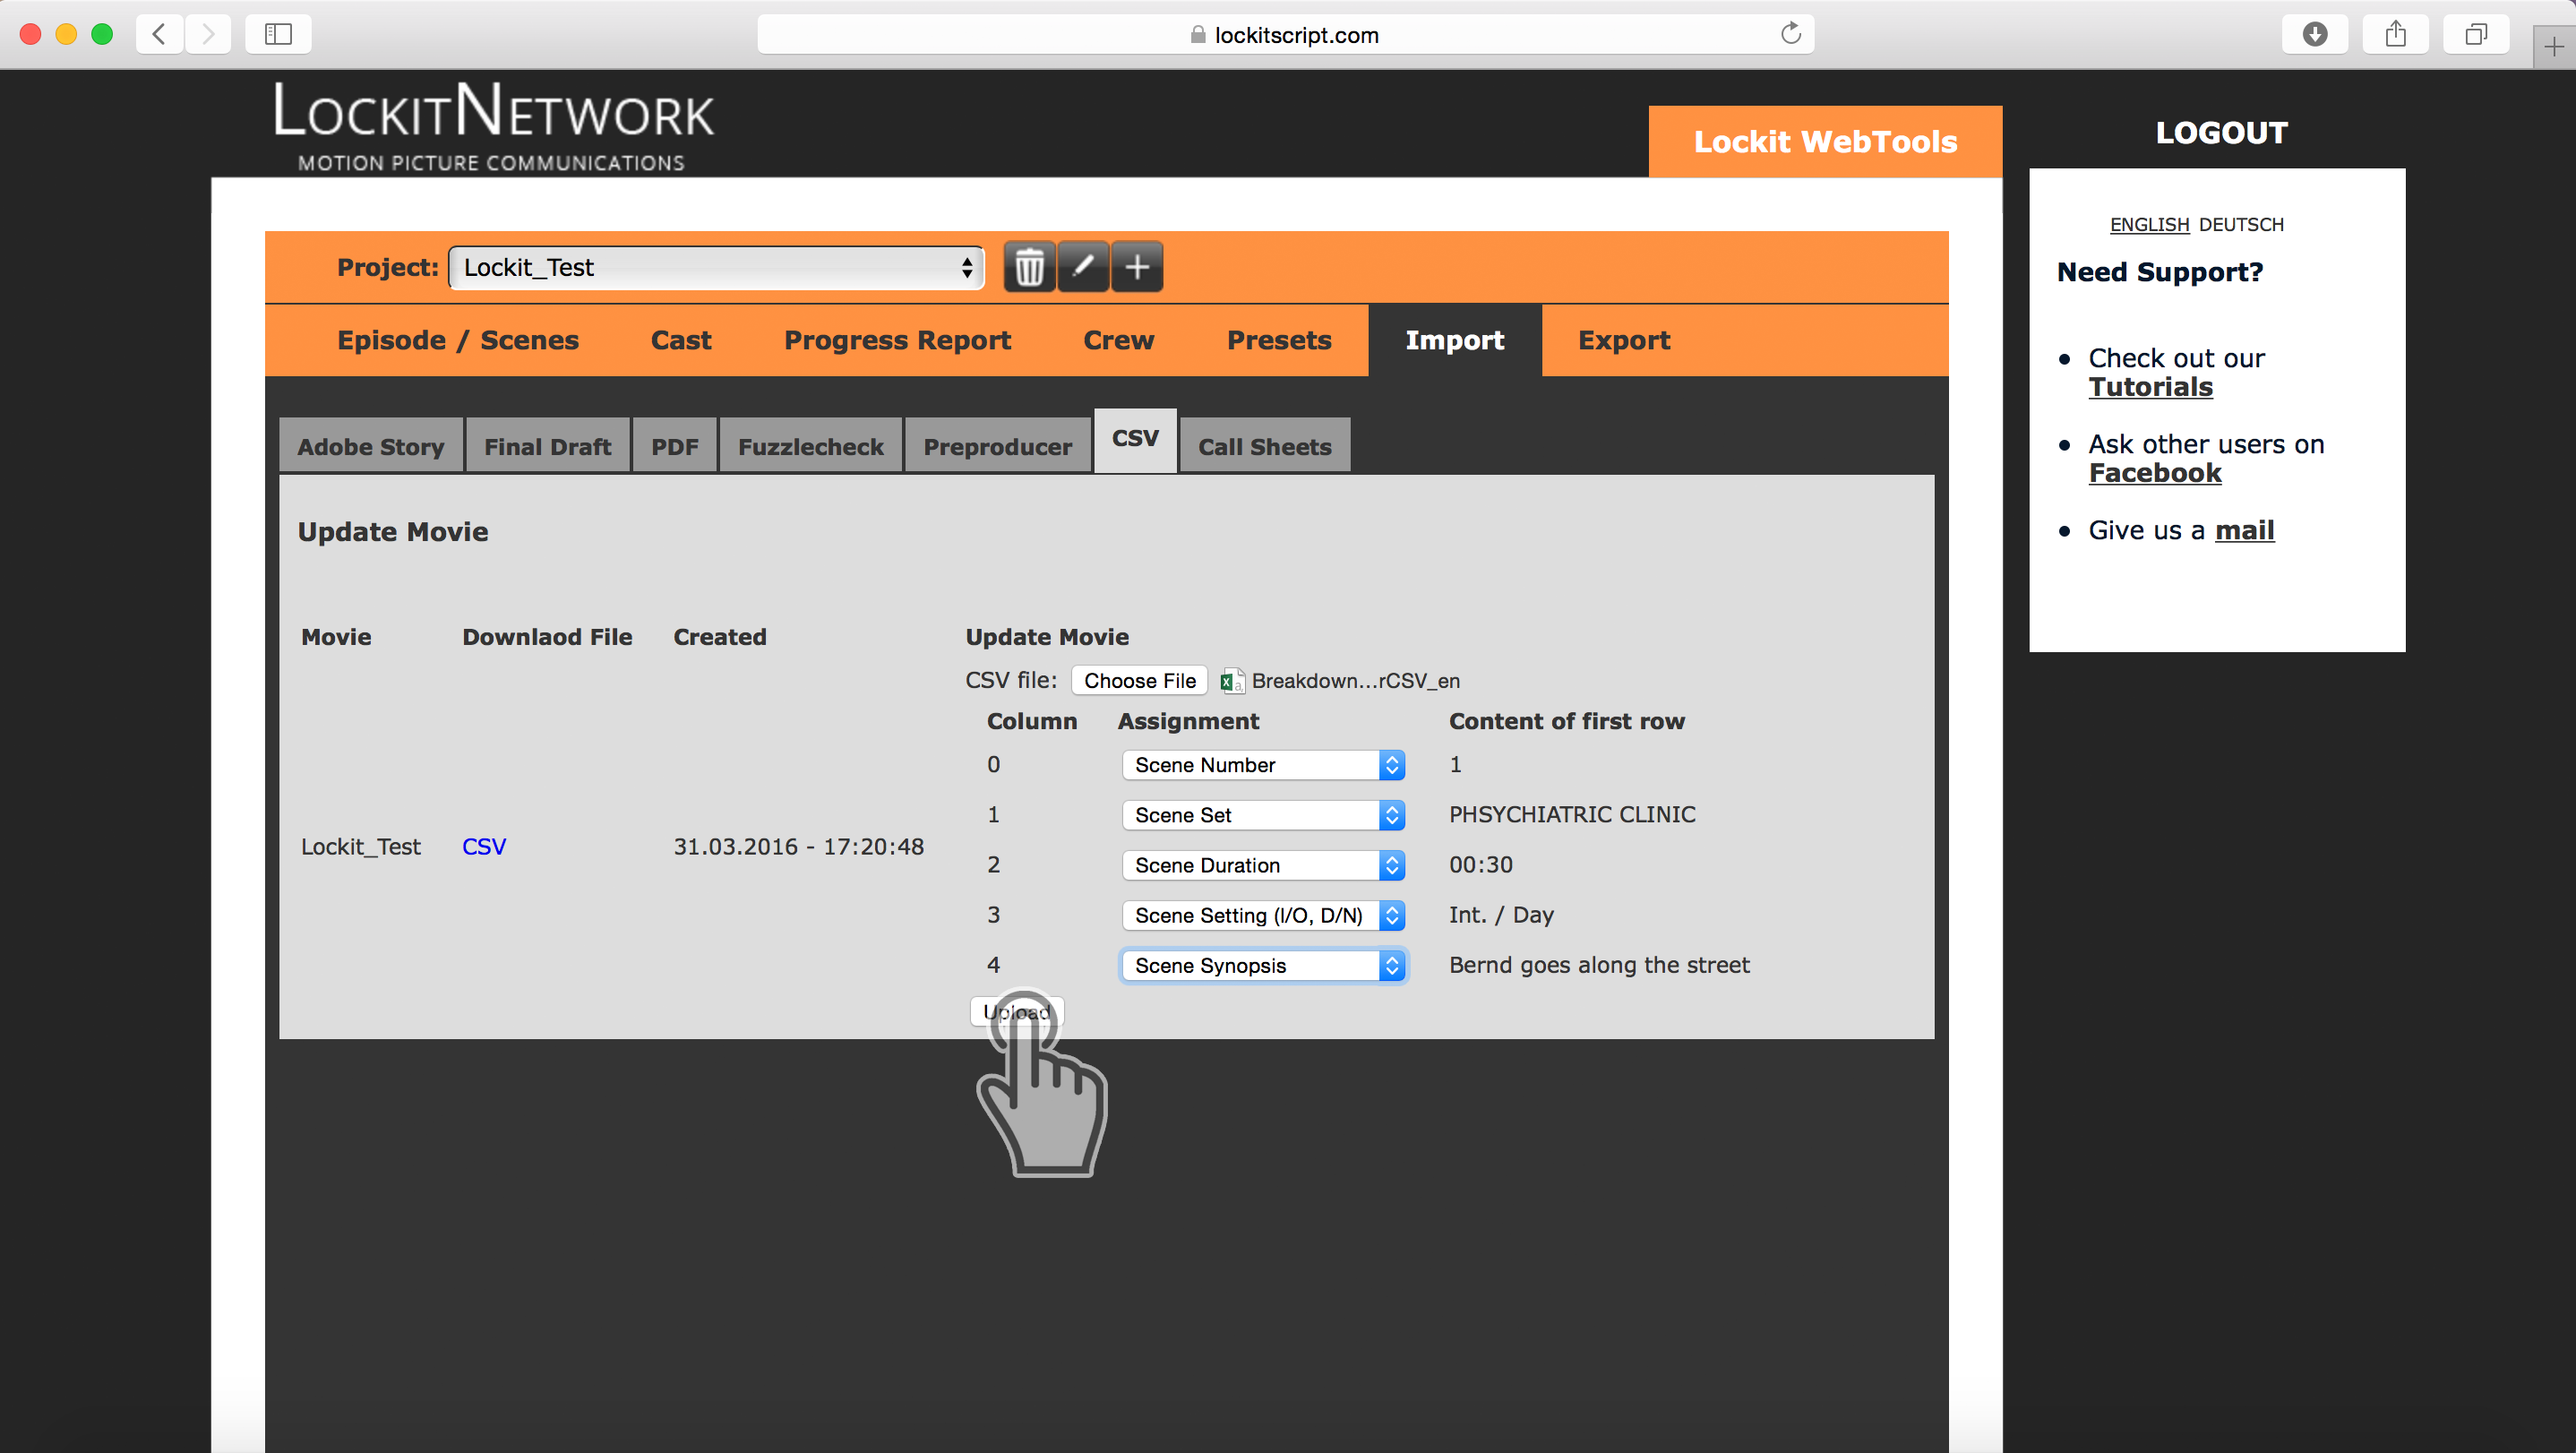
Excel / CSV Import
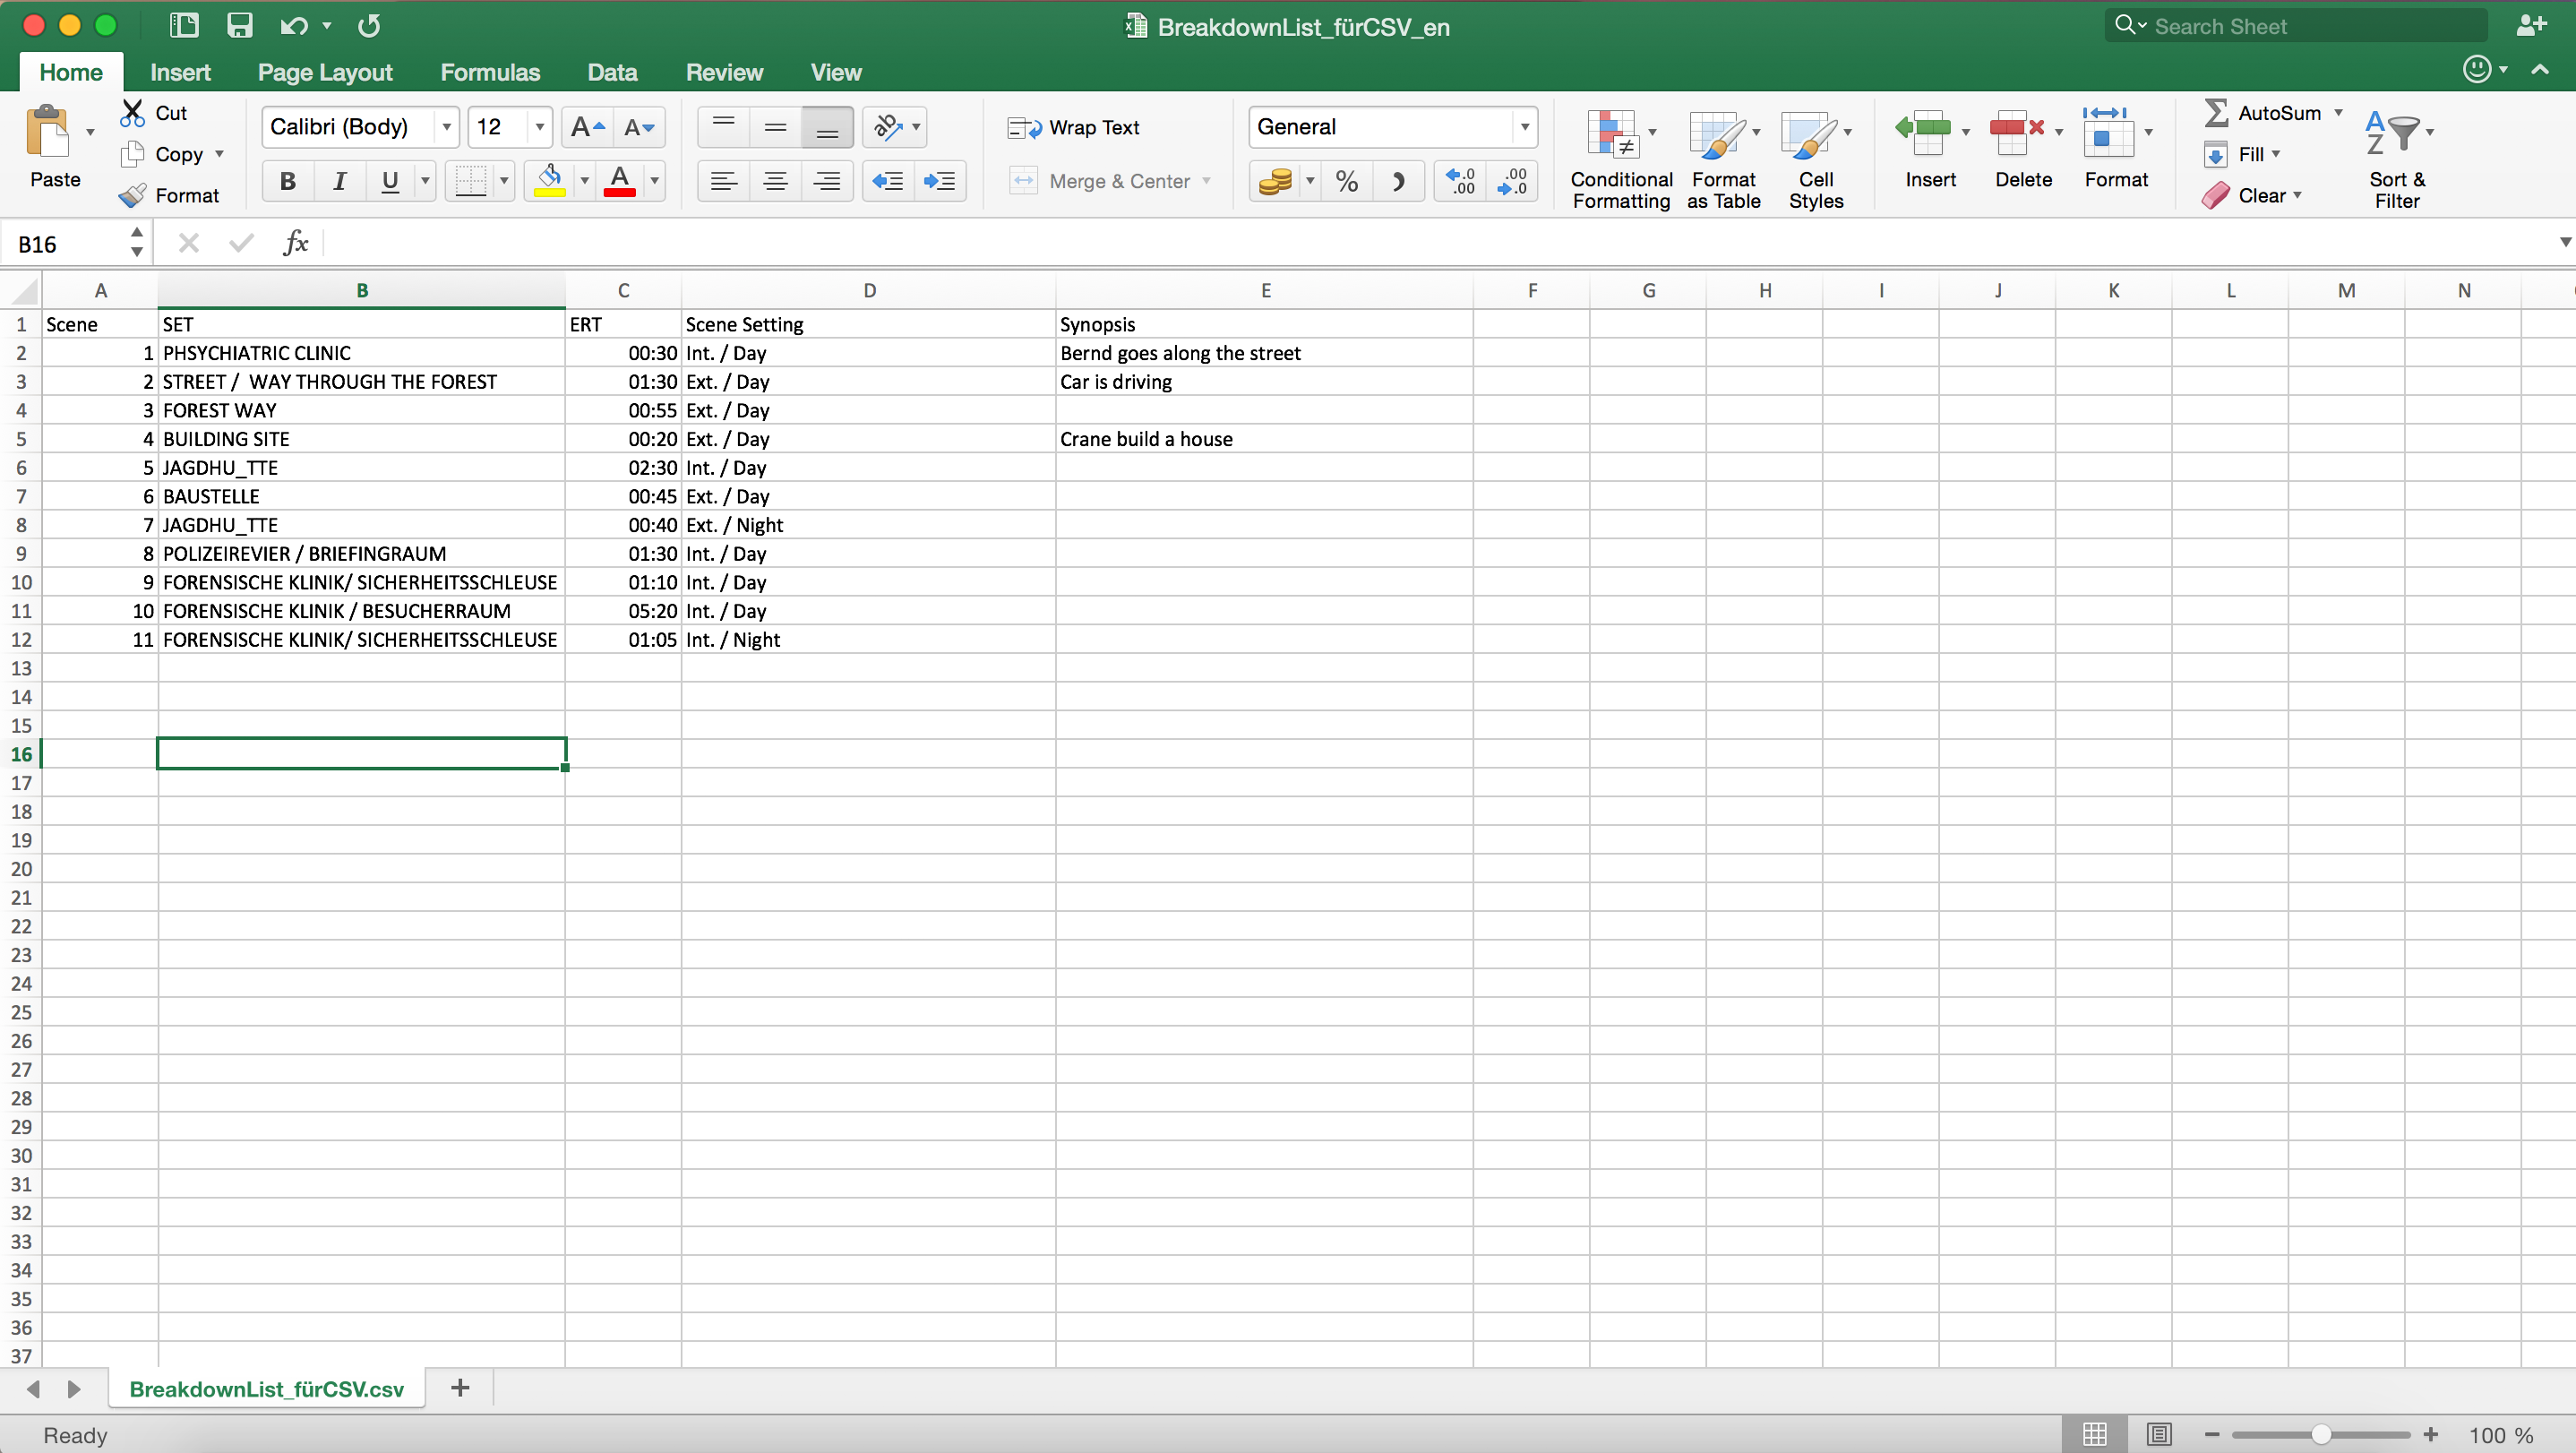
Make sure that all values belonging to a category (like “Scene Number, Set, ERT, synopsis etc.) are placed below each other in one column
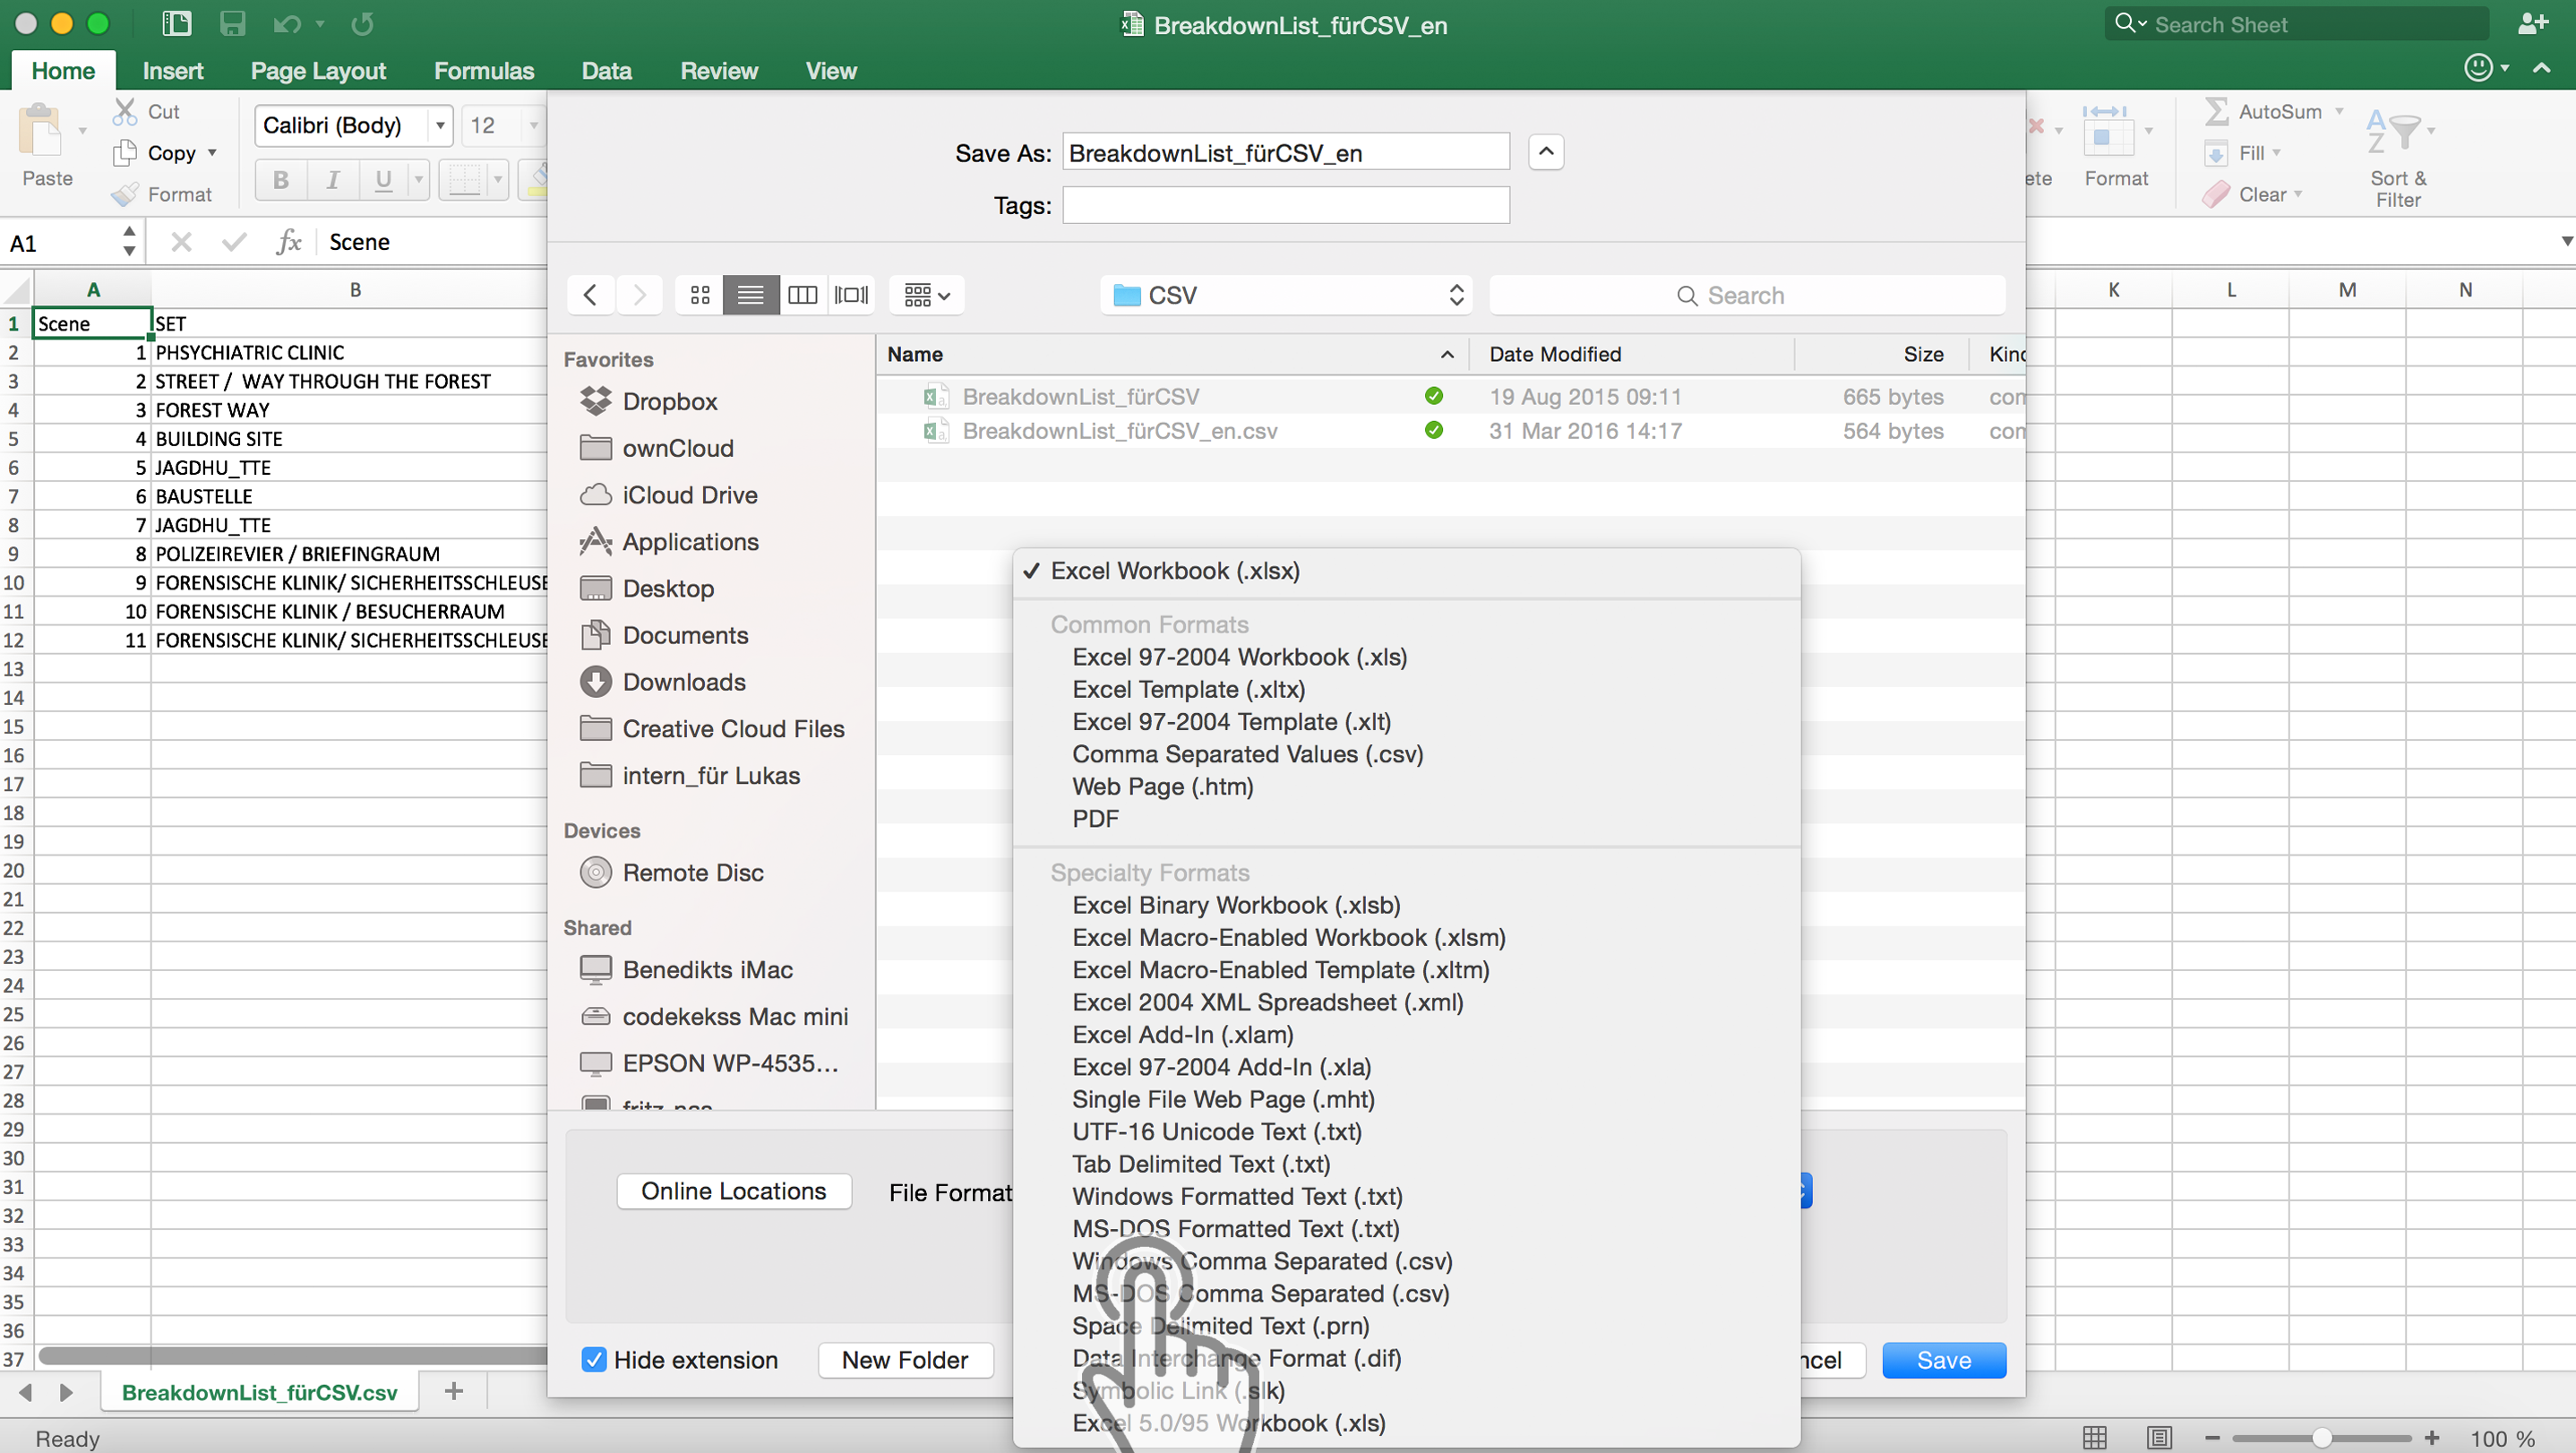
Click “Save As” and choose “Windows Comma Separated (.csv)
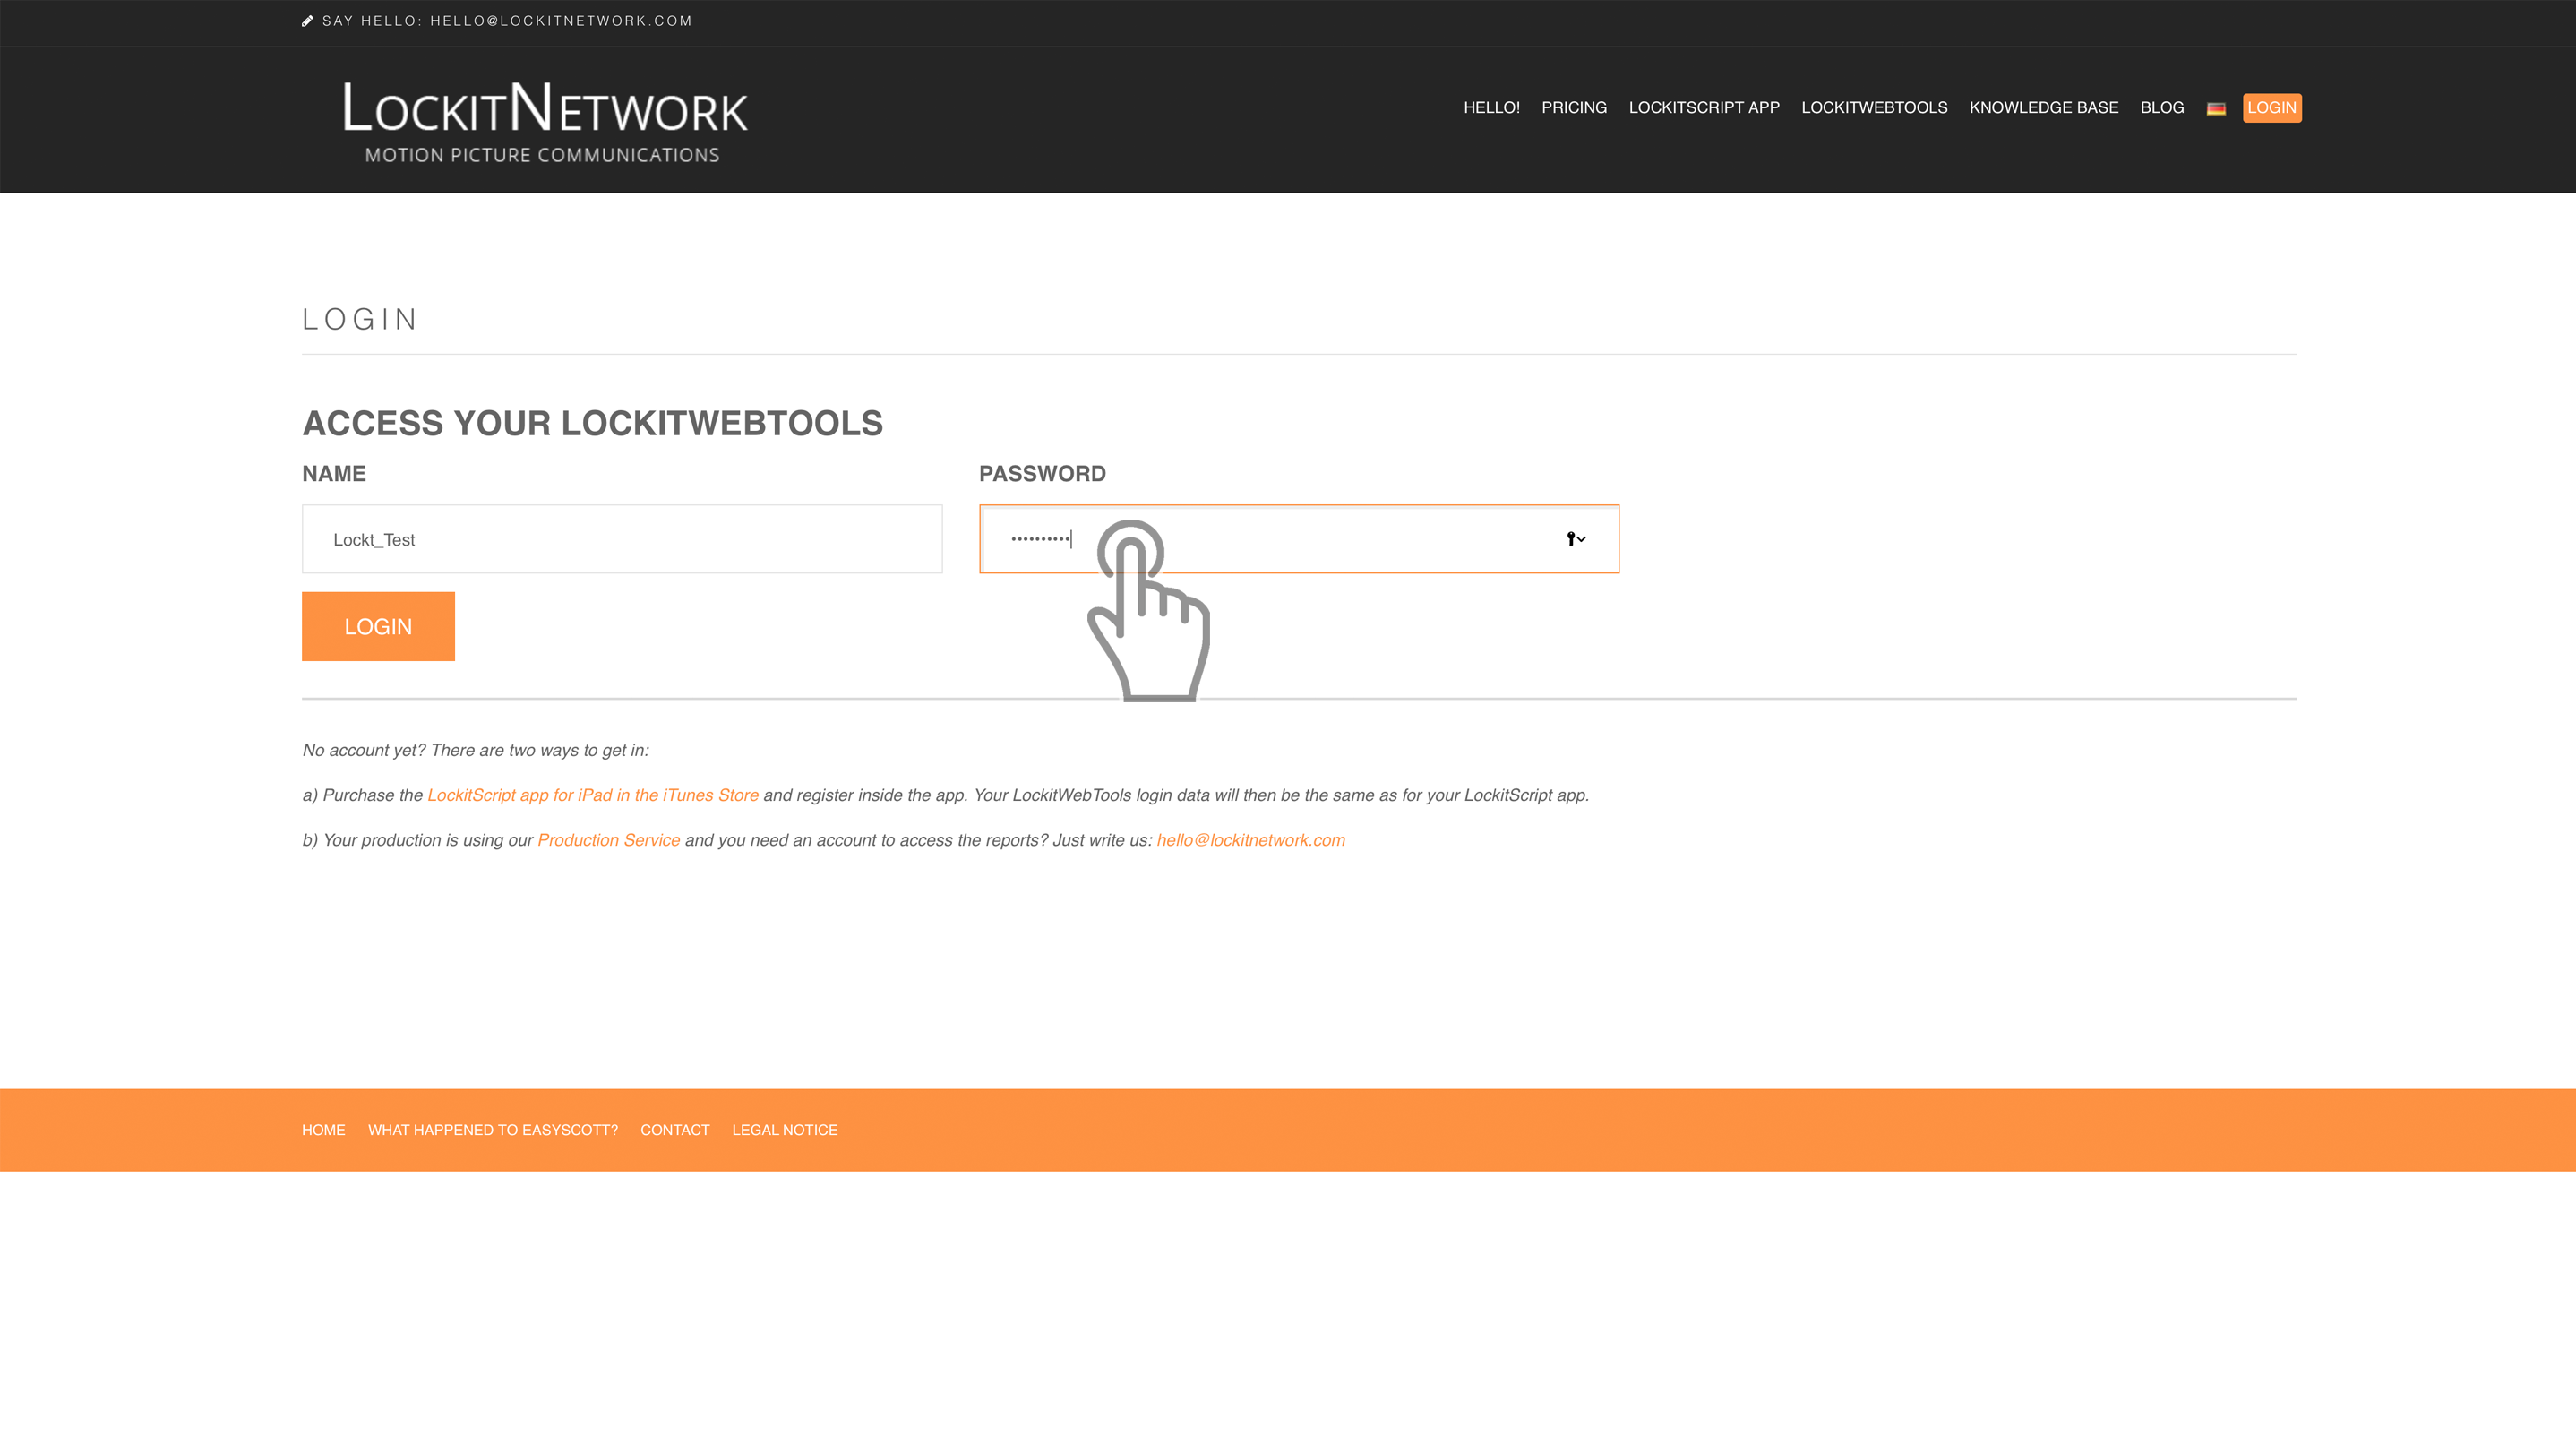
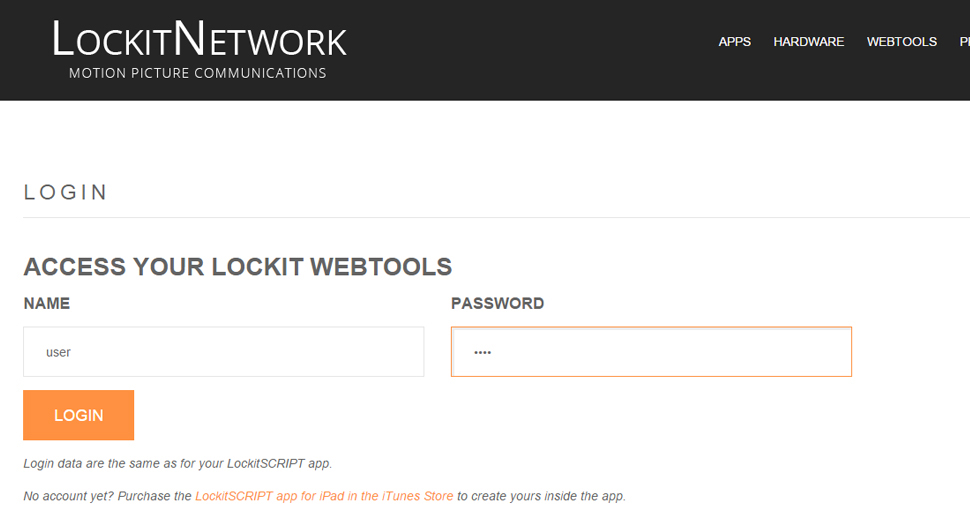
Visit lockitnetwork.com/login and sign in using your login credentials
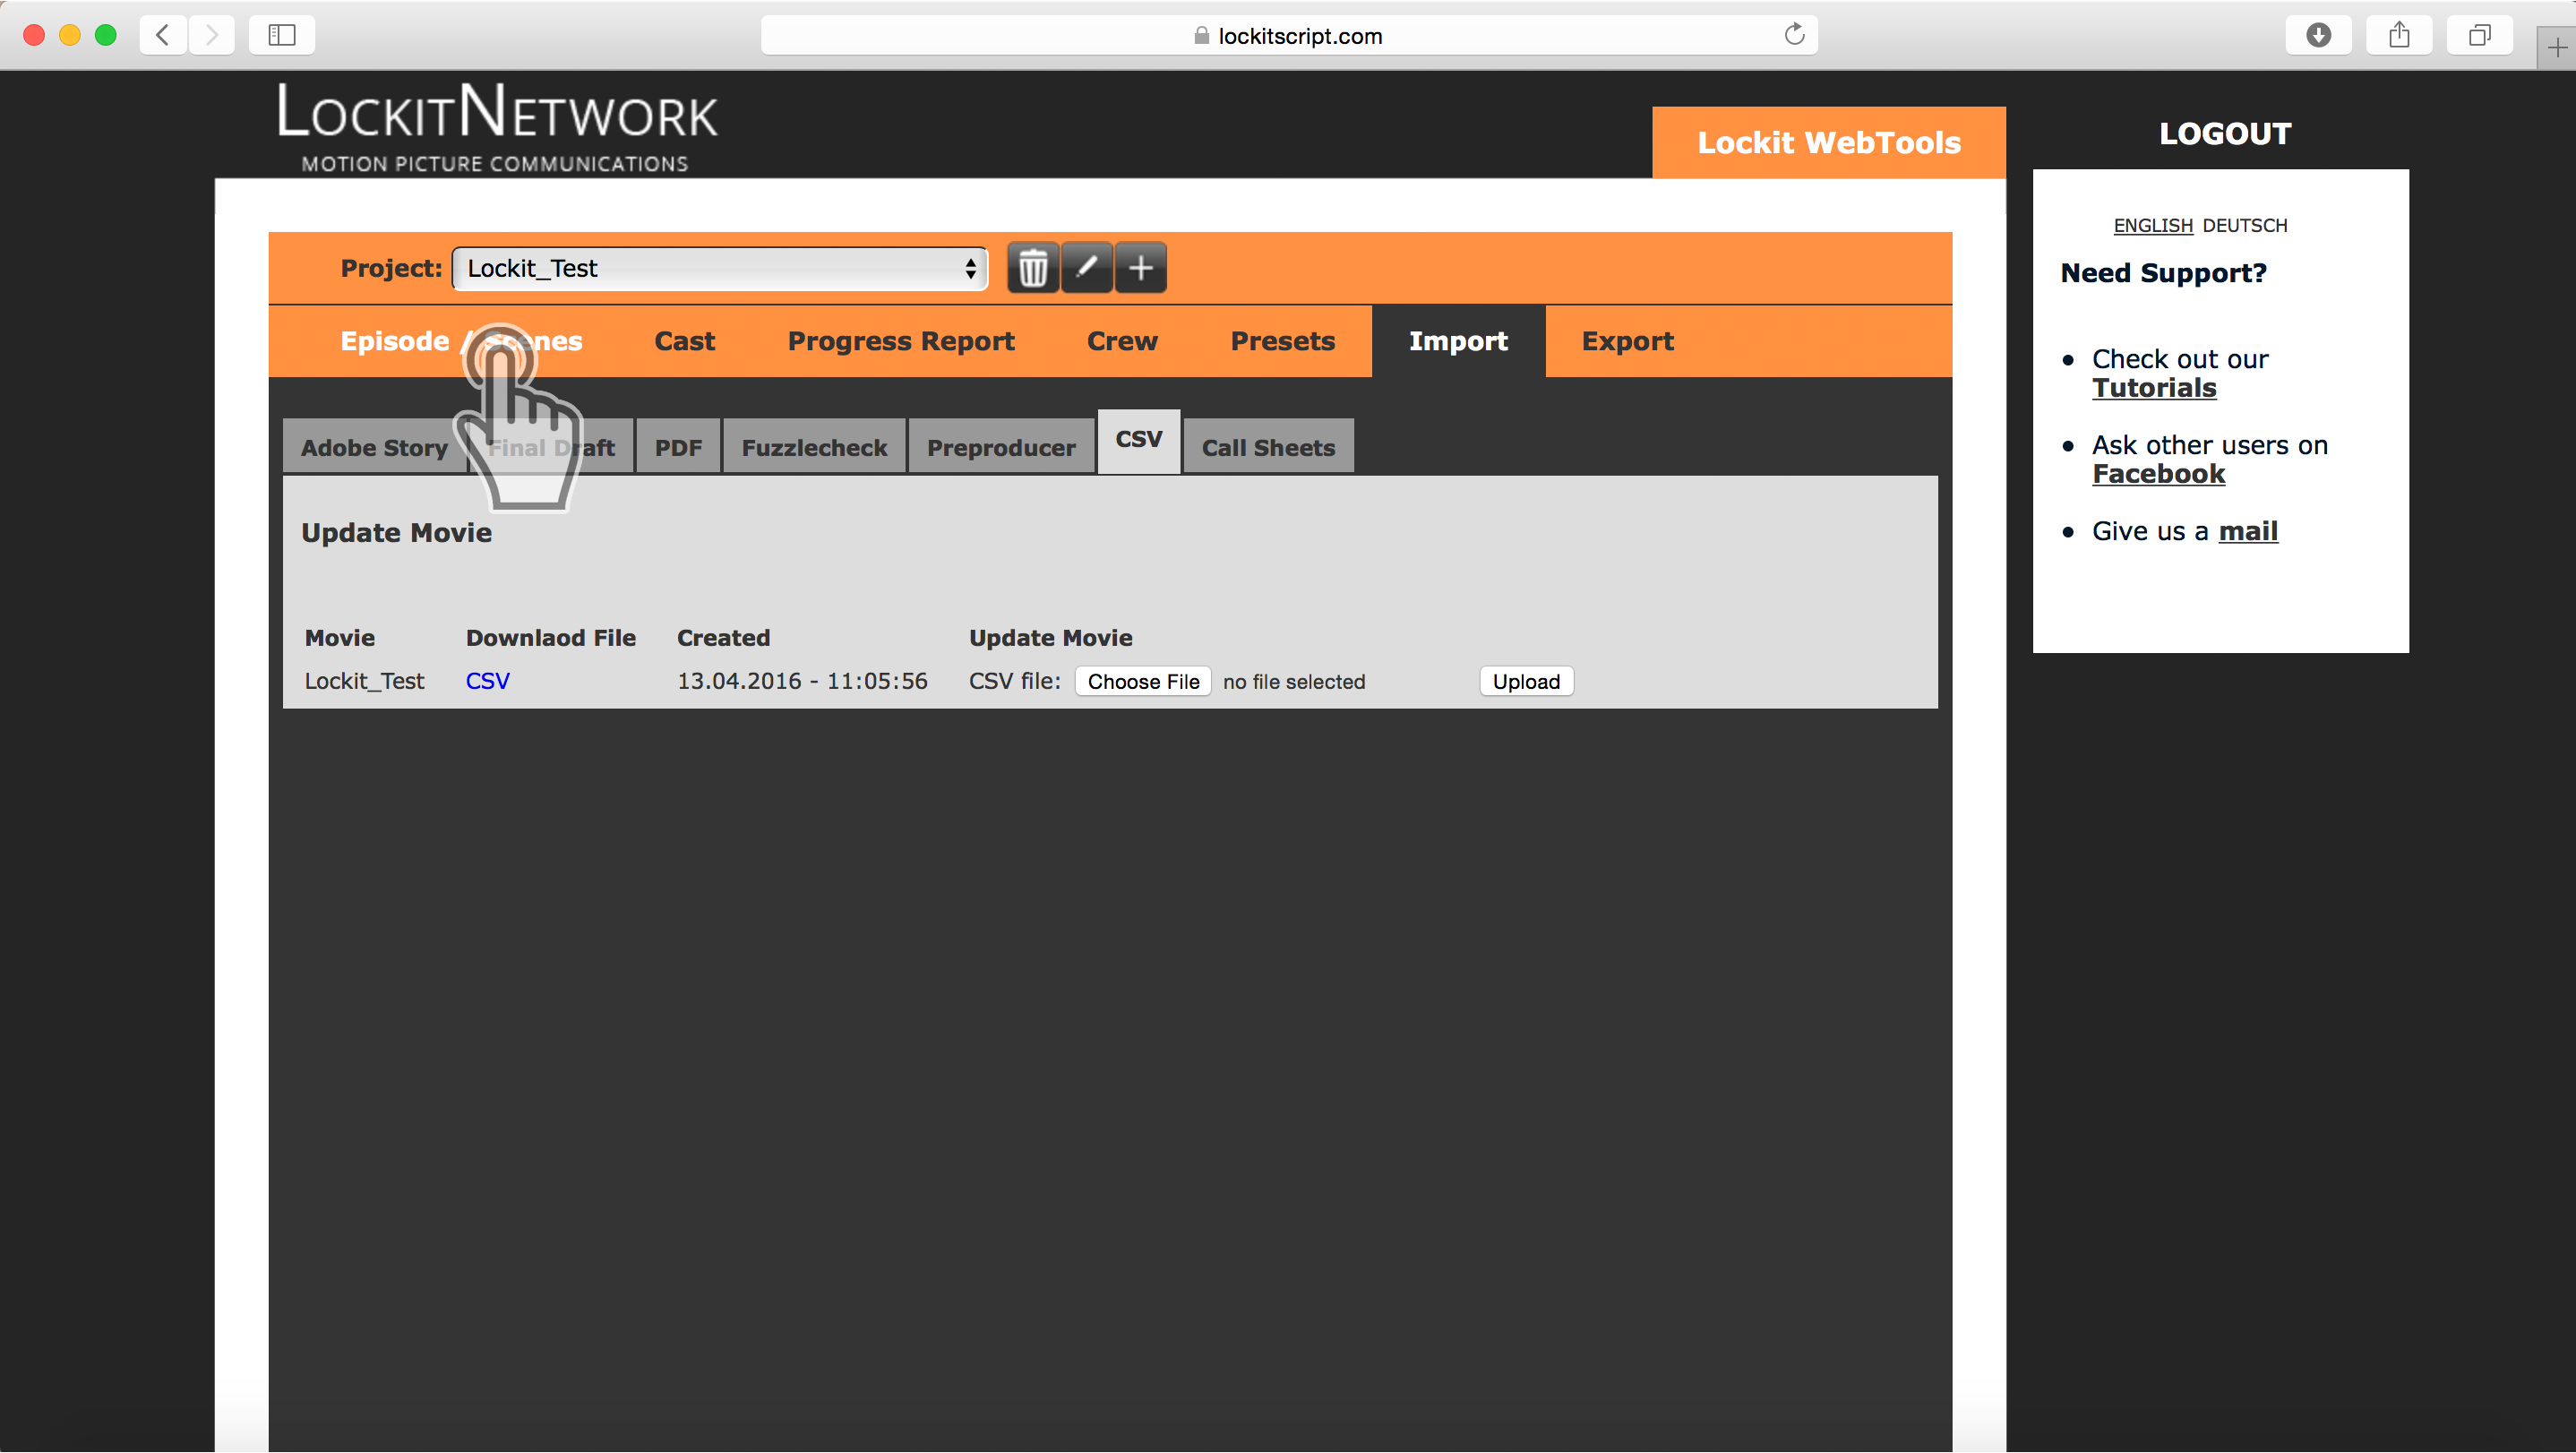
Click “Import” and select the “CSV” section
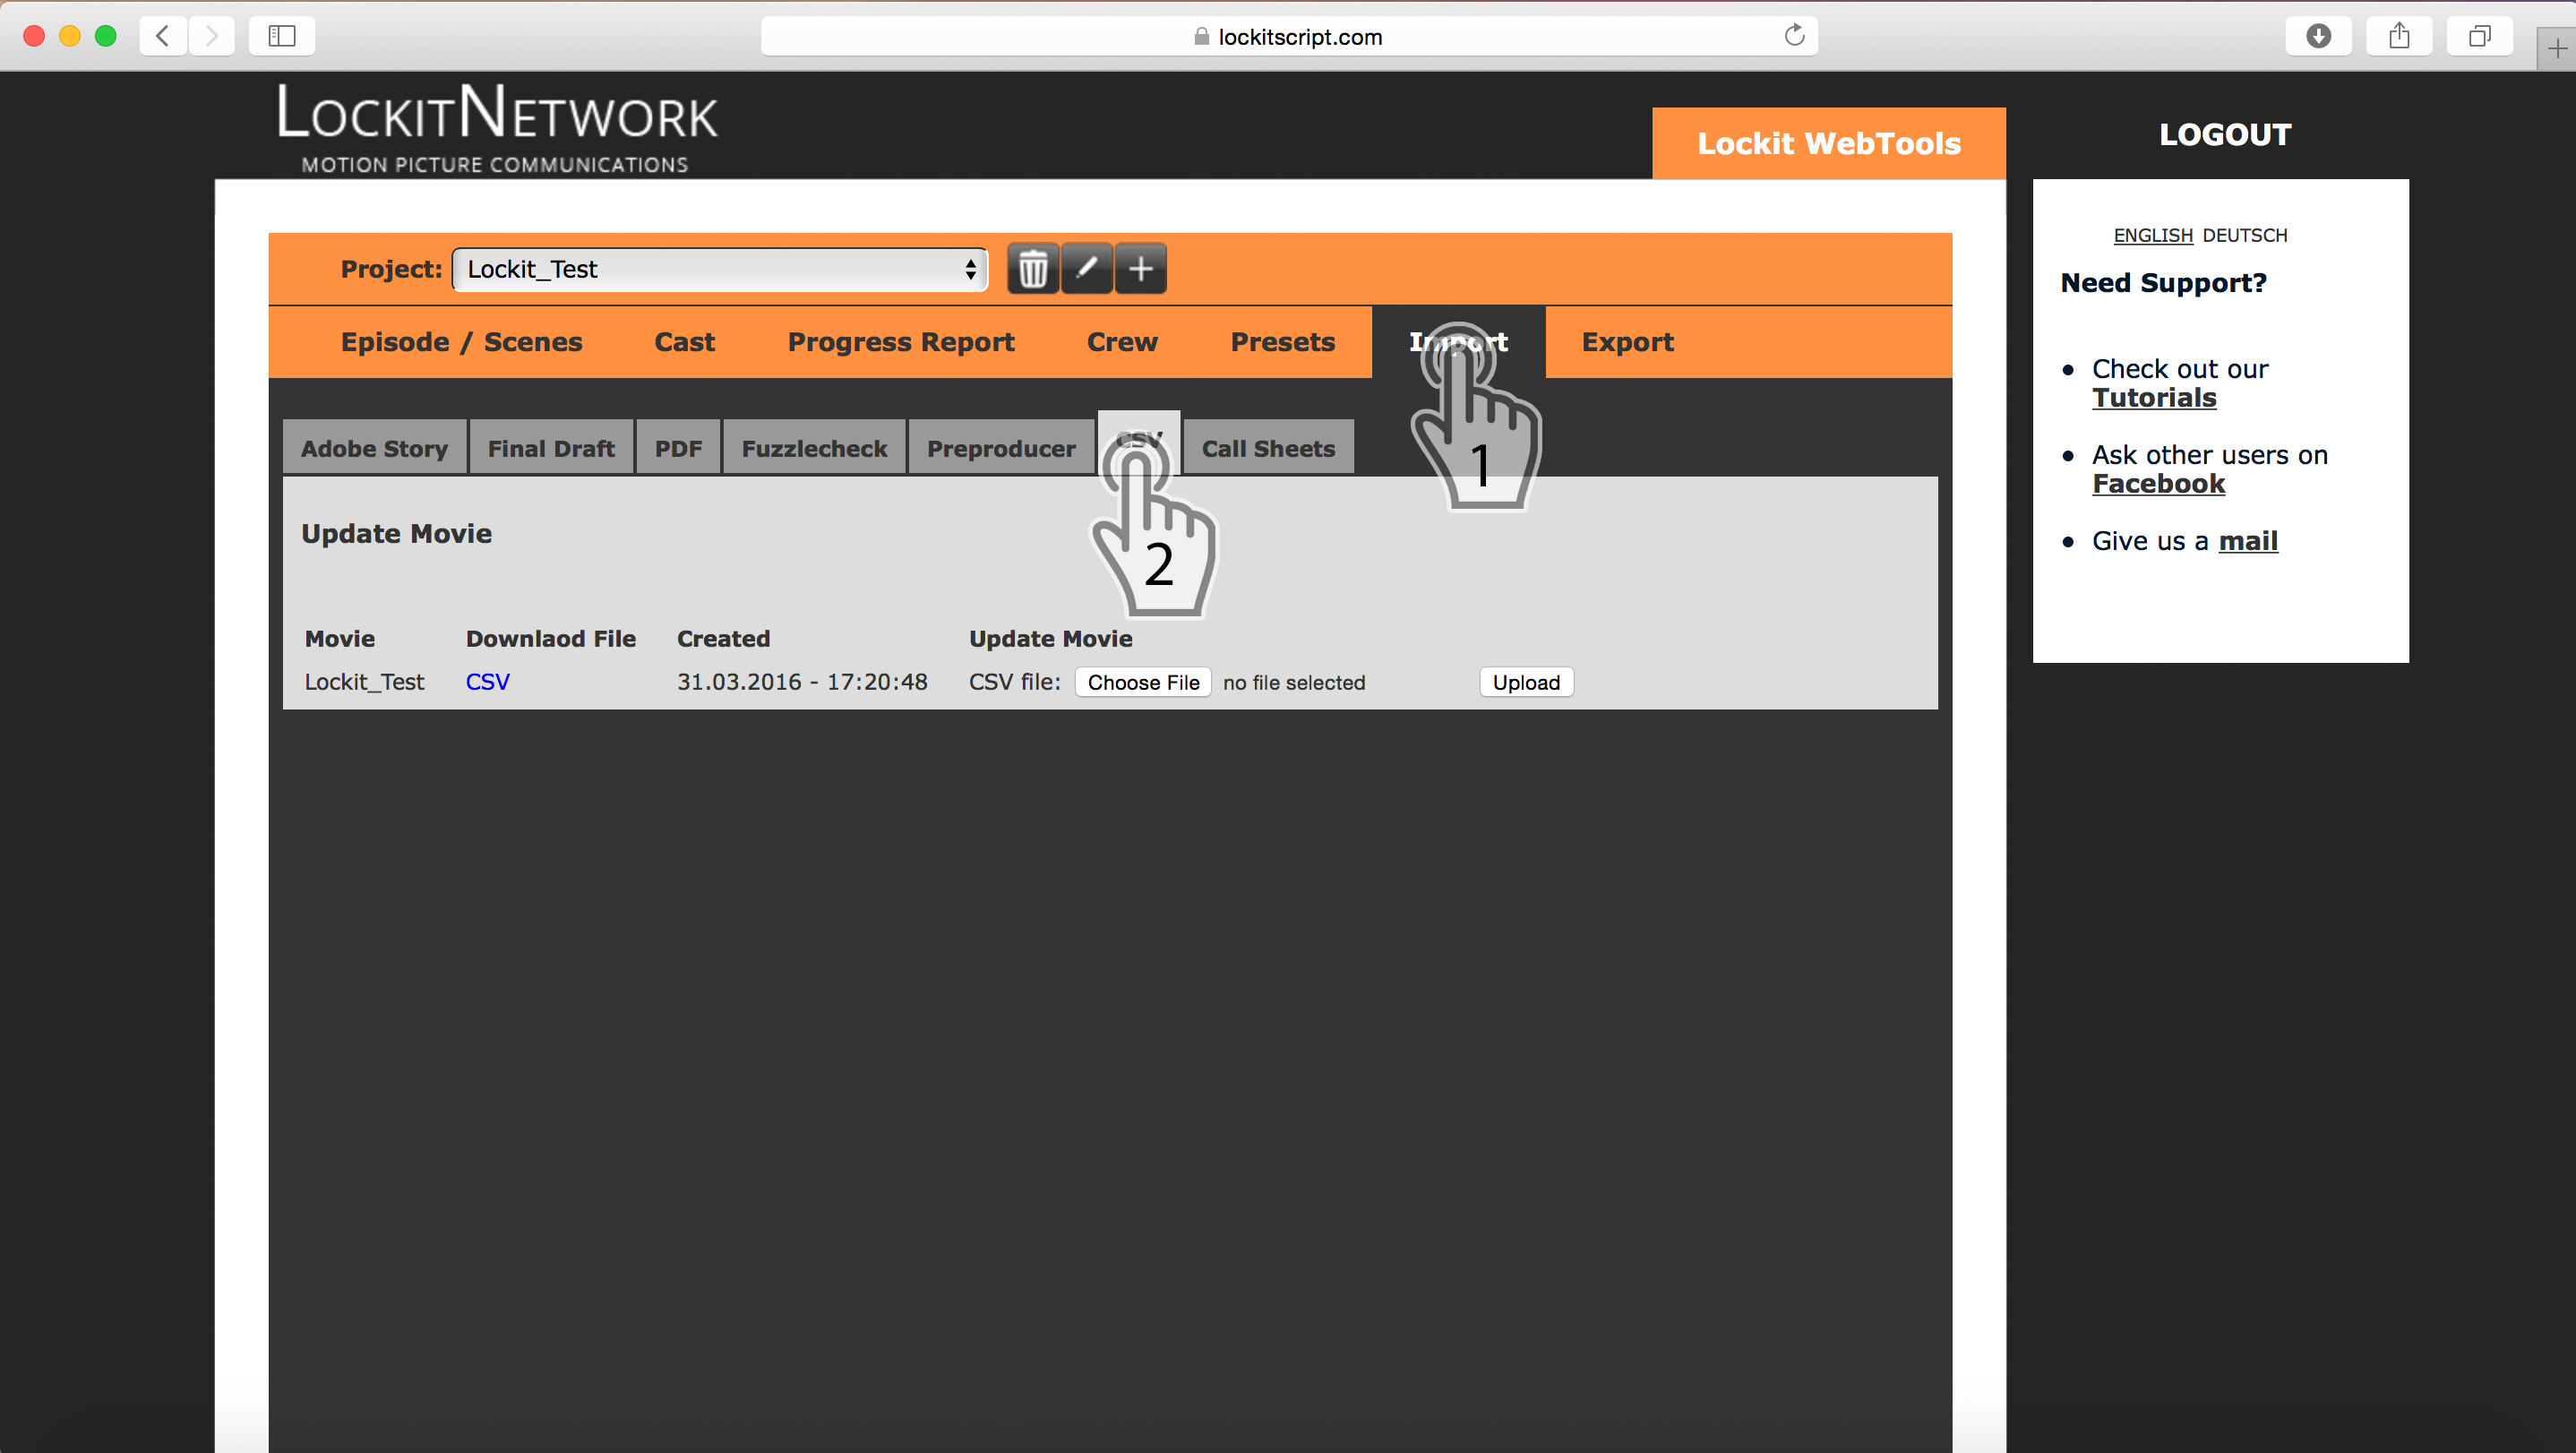
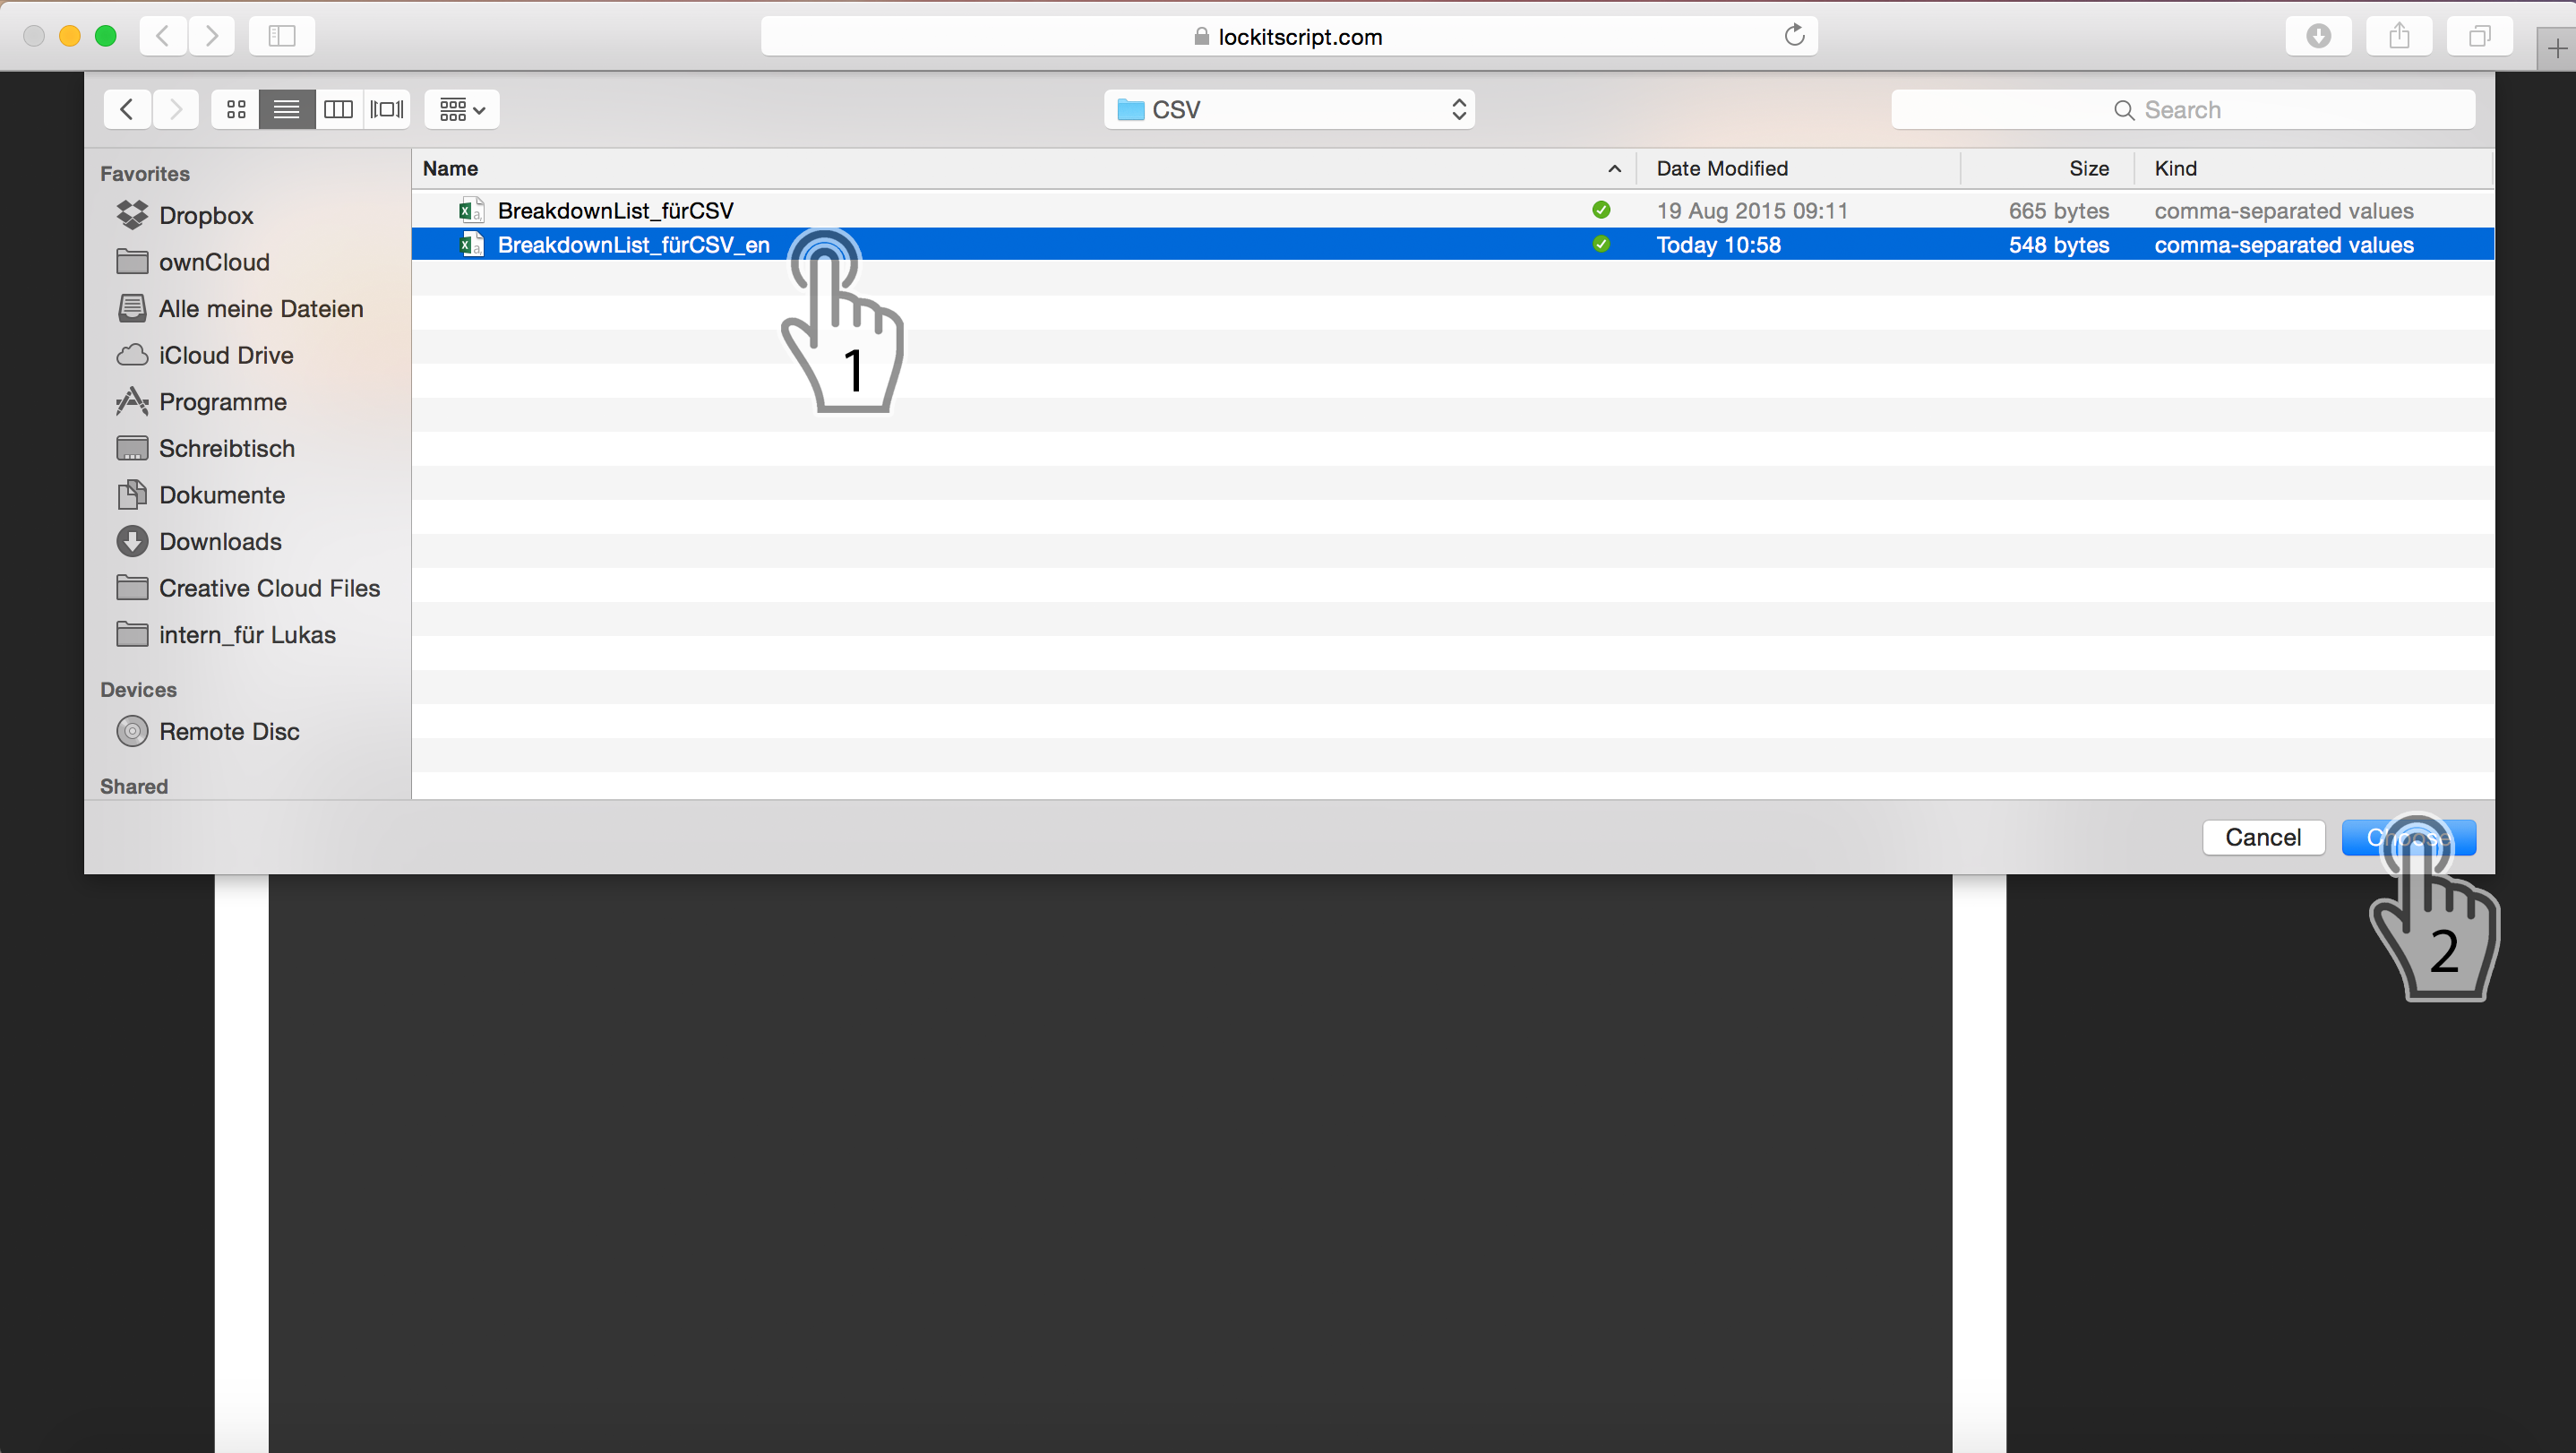
Click “Upload” and select the respective .csv file
[
Match the .csv data with the LockitNetwork Database
Since we can’t know which column in your .csv file has which content, the system will now ask you to select a LockitNetwork categorie for each column. E.g. if your first row contains the scene numbers select “Scene Number” in the dropdown
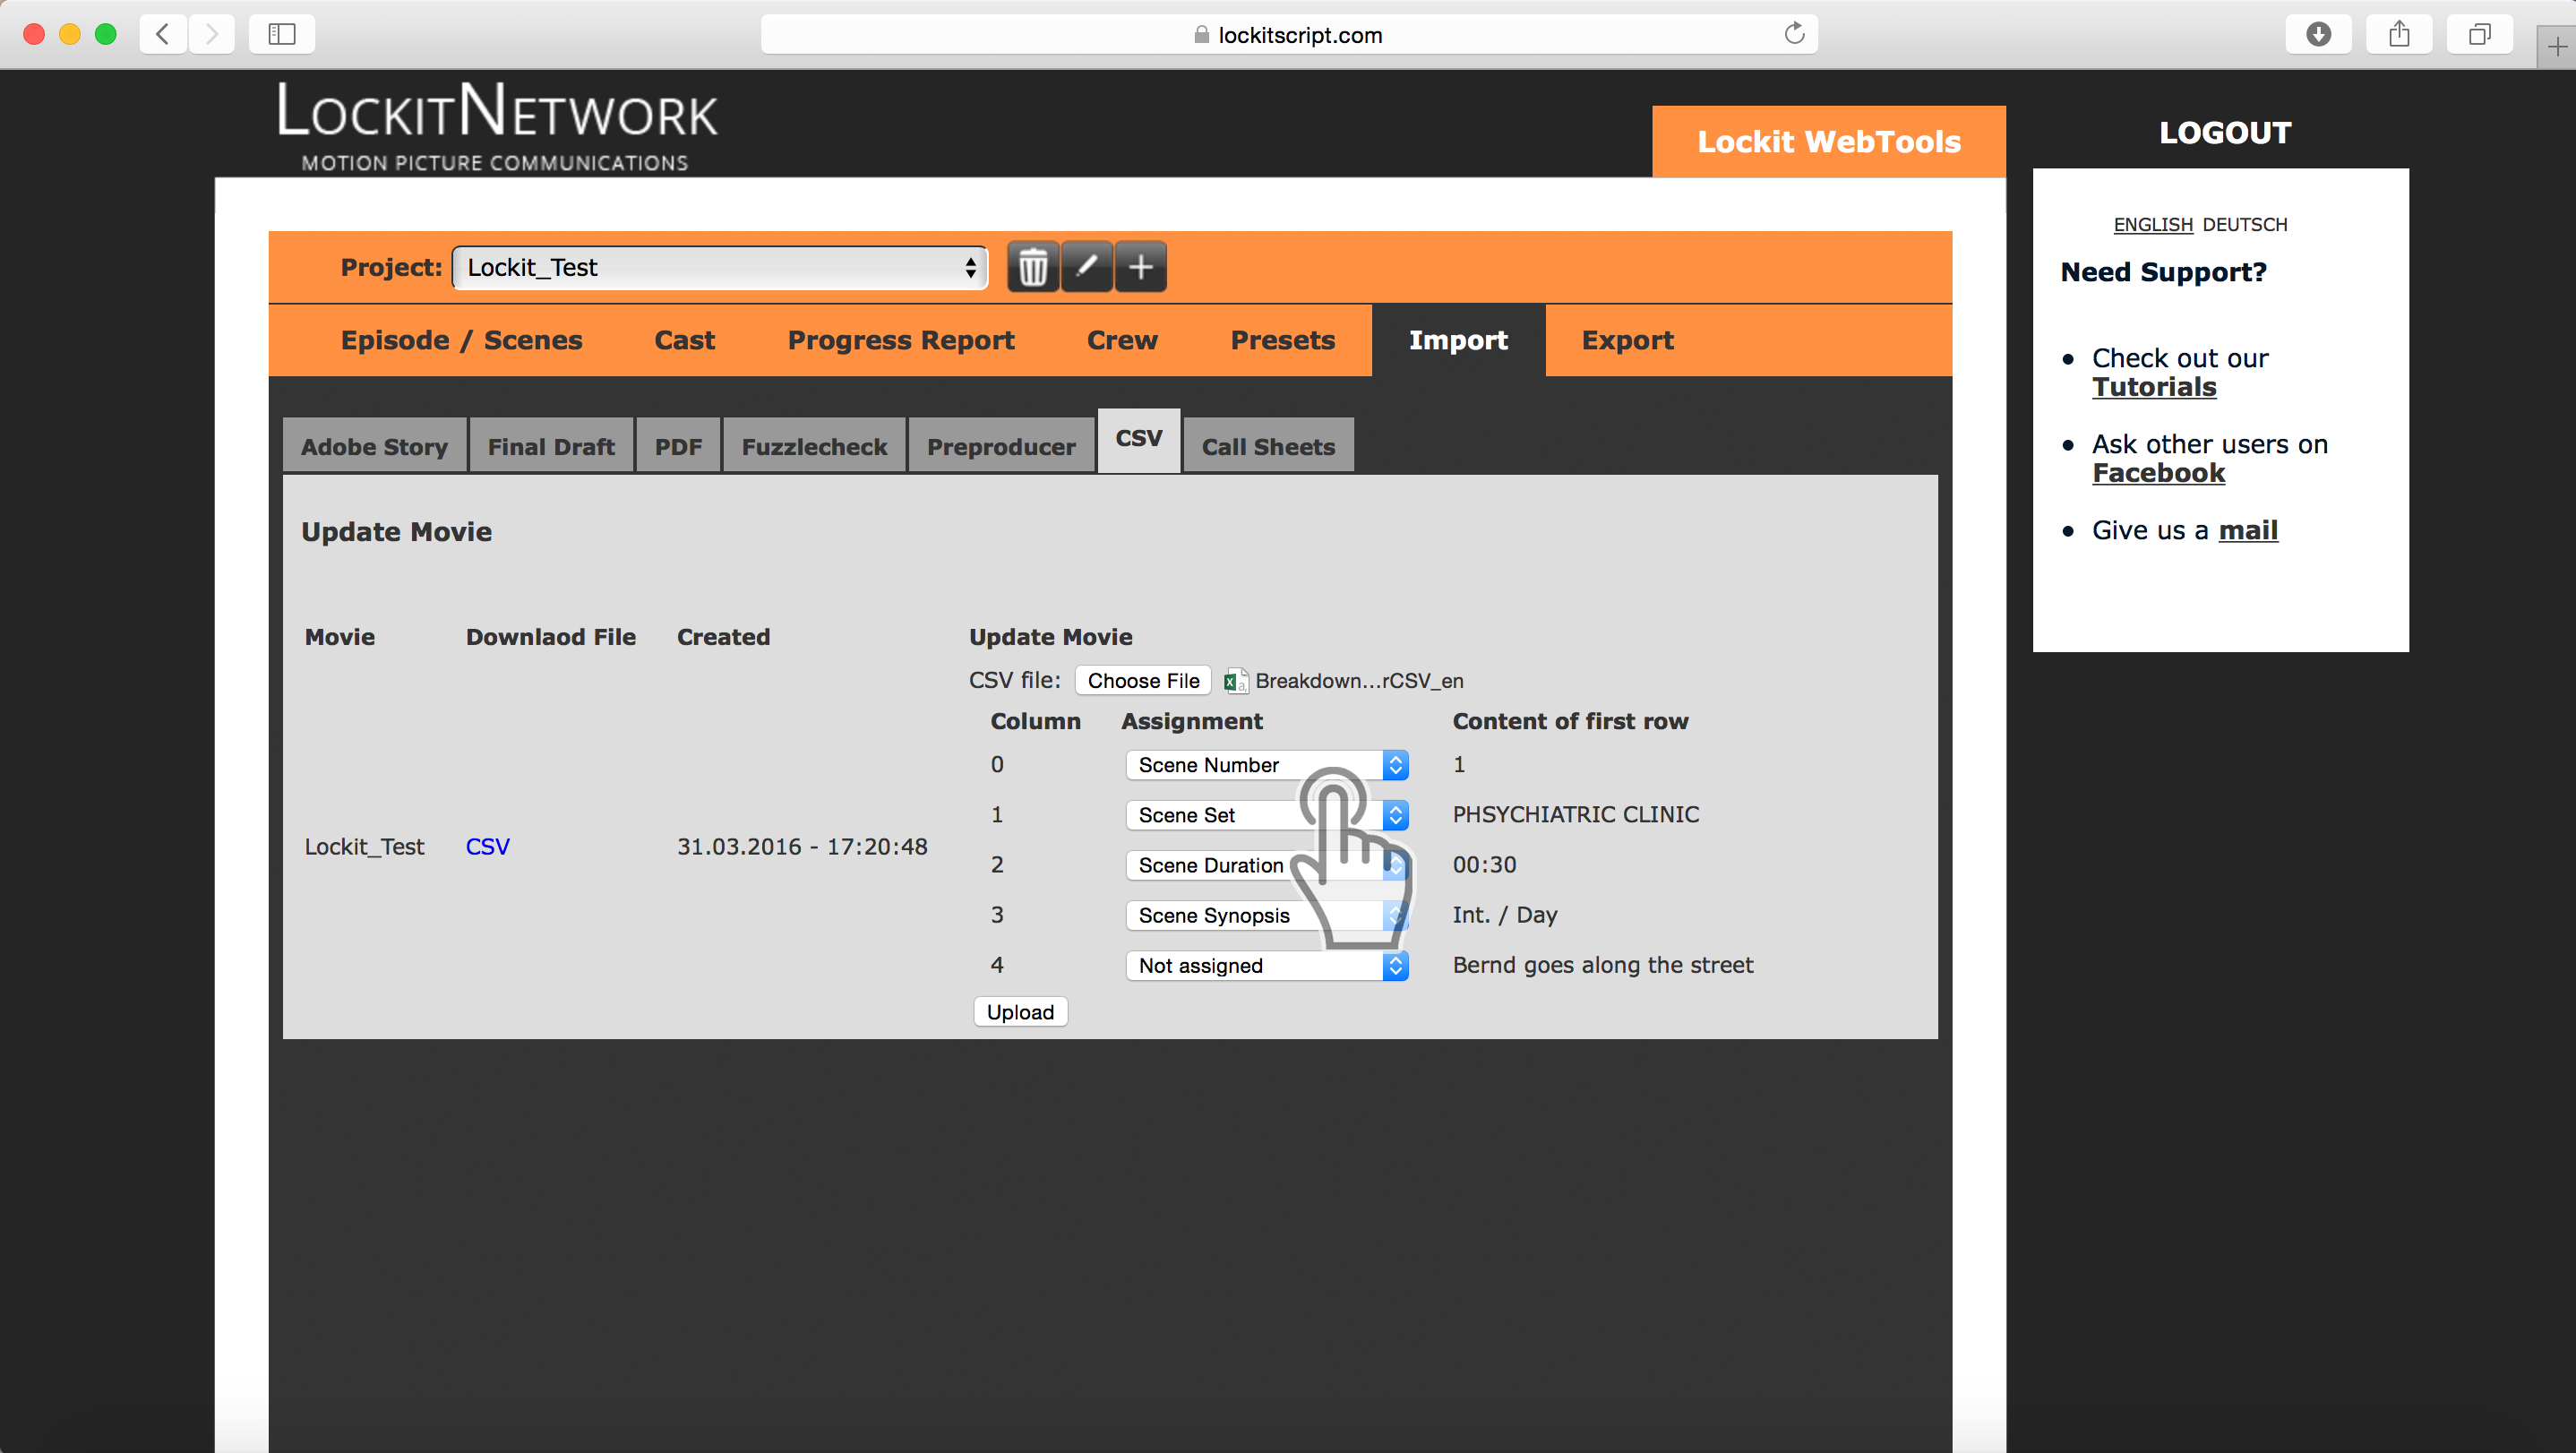
After selecting catagories for each relevant column (just select nothing for columns you don’t want to import) click “Upload”
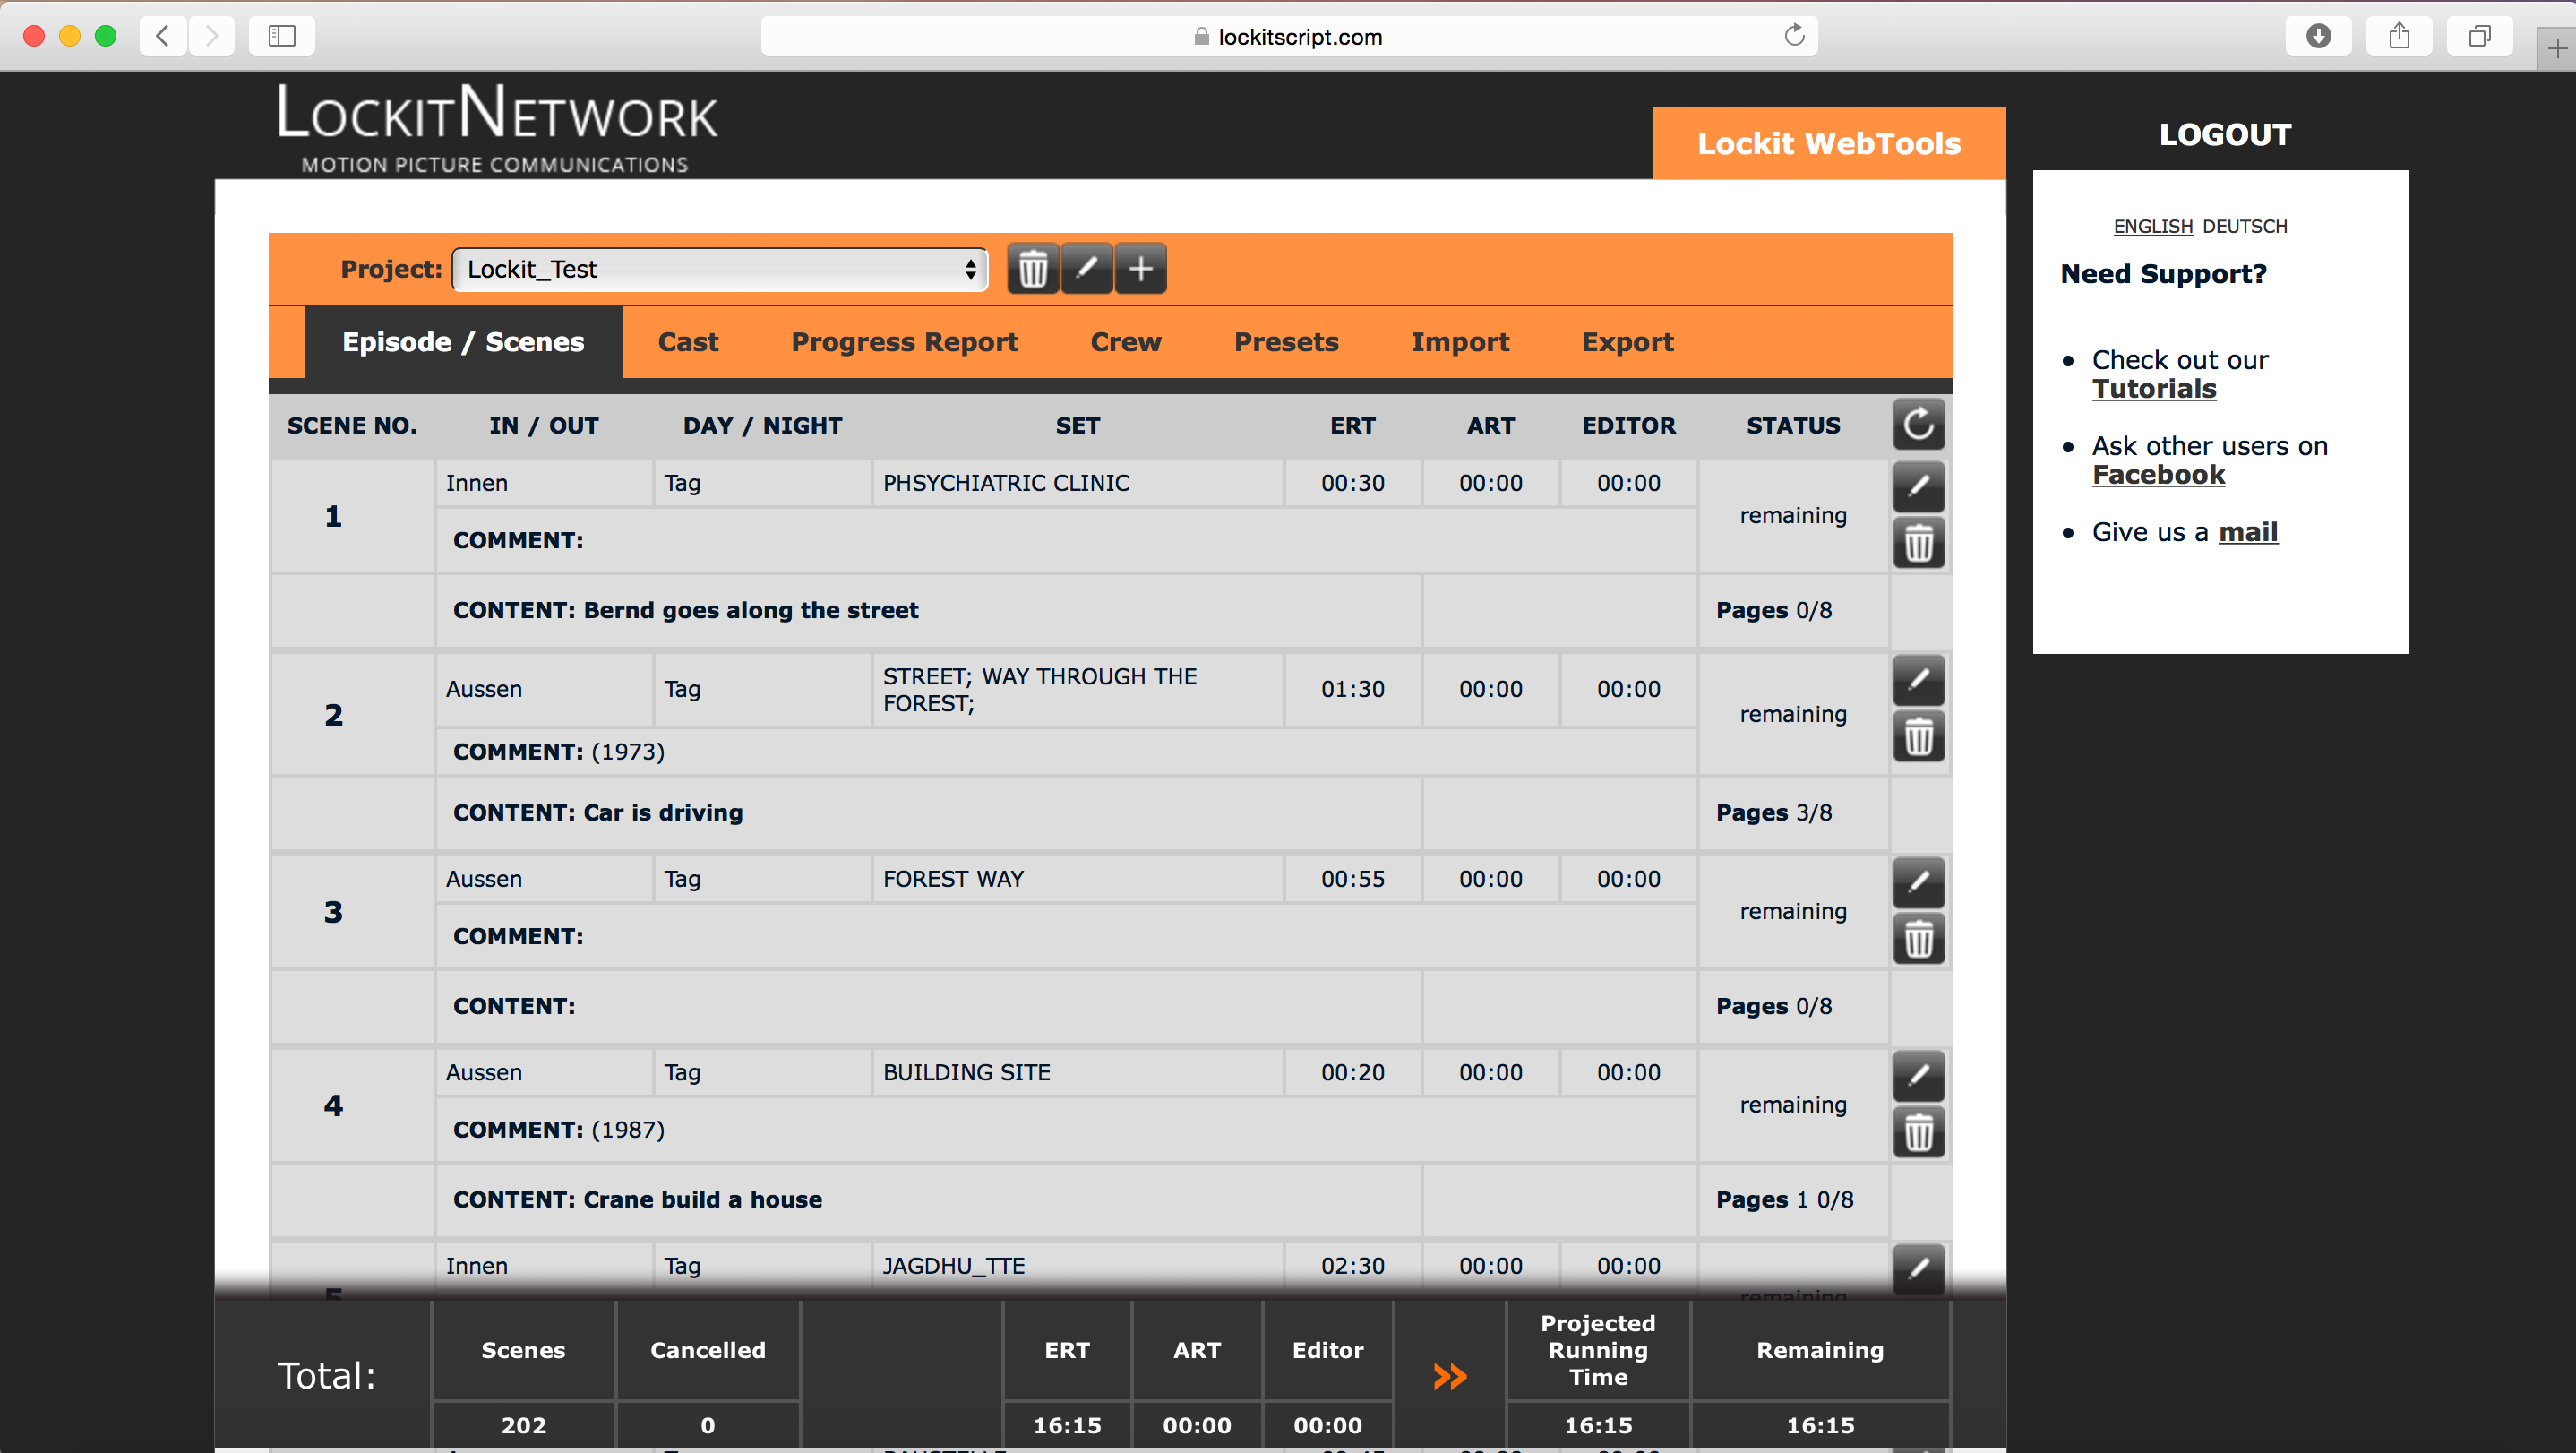
Check the “Episodes / Scenes” menu to see all imported scenes
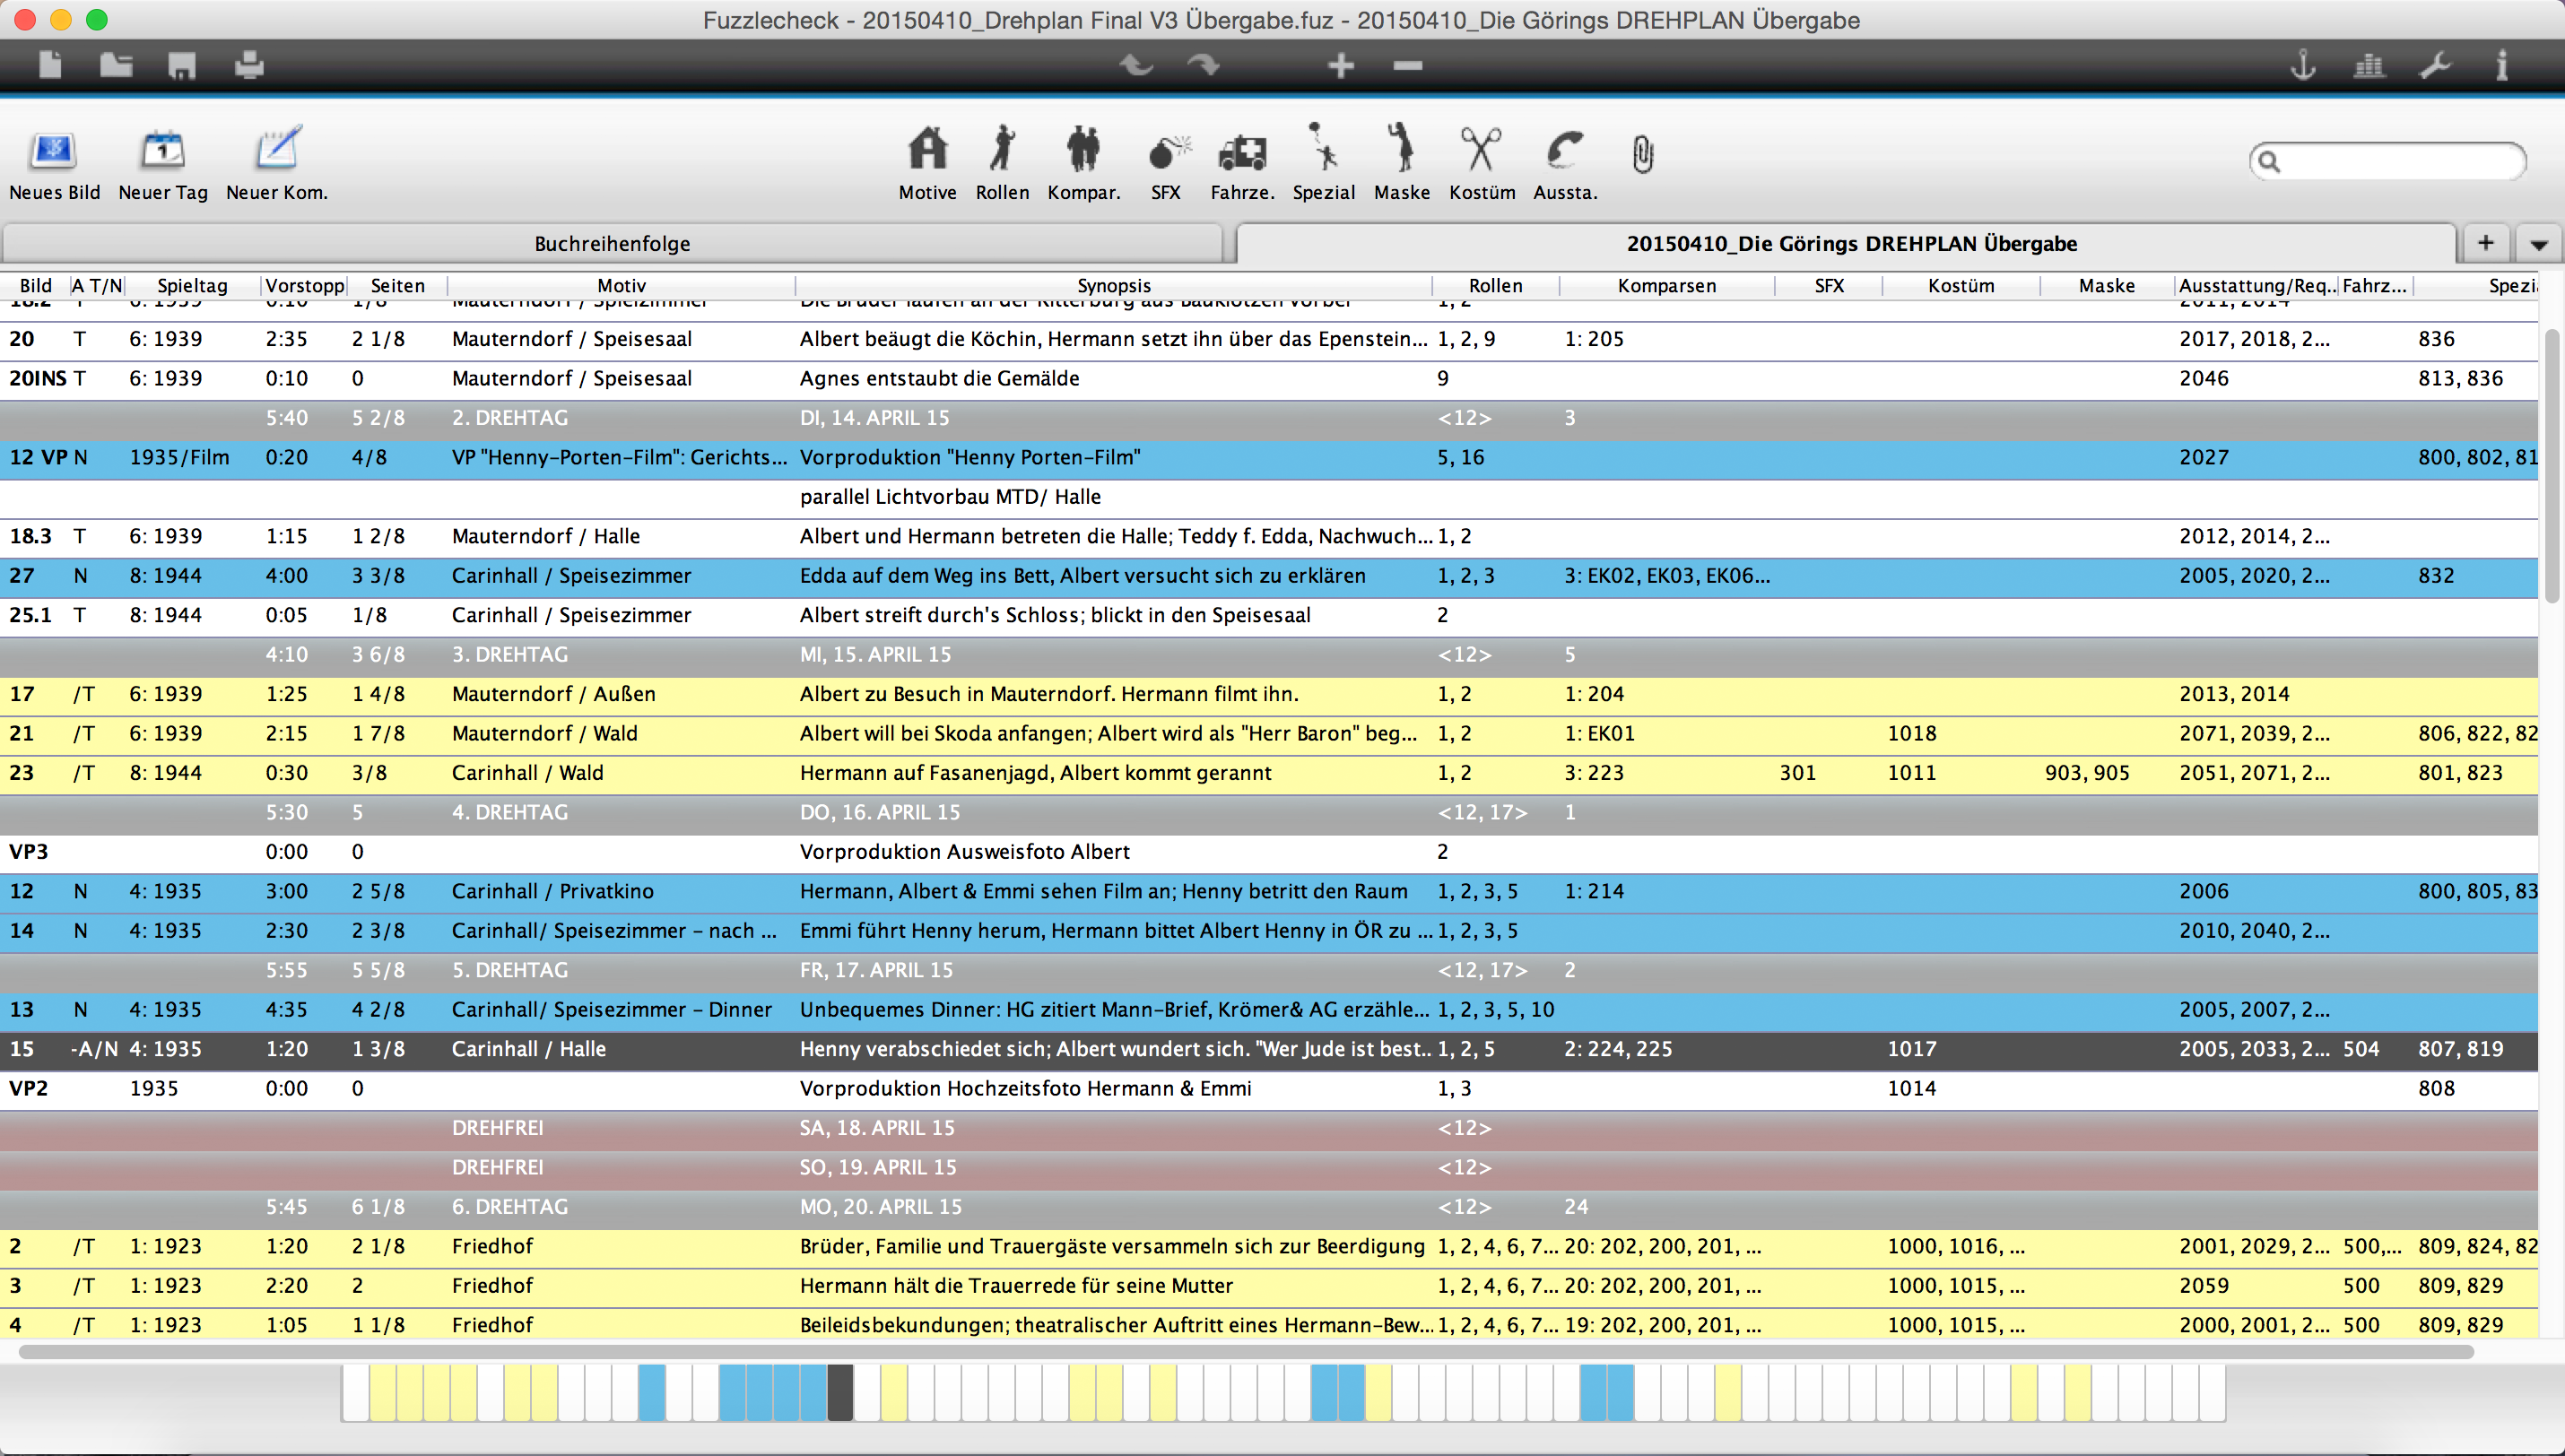
Fuzzlecheck Import
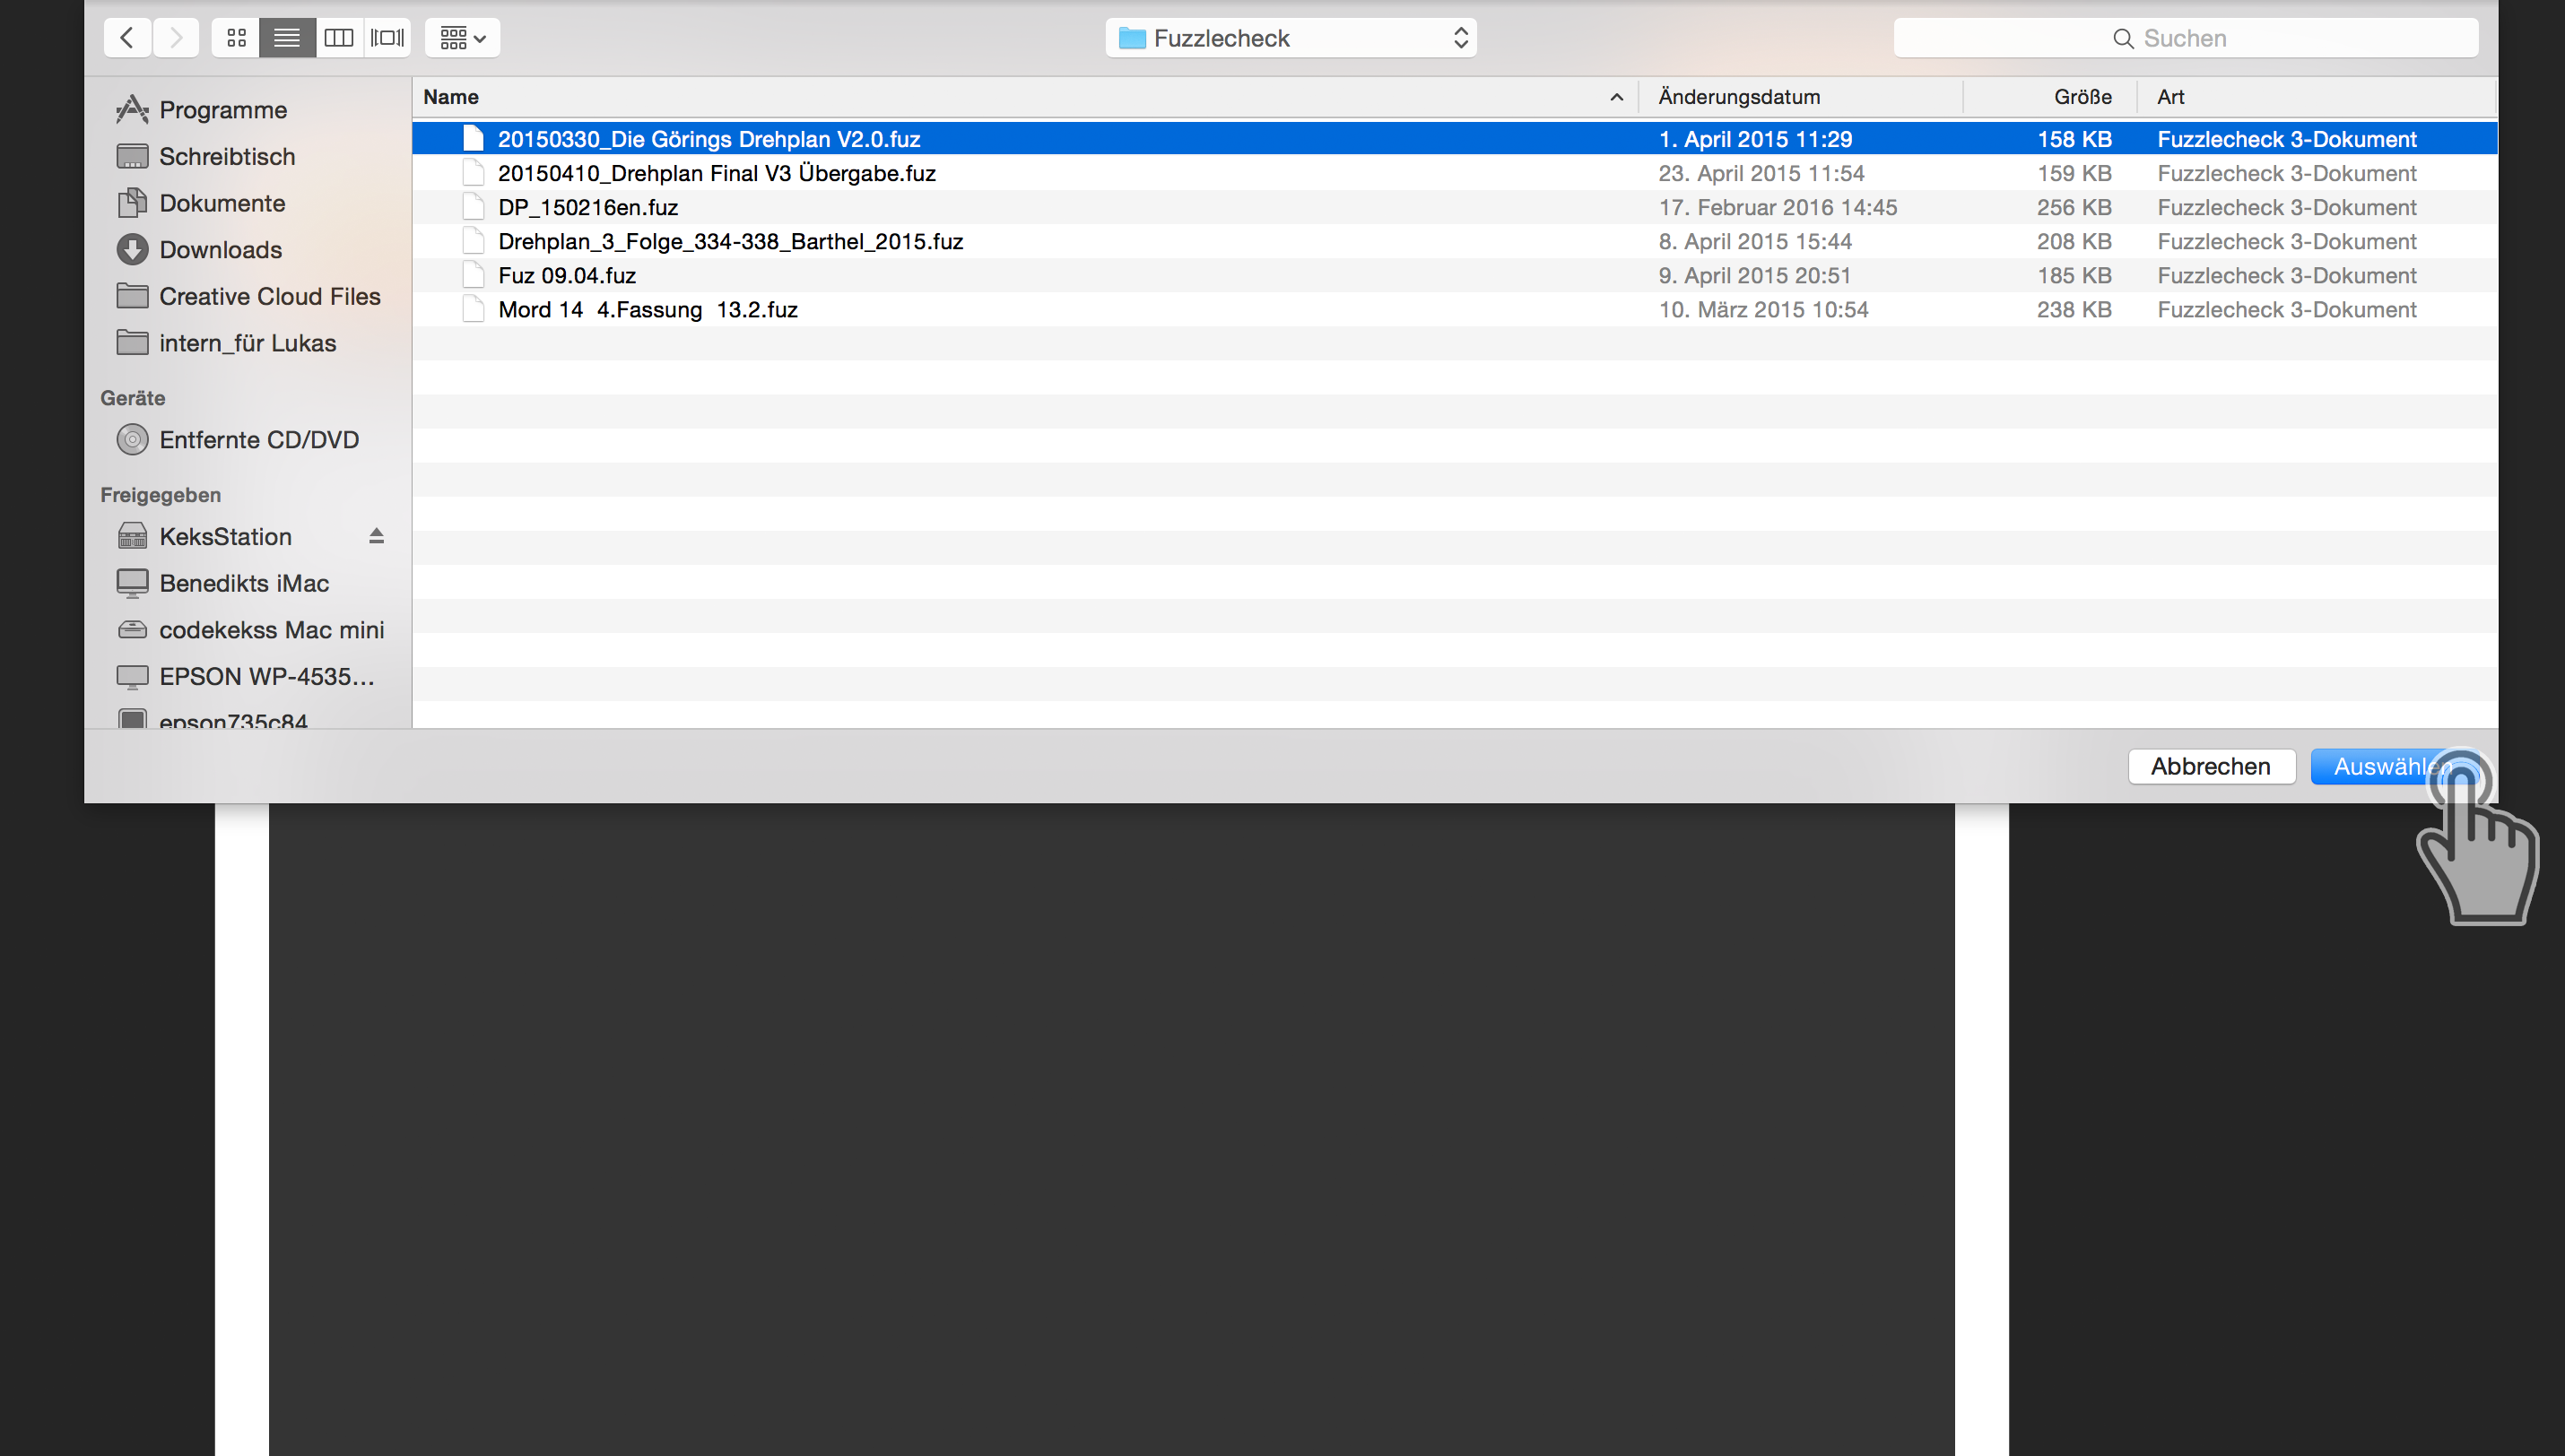
Make sure to remember which tab contains the most current version since you will have to select one certain tab to be imported later in the LockitWebTools
Visit lockitnetwork.com/login and sign in using your login credentials
![]()
Click “Import” and select the “Fuzzlecheck” Tab
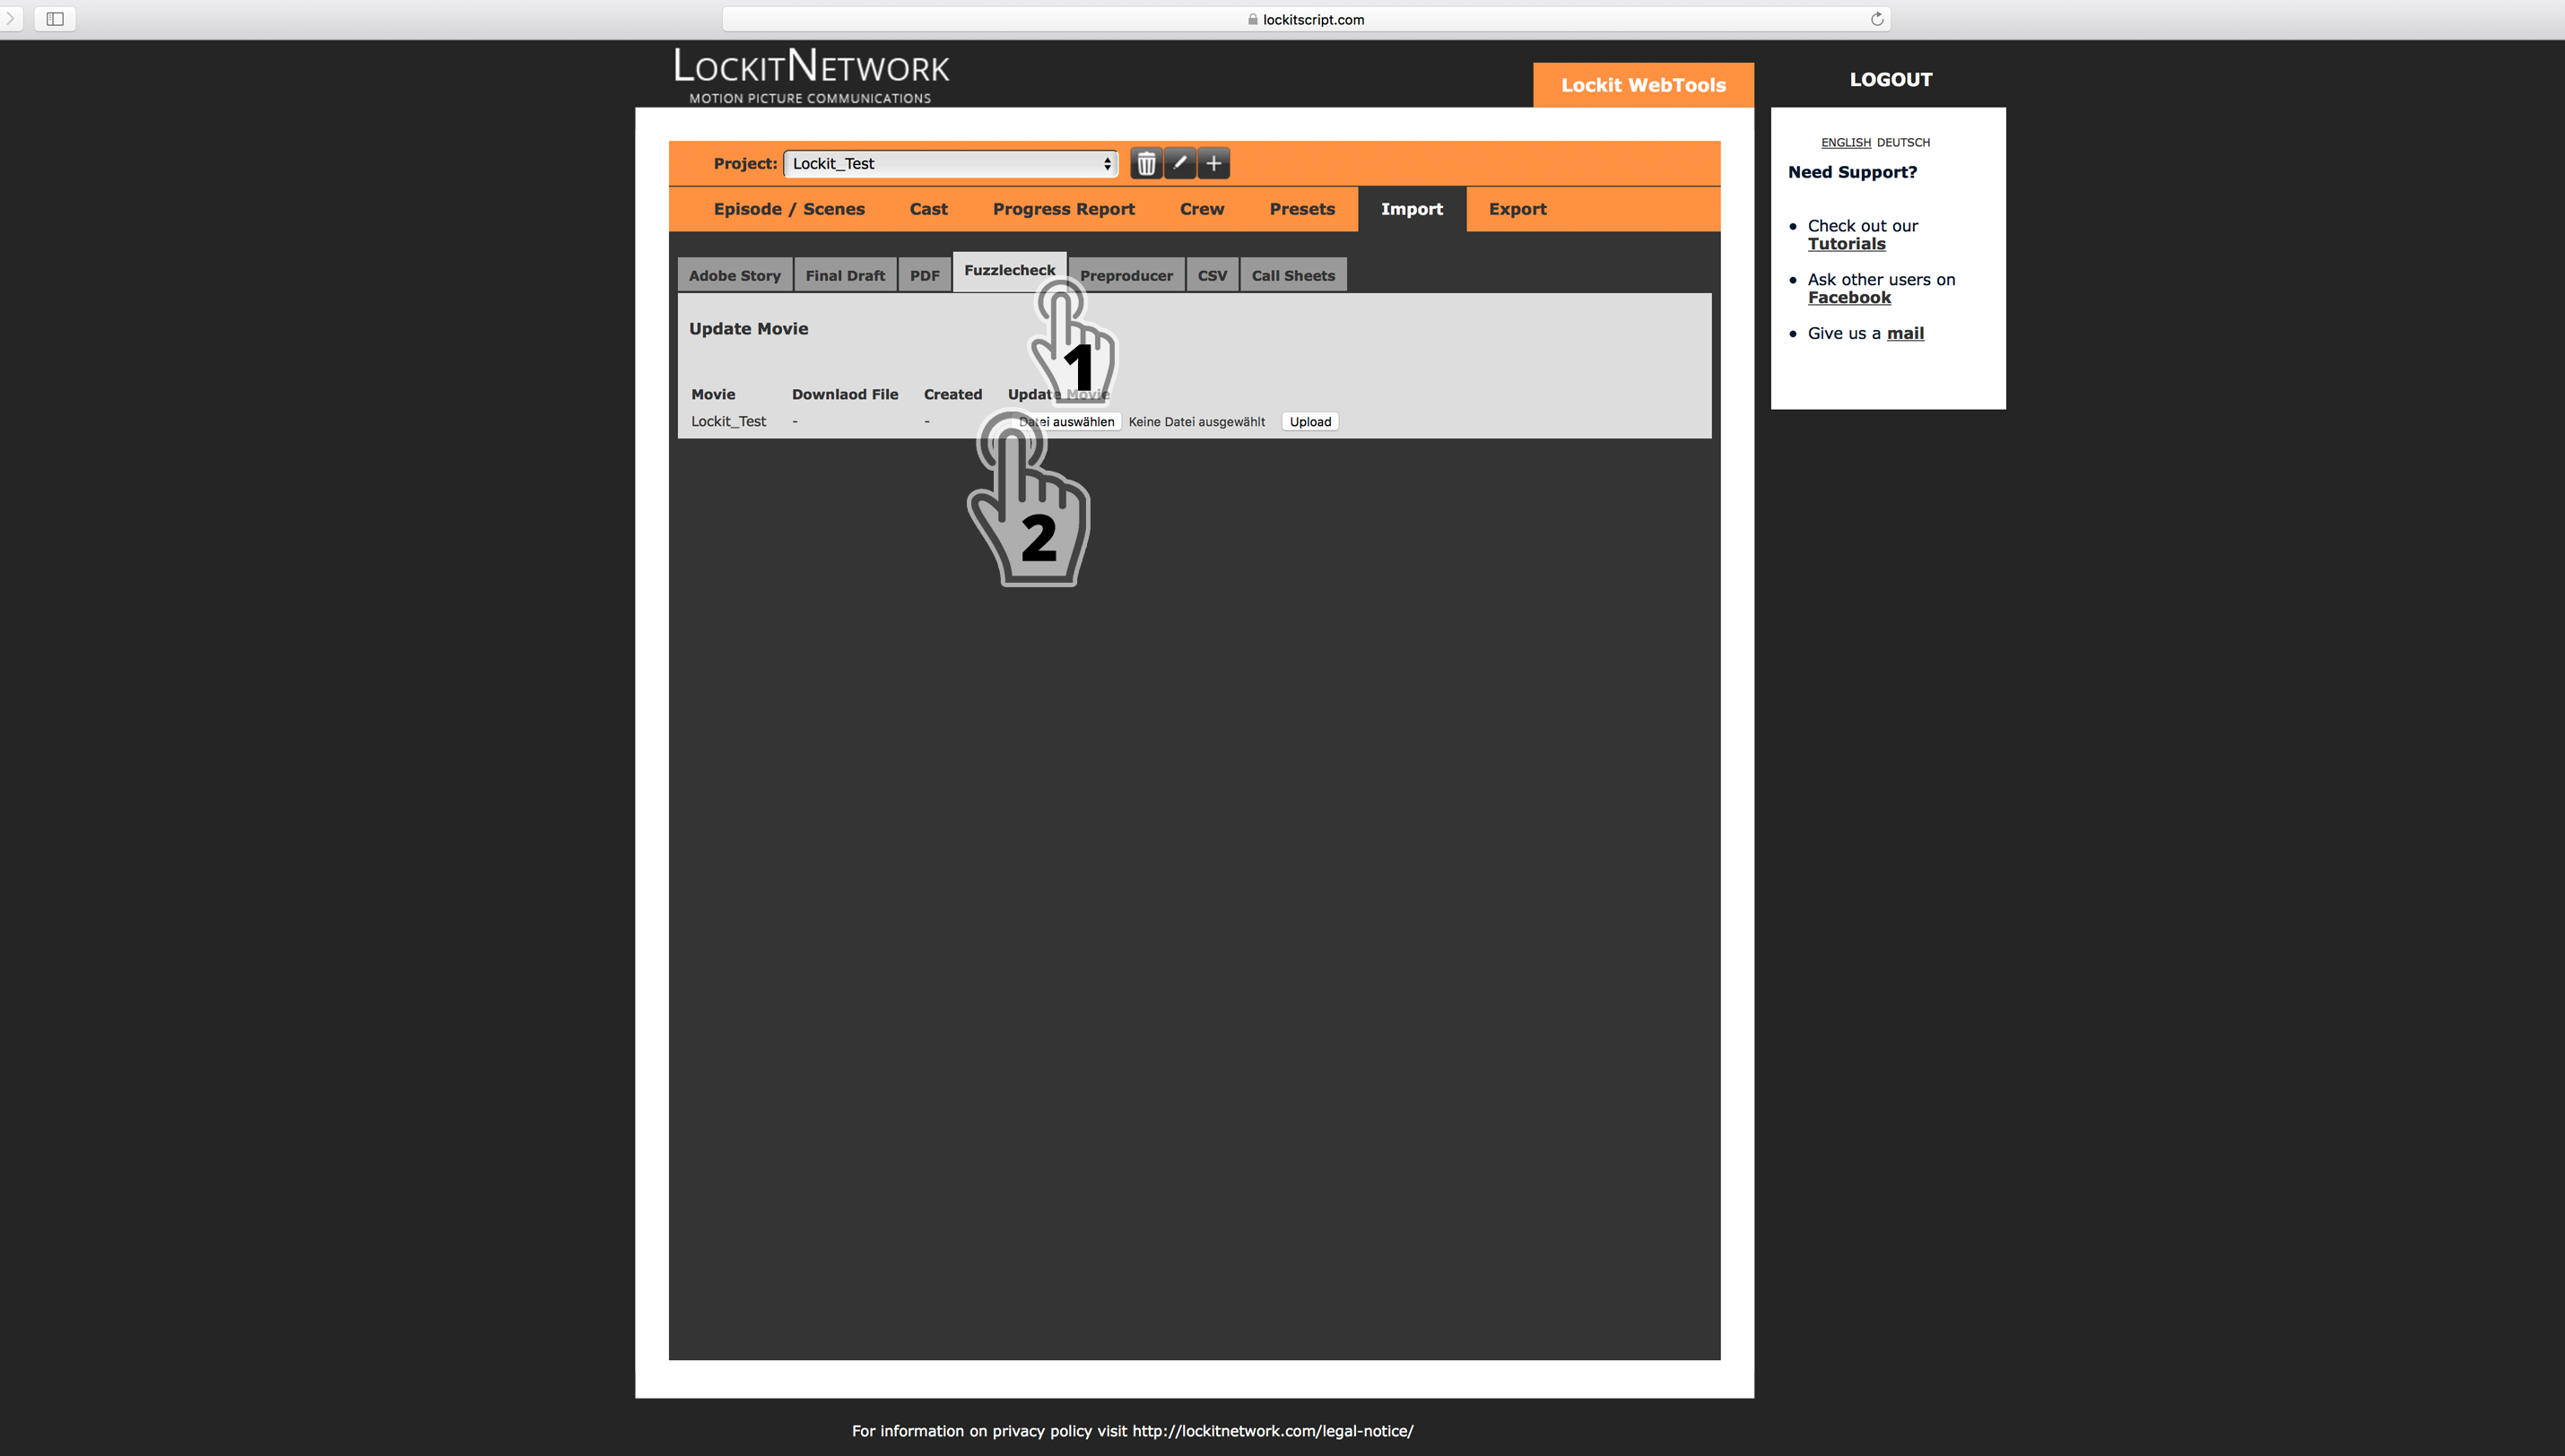
Click “Choose File” and select the respective .fuz file
Select the most recent section / tab of the .fuz file. You can only import one certain section / tab.
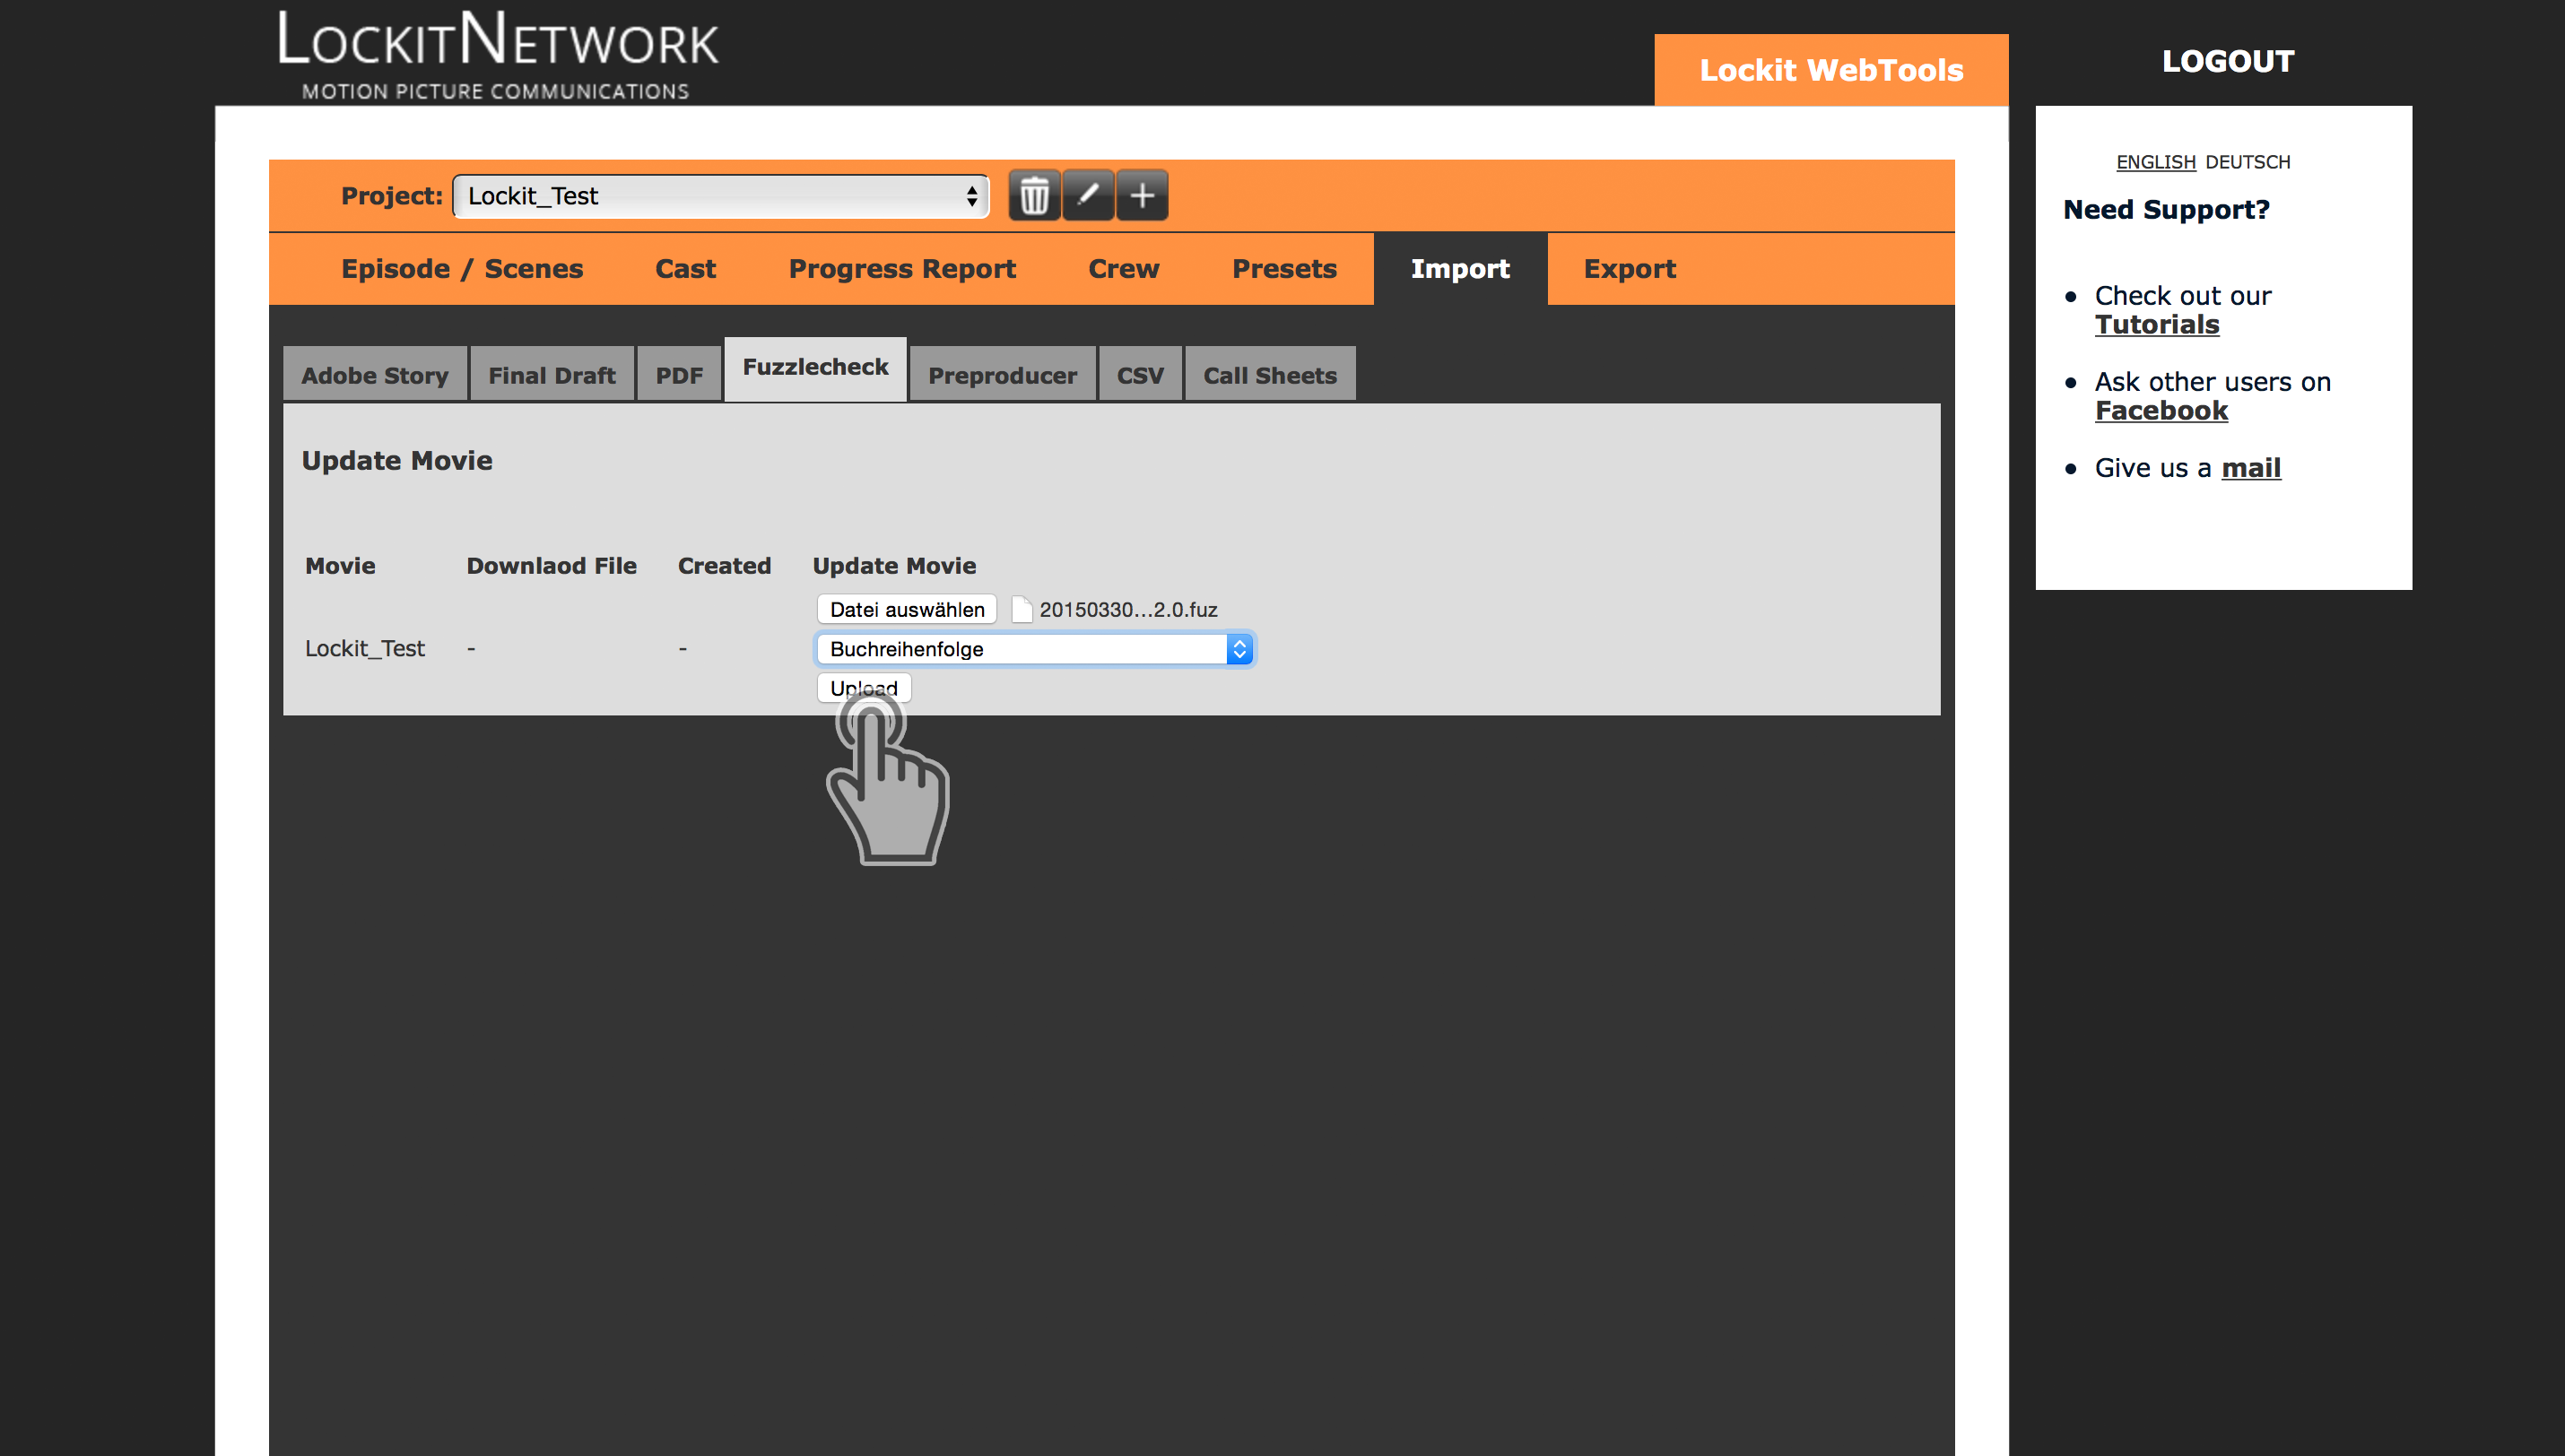
Then click “Upload”.

That´s it!
Check the “Episodes / Scenes” menu to see all imported scenes
WebTools Export
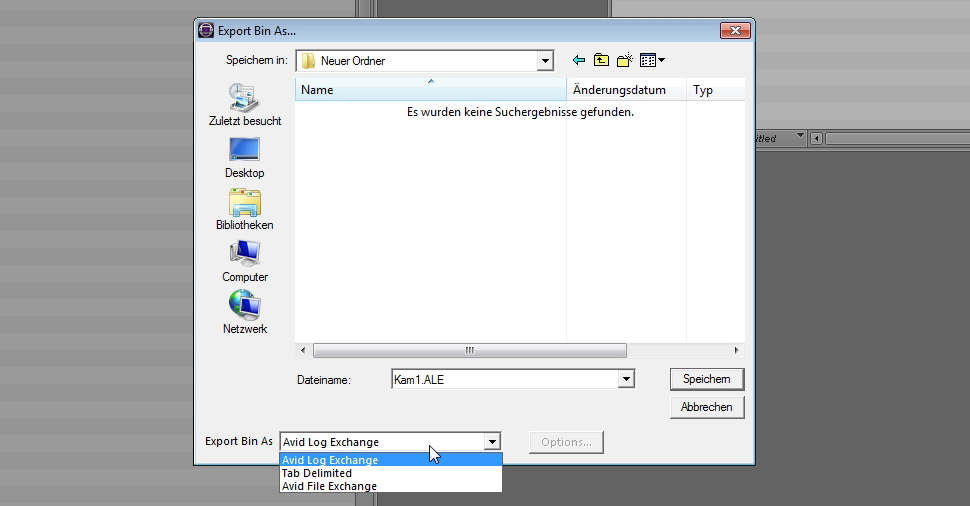
ALE Workflow with Avid Media Composer
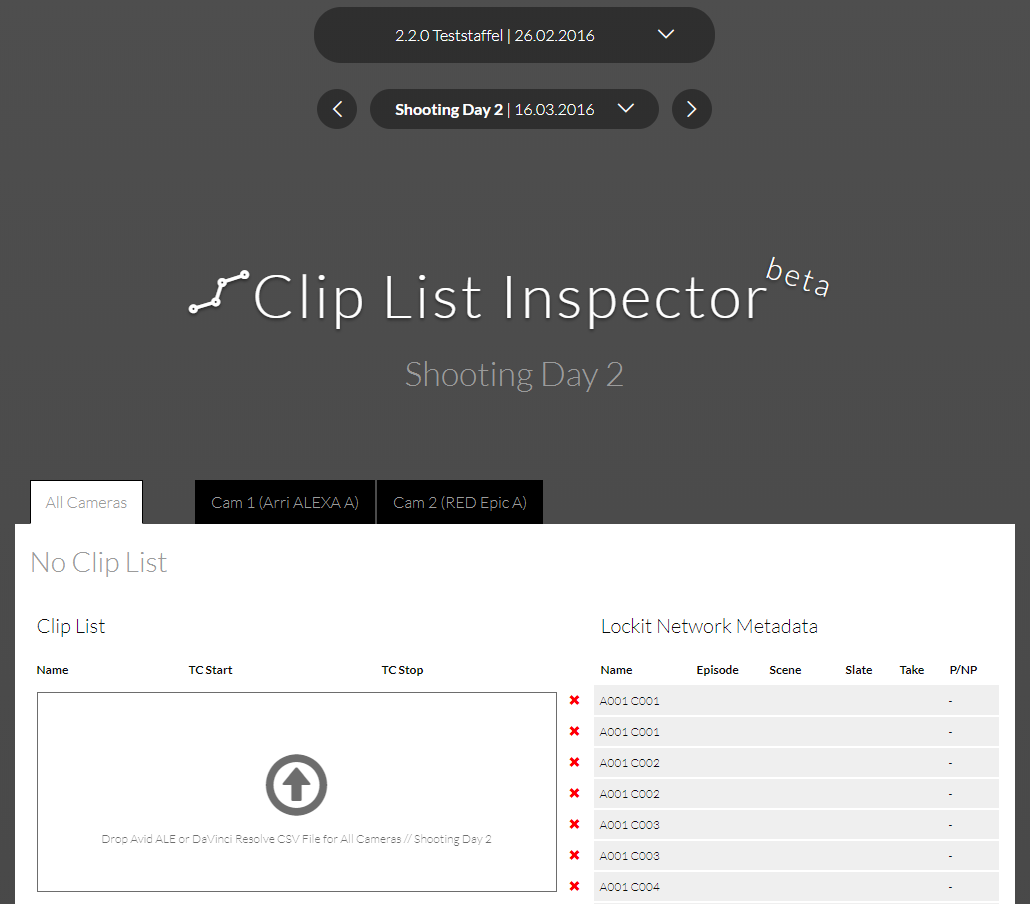
Learn how to import metadata from the LockitScript App into your Avid within 5 minutes – instead of typewriting piles of paper each shooting day. This feature is part of the Production Service.
Click on each step in order to see the entire process
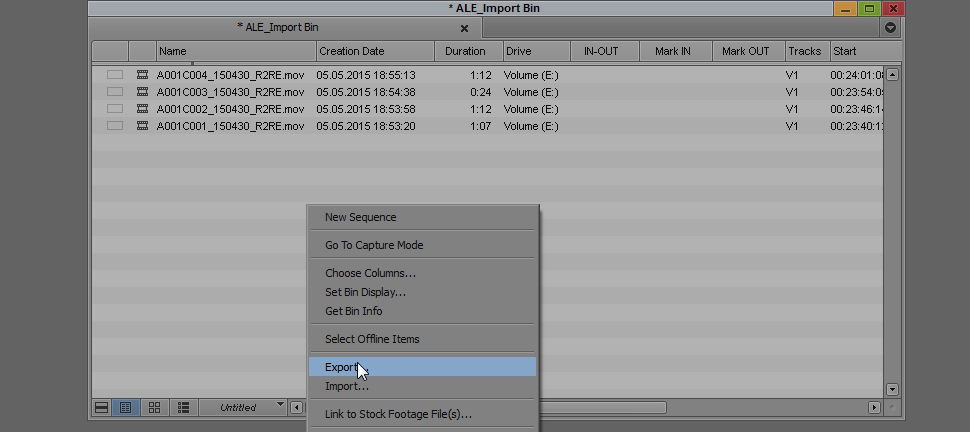
Select the desired project.


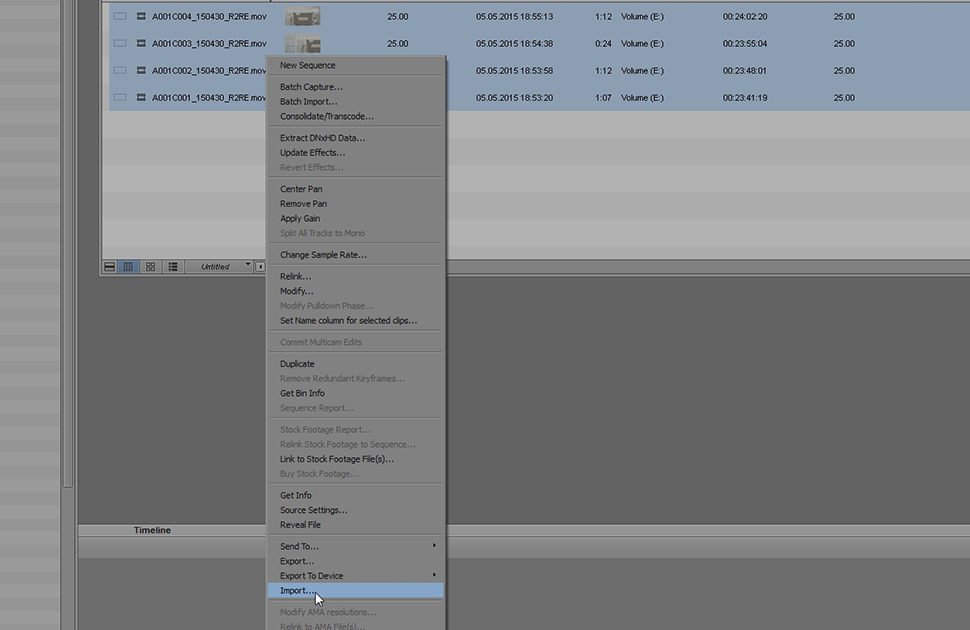

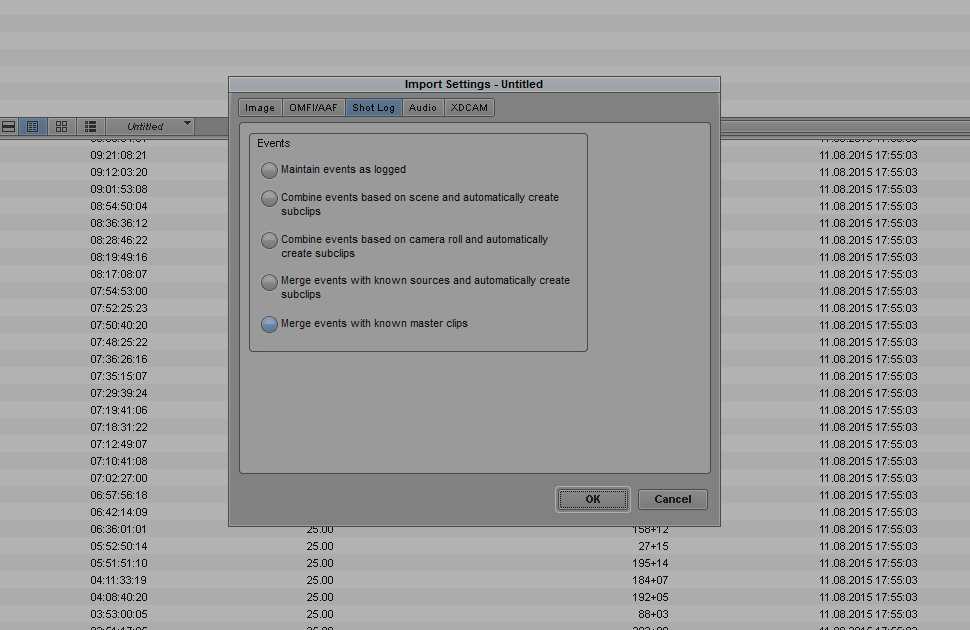
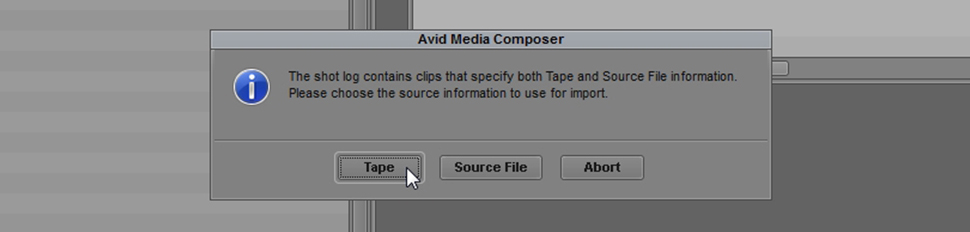
On the following screen choose “Options” and within the tab “Shotlog“ select “Merge Events with known master clips”.
Choose “Tape” to merge the ALE with your masterclips.
The same applies to syncing audio and video files first and afterwards merging the masterclips with the ALE.
To preserve the name do the following:
In the bin with the masterclips, which have been merged with the ALE, create a new column like “BU_Name”.
Mark the column “Name” and press Ctrl-D or CMD-D.
In the following window you can copy the contents of the column “Name” to other columns. Choose “BU_Name” as target. The Media Composer sychronizes all metadata from the masterclips across all corresponding subclips.
In the bin with the subclips display all columns and mark the column “BU_Name”, which should contain the name from the ALE.
Now use Ctrl-D or CMD-D again to copy the content of that column back to “Name”.
MasterLockit Setup
Display clip names inside LockitScript
When using the LockitScript app stand-alone, clip symbols are manually created by the script supervisor for each individual camera. With a MasterLockit connected to a supported camera, clip symbols containing original clip names and some other crucial metadata from the camera are automatically sent to LockitScript via WiFi and are displayed within the app.
How-To:
- Connect the MasterLockit to a supported camera
- Connect your iPad to the MasterLockit’s WiFi (WiFi password is always the same as the WiFi name)
- Access the MasterLockit web interface in any browser by entering http://10.0.0.1 or tap on the MasterLockit icon on the top inside the LockitScript App
- Go to tab “Metadata Network” and follow instructions to establish connection to the camera
- Activate the MasterLockit clip import in the LockitScript Preset Tab, select the camera and hit “Start”
- That’s it. Now hit the “Record”-Button on the camera and see a clip symbol containing metadata information appearing in your app
Supported Cameras:
- ARRI Alexa
- RED Series
Displayed Metadata:
- Clip Name
- CamRoll Name
- Fps
- Filter
- TC Start / Stop
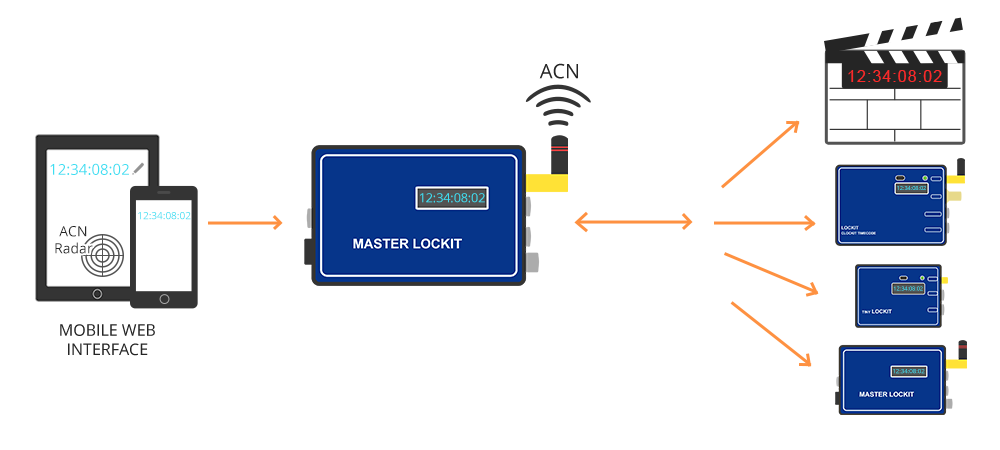
Monitor and remote control Lockit Timecode devices
How-To:
- Start all Lockit devices and make sure they are all in the same ACN channel.
- Connect your smartphone to the MasterLockit’s WiFi (WiFi password is always the same as the WiFi name).
- Access the MasterLockit web interface in any browser by entering http://10.0.0.1 or tap on the MasterLockit icon on the top inside the LockitScript App.
- That’s it. Now you can manage your Lockits in the “Timecode” tab.
Supported Devices:
- MasterLockit (ACN-ML)
- Tiny Lockit (ACN-TL)
- Lockit (ACL 204)
- Lockit Slate (ACN-LS)
Features:
- Set TC
- Set ACN channel and activate C-Jam
- Check battery status of all Lockit Devices on set
- Check fps
- Name your Lockit Devices for better overview
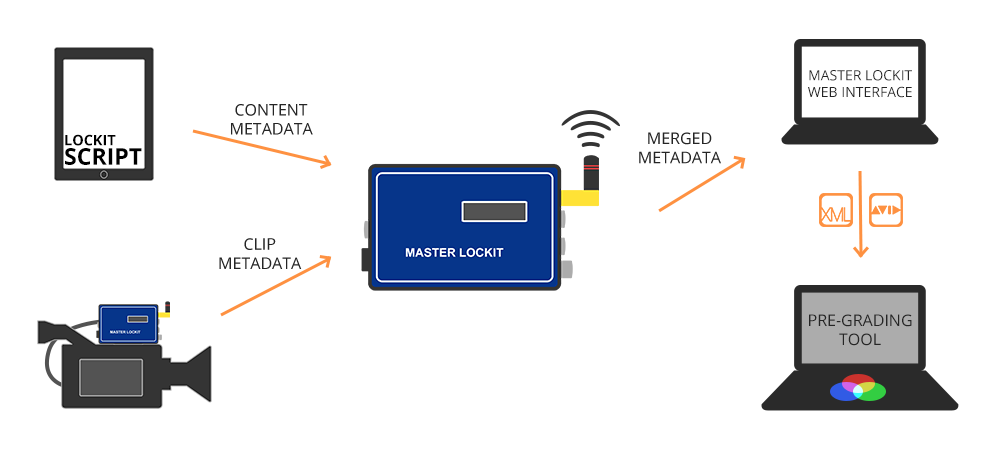
Download Content Metadata of Every Single Clip
With the LockitScript app, script supervisors note content information for every single clip. The MasterLockit’s web interface enables DITs to download important clip-based content information directly on set via the MasterLockit’s local WiFi – instead of connecting to the cloud-based LockitWebTools.
How-To:
- Convince your team to work with the LockitScript app and a MasterLockit
- Connect your Laptop to the MasterLockit’s WiFi (WiFi password is always the same as the WiFi name)
- Access the MasterLockit web interface in any browser by entering http://10.0.0.1
- That’s it. Go to tab “Metadata Export” and select the information and format you need
Export Formats:
- ALE
- CSV
- JSON
- EXCEL (Shotlog)